
How to Blur Background in a Picture: 3 Ways
Have you ever wished that you could place more emphasis on the subject of your photos? Or maybe you want to block out a feature that’s too imposing? In these instances, unless you have a pro camera it can be difficult to blur the background of such pictures.
However, fear not! Below, you will see how to blur the background of a photo already taken. I will explain how you can do it using two different image editors.

Why would you want to blur the background of a photo?
Let’s first take a quick look at why we would want to do this and there are a few reasons including:
- To place more focus on the picture subject.
- To reduce the emphasis on overpowering background objects.
- For artistic purposes.
- To make a sense of depth.
The main benefit is that you can create a more artistic and stylish professional photo that places emphasis on the subject. You are essentially recreating background separation that pro cameras can achieve - an effect you will see in most professional portrait photography.
Alternatively, you may have a fantastic photo that has been ruined by an overpowering or annoying background element. In these instances, learning how to blur the background of a picture allows you to remove the emphasis of those annoying backgrounds.
To give you variation I have selected two simple options for blurring the background of a photo - both of which are free to use.
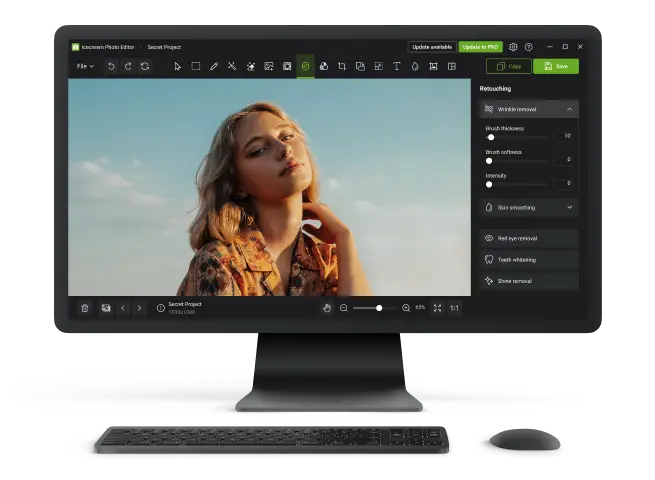
Icecream Photo Editor
Icecream Photo Editor has a myriad of useful photo editing tools and what makes it even more attractive is that it’s free! There is a pro version too that offers improved functionality and some more manipulation tools.
This free photo editor also has a blur tool, which I will use in this method. It is incredibly easy and intuitive to use. All it requires to blur a background in a picture is a little patience and careful outlining.
Step 1 - Open the picture
First of all, you need to download photo editor for Windows. The installation should only take a few minutes and you can have a handy desktop shortcut too.
When you launch the free photo editing software, the main screen should show an option to browse for photos. Click on that and then use the folder navigation window to find your file. Once located, double-click on it and it will open the image in the editing pane.

Step 2 - Select the blur tool
Now we need to find the blur background tool and take a look at how it works. It is located in the top menu. Click the water droplet icon and a toolbar on the right side should open. The toolbar shows the following parameters:
- Brush size. This determines the diameter of the blur brush tool.
- Blur strength. This determines how strong the blur effect is.
It’s important to understand these two parameters. You can change them to affect the strength of the blur, and to draw neatly around your subject with a smaller brush.

Step 3 - Use the blur tool to paint around the subject
Now comes the tricky part! The premise is simple - you must use the blur tool to draw around your subject to make a blurry background. I take the following approach:
- I start by using a larger brush size to blur around the subject, leaving a gap between their outline.
- I then use a smaller brush size and zoom in to carefully blur around their outline.
Using a large brush when not close to the subject allows you to blur most of the background in a short time. You can then change to a smaller brush for the detail work so you don’t accidentally blur part of the subject.
Pro tip: Instead of continually holding the blur tool, use it in small sections and release your mouse click. Each time you stop the blur tool, this creates an "Undo point". If you make a mistake, you can simply hit Ctrl + Z to undo it. Otherwise, you will have to undo the entire blurring brushwork you have just done.

As you can see from the above photo, the results are incredible and I like that you can alter the blur strength too. This means you can achieve the exact level of background blur you want. In the above example, I used a 100% strength blur to emphasize the subject completely.
Adobe Express
Adobe Express is a free photo editing tool that has a range of custom features similar to the Canva editor. It offers much of the functionality of Photoshop without paying for a subscription and one of the useful features is the ability to blur a background in a picture.
Step 1 - Create a new project
First, we have to create a new project using your image. Surprisingly, this can be tricky if you don’t know the layout of the website.

Open Adobe Express in your web browser and there should be a sub-heading titled "What will you create today?". Underneath this, select the photo option.
Beneath this, you should see the "start from scratch" option. Click this and a dialogue box will open where you can choose your picture. Select the one you want to blur and open it - this should then launch the editor.

I suggest selecting the "original aspect ratio" option for the project layout as this gives you a canvas that is exactly the same size as your photo.
Please note that to use this online photo editor you will have to create an account. You can register in Adobe, or log in using your Google account for example.
Step 2 - Duplicate the image
Whereas in the previous method, we used a brush to blur the background of a picture, in Adobe Express we need to duplicate the image. We then will cut out the subject from the top layer and then blur the original image beneath it.
To create a copy of the image, right-click on it and select the duplicate option (Shortcut Ctrl + D). This will add a new image above the existing one but slightly off-center.

Click and hold on to the copy to reposition it so that it aligns perfectly with the original image. The service has handy markers that show the center of the photo both horizontally and vertically so this should be easy to align.

Step 3 - Delete the background from the copy
Now we have to remove the background from the new image copy that is sitting on the top layer. Luckily, the platform has a handy background removal tool that makes this process especially easy.
Make sure you have the top picture selected and you should see an image toolbar on the left-hand side. Click the "remove background" option (It has a picture of a dog).
This should automatically outline the subject it identifies and remove the surrounding background as shown below.

Please note that this is an AI tool so the results may not always be perfect. From my experience, it does a good job of identifying the main subject and making a clean background crop.
Step 4 - Blur the background of the original image
You should now have a nice cutout of your subject sitting on top of the original photo. You can check this by looking at the layer thumbnails on the right-hand side of the image. You will see the top layer contains your subject surrounded by a white background.
You now have to select the original image to open the toolbar again. Next, click on the "Adjustments" option.
Scroll to the bottom of this toolbar and there should be a "Blur" option. Click this and adjust the slider as needed. The further right you slide it, the more pronounced the effect becomes.

I find that the blur effect is much stronger in Adobe Express and often you only need to use a strength of between 20-30. Anything higher than this can look ridiculous. You can see in the below image how pronounced the blur effect is at 100 strength:

Once you are happy with the result you can save your project and export the image!
Overall, this method takes a few more steps compared to using the Icecream Photo Editor and is a little more complicated. However, you have the benefit of being able to edit the image further and add things like stickers, or create photo collages.
Canva
Canva functions as an intuitive photo editor that enables users to blur the background of images with ease. Through it’s straightforward interface, you can control the effect strength to create the perfect focus balance.
Method 1 - With background remover (pro feature)
- Open or create a design in the app.
- Upload your pic or select one from the library.
- Click the image, then choose "Edit photo" from the top menu.
- Select "Background Remover" (Pro users only).
- After removal, blur the remaining background:
- Duplicate the original image.
- Place the copy behind the subject.
- Use "Adjust" > "Blur" to soften it.
- Ensure the subject (cut-out) stays in the front for a realistic effect.

Method 2 - Manual blur
- Insert your footage onto the canvas.
- Right-click and duplicate it.
- On one version, go to "Edit Photo" > "Adjust" > "Blur", and increase the softness.
- For the top copy, crop or use shapes/masks to isolate the subject.
- Stack the focused version over the blurred layer to simulate background depth.

FAQ on blurring the background of a photo
- How can I ensure the blur effect looks natural?
- To achieve a natural effect, use gradual and subtle blurring. Avoid harsh or unnatural lines between the blurred background and the in-focus subject.
- What is the Gaussian blur?
- Gaussian blur is a popular technique that averages the pixels within a specified radius. It’s commonly used for its ability to produce a natural-looking blur.
- What is the difference between blurring and pixelating?
- Blurring reduces the sharpness of the background, making it softer and less distinct, while pixelating replaces the image with large, blocky pixels. Both techniques hide details, but blurring typically results in a more aesthetically pleasing effect.
- How does depth of field influence background blurring?
- A shallow depth of field, achieved by using a wide aperture (low f-stop), naturally blurs the background while keeping the subject in focus.
- Why is it important to preserve edge sharpness around the subject?
- Hard edges or halo effects from poor masking can break realism. Proper feathering and edge blending ensure that the blur integrates naturally.
Conclusion
I hope you have found this guide on how to blur the background in a picture useful!
As you can see, even if you don’t have a pro-DSLR camera that can create a blurred background, you can still achieve a similar effect using tools to edit photo like Icecream Photo Editor or Adobe Express.
The key is achieving the right level of background blur that still looks realistic but provides the desired effect of emphasizing your subject or blocking out unwanted background noise.

Tech Writer and Photography Aficionado
