How to Screenshot on Dell Laptop
These days, everyone needs to take a screenshot from time to time, whether you're in school, at the office, or simply playing online. Learning how to screenshot on a Dell laptop or PC can also save you a lot of time and help you communicate with others.
This complete guide features 8 ways and tools that allow you to take a screenshot. Whether you need a picture for documentation or craft a visual tutorial, you’ll find the right instrument for your Dell here.
Icecream Screen Recorder
Icecream Screen Recorder is a versatile software designed for taking a screenshot and capturing desktop activities. It allows users to take screenshots, record video tutorials, gameplay, webinars, live streams, and others.
How to take a screenshot on Dell computers with Icecream Screen Recorder
- Visit the official website and download free screen recorder.
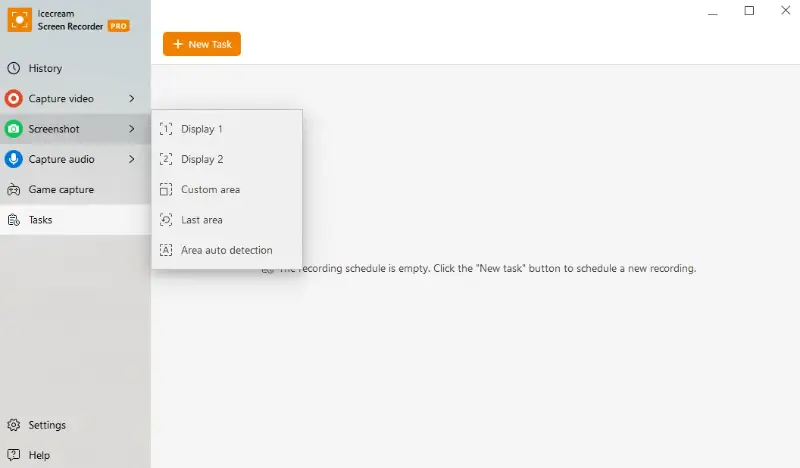
- Launch the screenshot software and click the "Screenshot" tool in the side menu.
- Select whether you want to capture the entire screen, a custom area, or use the auto detection mode.
- Press and drag the mouse to choose the area of the screen to capture your screenshot. You can edit the selection using the borders or corners of the frame.
- Hit the "Screenshot" button. You will be provided with options to edit and save the image.
Pros:
- It’s a free screenshot software for Dell that can take photos of your entire screen, or of just parts of it, or of particular windows in it.
- It ensures high-quality image and video output, preserving the clarity of the content.
- You can annotate the screenshots with text, arrows, shapes and more. Great for creating video guides and tutorials or vehemently highlighting details.
- Any screen capture on Dell can be saved in formats like PNG and JPG for your convenience.
- A hotkey gives easy access to functions, making it faster to use. You can then see the settings menu.
- The program includes a history panel to quickly access and manage previous captures and recordings.
Lightshot
Lightshot is known for its simplicity, making it a great option for those who need an efficient and straightforward way to take a screenshot on Dell devices.
How to capture your Dell display using Lightshot screenshot software
- Download the software from the official Lightshot website and follow the installation instructions.
- The app can be launched by pressing the Print Screen key (PrtScn) on your keyboard.
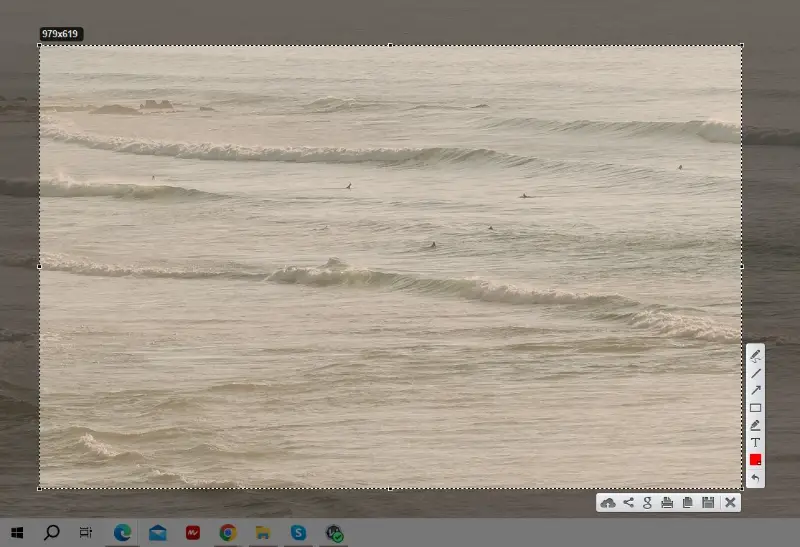
- Once the display is dimmed, click and drag to select the area of your screen you wish to capture.
- A toolbar will appear, allowing you to annotate, highlight, or draw directly on the image.
- You can save the screenshot locally on your Dell computer by clicking the save icon. Alternatively, use one of the share options.
Pros:
- Built-in tools for annotating screenshots are convenient.
- Easy sharing via cloud storage, direct URLs, and social media.
- Offers basic image editing such as cropping and color adjustments.
Cons:
- Lacks advanced features like screen recording or delayed captures.
Built-in screenshot tools on Dell
Dell computers run on the Windows operating system, which comes equipped with built-in screenshot takers. Below you can find the description of 4 different ways to take a screenshot on laptop with the native Windows OS
Print Screen Key (PrtScn)
- Press PrtScn on your keyboard. This saves the entire screen.
- The captured image is copied to your clipboard.
- Open an image editor (like Paint, GIMP or Photoshop) or any document, then paste (Ctrl + V) the screenshot to save or edit it.
Alt + Print Screen
- Hold down the Alt key and press PrtScn to capture just the currently active window.
- Launch a document (like Word) or the app where you want to share it.
- Press Ctrl + V to paste the captured image. Save or edit as needed.
Snipping Tool
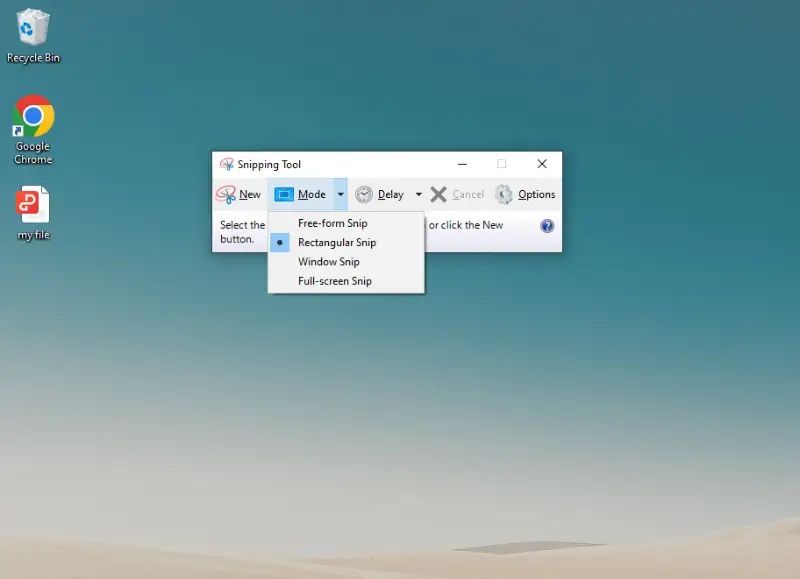
- Look for Snipping Tool in the Windows search bar and open the screenshot maker.
- Click "New" to start a new snip.
- Drag the cursor to choose the specific area you want to capture.
- Once selected, the screenshot will appear in the Snipping Tool window.
- Export the picture by hitting "File" > "Save As".
Snip & Sketch (Windows 10 and later)
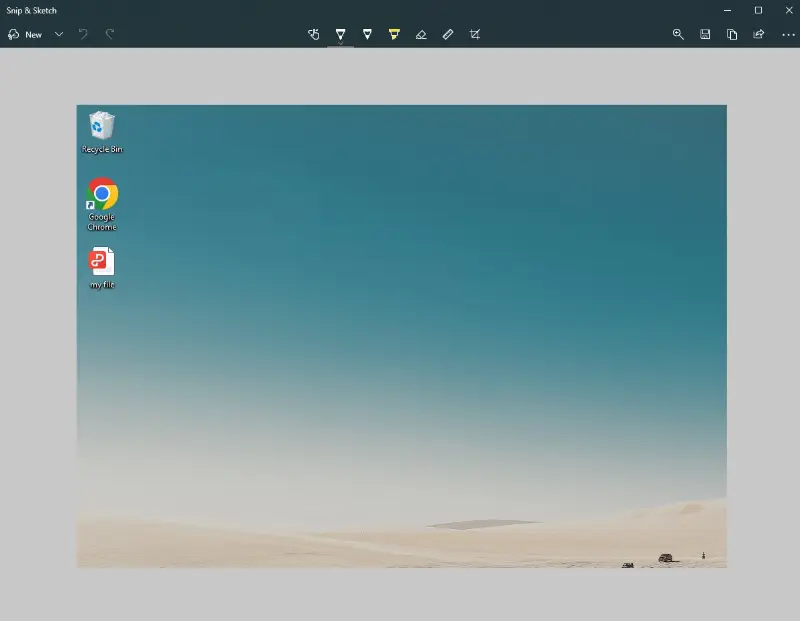
- Press Windows key + Shift + S to open the Snip & Sketch tool.
- Select the type of snip you want to take(Rectangular, Freeform, Window, or Fullscreen).
- Drag the cursor to capture the desired area.
- The image is automatically copied to your clipboard.
- Paste (Ctrl + V) the screenshot into any application or document to save and edit it.
Game Bar
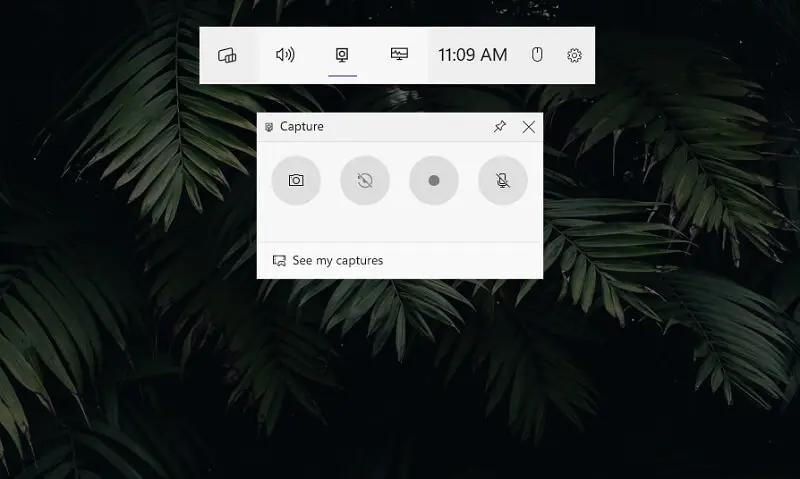
Game Bar is a built-in tool in Windows 10 and 11 computers and laptops designed primarily for gamers, offering a range of features including the ability to take screenshots seamlessly during letsplays.
How to screenshot on laptop using Game Bar
- Press "Windows key + G" to launch the Game Bar.
- Tap the camera icon to take a screenshot.
- Alternatively, hit "Windows Key + Alt + PrtScn" to instantly make a screenshot.
Pros:
- Provides basic options to take screenshots, including: choosing where to save, whether or not to send you reminders, and what keyboard shortcuts to use.
- Captures screenshots by default in PNG image format, which stores images at very high fidelity with almost zero loss in detail.
- The screenshoter overlay can be customized to include whatever the user wants, such as rearranging icons to fit their style.
- Supports background screen recording, capturing footage from the last few minutes without manual start.
Python
Python has a useful library called Pillow for image processing, and it can be used to capture screenshots. Please refer to the guide below to see how to do it.
How to screenshot on a Dell laptop using Python
- Install the Pillow library. Open your command prompt or terminal.
- Write the Python code to take a screenshot.
.webp)
Pros:
- Once the code is written, you can automate the screenshot taking process.
- You don't have to install third-party screenshoters or rely on manual methods.
Cons:
- You need basic knowledge of Python programming
Common problems and solutions
| Problem | Cause | Solution |
|---|---|---|
| Screenshot Not Being Saved. | Using PrtSc (Print Screen button) doesn't automatically save the screenshot. | Press Windows + PrtSc to save automatically to the "Screenshots" folder in "Pictures." |
| Screenshot tool settings are misconfigured or not saving. | Open Snip & Sketch or Snipping Tool and ensure settings are set to save automatically to the correct folder. | |
| There may not be enough space on the hard drive. | Free up space by deleting unnecessary files or transferring them to external storage. | |
| Capturing Unwanted Parts of the Screen. | Using PrtSc or Windows + PrtSc captures the entire screen (including taskbar and windows). | Use Windows + Shift + S for Snip & Sketch to select a custom screen area. |
| Tool might be set to capture the entire screen or the wrong mode. | Open Snipping Tool and set it to Rectangular or Window for specific captures. | |
| Taskbar or other elements may be captured unintentionally. | Minimize windows or temporarily hide the taskbar by right-clicking the taskbar > Taskbar Settings > Auto-hide the taskbar. | |
| Screenshot Appears as a Black Screen. | Some apps or games block screenshots due to hardware acceleration settings. | Disable hardware acceleration in the app (e.g., in Chrome, Settings > Advanced > System > turn off "Use hardware acceleration"). |
| Certain tools may not work with graphics-heavy apps. | Try using Windows + Shift + S or third-party tools like Greenshot or Lightshot for better compatibility. | |
| Keyboard Shortcuts Not Working. | Keyboard may not be functioning properly, causing shortcuts not to work. | Reinstall keyboard drivers through Device Manager > Keyboards > right-click and select Update driver. |
| Hotkeys might be disabled in system settings or by third-party software. | Check Ease of Access settings under Control Panel and ensure hotkeys are enabled. | |
| Captured Image Quality is Poor. | If the screen resolution is too low, the screenshot will be pixelated or blurry. | Set the screen resolution to the highest setting in Display Settings > Resolution. |
| Screen scaling (e.g., 125% or 150%) can affect the quality of screenshots. | Set display scaling to 100% in Settings > Display > Scale and Layout for better image clarity. | |
| Screenshots Not Working in Apps or Games. | Some apps or games prevent screenshots for anti-piracy or security reasons. | Look for an in-app screenshot feature or use Windows + Shift + S for external tools. |
FAQ on taking a screenshot on Dell
- How do I access the screenshots I've taken on my Dell laptop?
- Screenshots are usually stored in a folder called "Pictures" or a designated screenshot folder on your Dell laptop.
- What should I do if my Dell laptop doesn't have a Print Screen key?
- On some devices, you might need to use Fn with another key, such as Fn + Insert, to take a screenshot on a laptop.
Conclusion
Either way, whether you want to stick with the simplicity of built-in Windows features or use Icecream Screen Recorder for enhanced functionality, your toolbox is now stocked, and you’re ready to screenshot, shoot, annotate, and distribute on Dell!
By mastering the art of how to take a screenshot on your Dell computer, you've unlocked a powerful method for communication, collaboration, and documentation. Go shoot your screen with the best free screen capture software of your choice; you’ll become better at digital work because of it.


