How to Change Screen Recording Settings
Icecream Screen Recorder is an ultimate video recorder for capturing any on-screen activity. The free video recording software offers a bunch of settings to give the users total control over the output files.
Read on to get full information about how to change recording settings in Icecream Screen Recorder and capture your screen in the best way possible.
Access the settings
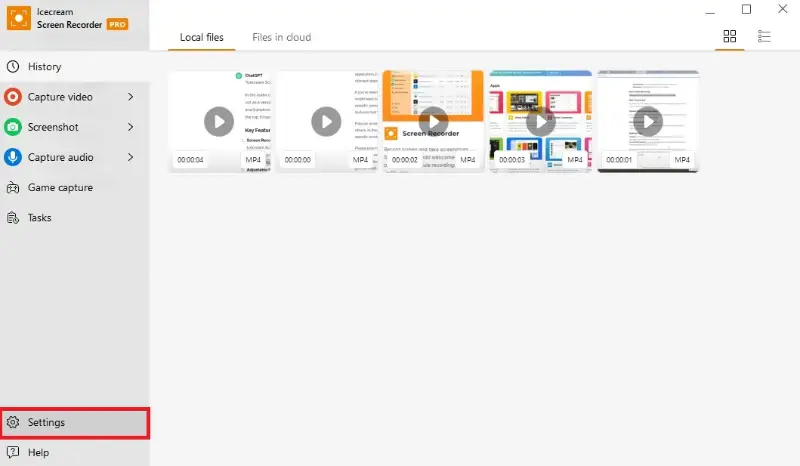
To change the screen recording parameters, click the "Settings" button in the bottom left corner of the main window. It will open the panel with 7 different tabs where you can customize various important parameters:
- System (general settings);
- Save to (settings for the output file saving);
- Video (video recording settings);
- Audio (audio recording settings);
- Webcam (webcam recording settings);
- Hotkeys (program hotkeys settings);
- License (version and cloud storage information).
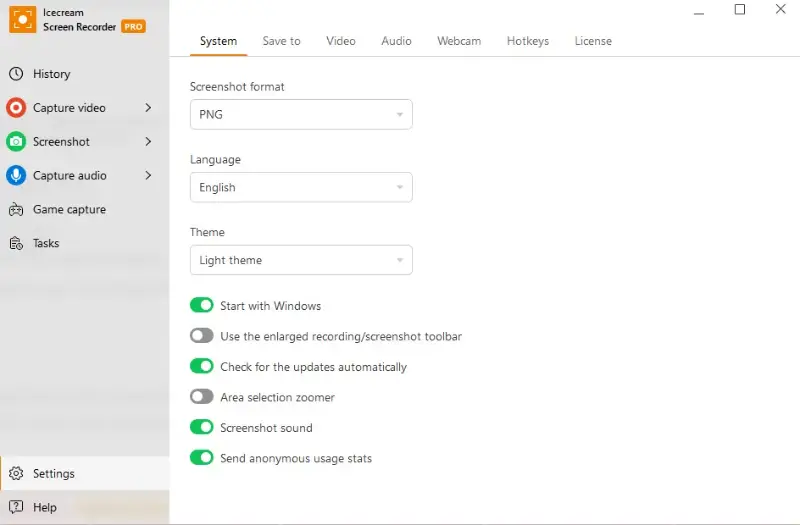
1. System
Screenshot format.
Use the drop-down menu to select the file format for saving the results. Available options include PNG and JPG.
Language.
Choose the language in which the interface (menus, buttons, options) of the screen recorder will be displayed. The software supports over 45 languages.
Theme.
The option to switch between dark and light modes provides a comfortable viewing experience in different environments. "Default theme" will automatically adjust the software colors to the system's theme.
Start with Windows.
This option ensures that the application is initiated as part of the startup process. You don't have to manually launch the video recording software every time you want to use it.
Use the enlarged recording/screenshot toolbar.
Increase the size of the recording or screenshot toolbar to make buttons, icons, and controls larger and easier to see.
Check for the updates automatically.
The program will periodically connect to the developer's servers to check if there are any updates or new versions available. If an update is found, you will be notified within the software interface.
Area selection zoomer.
This free screen recorder is extremely handy for accurate positioning of the video recording area. It zooms on the part of the screen where the mouse cursor is currently located.
Screenshot sound.
When you press the screenshot button or use a specific key combination, the recorder will play a sound to indicate a successful screencast.
Send anonymous stats.
Enabling this option allows the video recorder to collect statistical data about interactions, feature usage, and performance to the developers. No personal information is included in it.
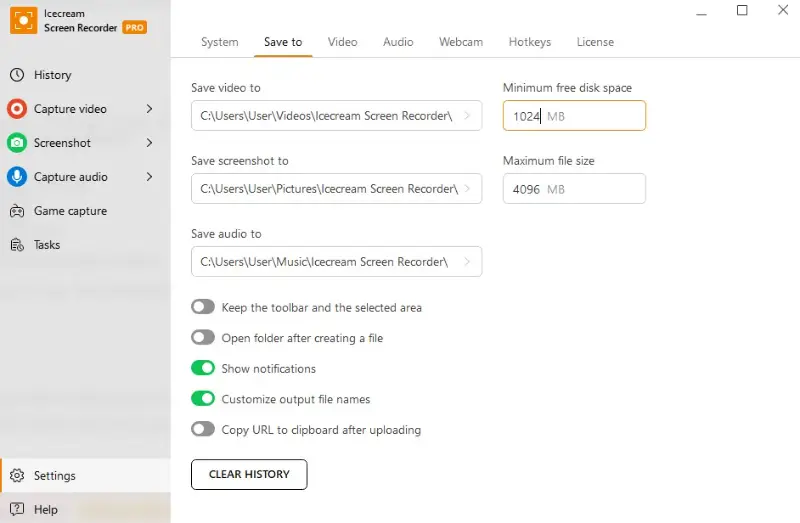
2. Save to
Save video/screenshot/audio to.
Click this area to open Windows Explorer and select the folder on your PC to which all recordings and screenshots will be saved.
Minimum free disk space.
The value set for this option defines the amount of free space on the disk where the output folder is located. The default value here is 1024 MB. You may customize it according to your own preferences.
Maximum file size.
As soon as the recorded file size reaches this limit, the screen recorder will automatically stop the recording. The default value set for this option is 4096 MB. You may customize it according to your needs.
Keep the toolbar and the selected area.
This option will keep the toolbar and the selection of the area after you take the screenshot. This is useful if you need to make multiple screenshots.
Open folder after creating a file.
When you finish recording a video or capturing a screenshot, the application automatically opens the folder where the captured file is stored.
Show notification.
When this option is enabled, the screen recording software displays pop-up notifications in the lower right corner of your display.
Customize output file names.
By default, the video recorder generates names based on the date and time. When this setting is enabled, you can specify a name for their clips or screenshots.
Copy URL to clipboard after uploading.
Once the upload to the cloud storage is complete, the URL will be automatically copied, allowing you to share the link promptly.
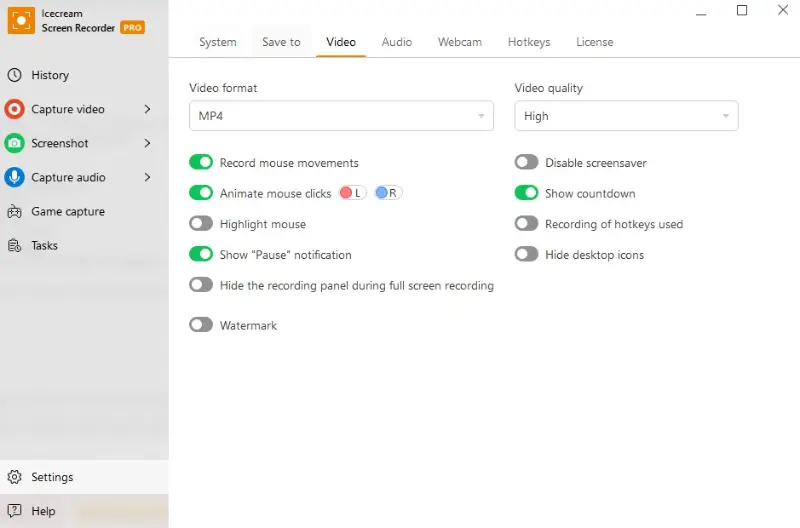
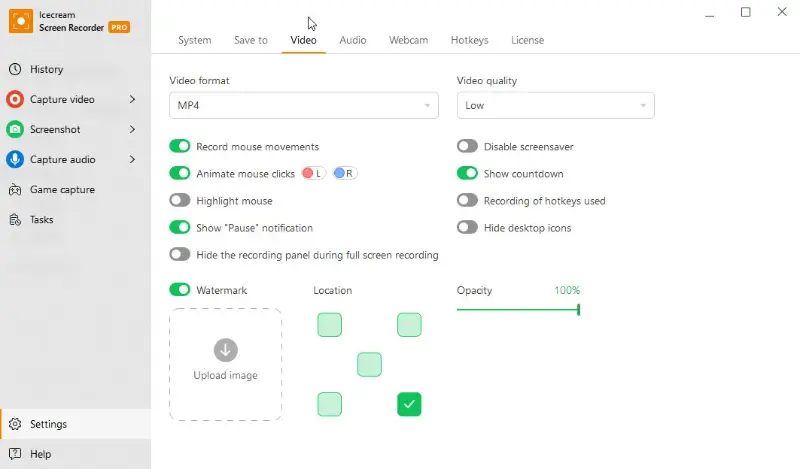
3. Video
Video format.
To select the output format of the video click the arrow to the right of this setting. This will open the drop-down list with all the output video formats supported by the screen recorder. There are such formats to choose from as MP4, WebM, MOV, and AVI.
Video quality.
There are 3 different video quality levels you can select from: High, Medium, and Low.
Record mouse movements.
Enable this feature to display mouse cursor movements in your recorded clip. If disabled, the cursor will not be visible in the final output.
Animate mouse clicks.
When you press the mouse during a screen recording, this feature causes a circle visual effect at the location of the click. This makes it easier to follow the actions taken on the screen. You can set separate colors for left and right mouse clicks.
Highlight mouse.
If this option is on, each mouse click will be highlighted with a yellow circle around the cursor. In case you wish to remove it – turn this feature off.
Show "Pause" notification.
When this option is enabled, you will receive a clear on-screen notification whenever you pause the recording. This notification includes the time when the recording was paused.
Hide the panel during full screen recording.
The control panel and user interface elements will be hidden when the recording is set to full-screen mode. You can still control the process using the hotkeys.
Disable screensaver.
This feature might be handy for those who are planning to record long videos. If it's enabled it blocks the sleep mode activation on your PC. In case this option is disabled, your default screensaver will show up according to its settings.
Show countdown.
This option enables or disables the 3-2-1 countdown that is being shown prior to the video recording.
Record hotkeys used.
During the screen capture process, some users tend to use various hotkey combinations. When this option is on, these combinations will be shown in the output videos in the lower corner exactly at the time when they were used by the user.
Hide desktop icons.
In case this setting is ticked, the desktop icon will be hidden in the video recorded. If it's unticked, all your icons located on the desktop will appear in the video as is.
Watermark.
You can upload your own images to be added to the captured videos as a custom watermark. Icecream Screen Recorder supports JPEG, JPG, PNG, and BMP images.
Location.
You can select the watermark location in the output video. There are 5 options to select from: Top Left, Top Right, Bottom Left, Bottom Right and Center. Choose the one that suits your needs.
Opacity.
Toggle the scrollbar under the "Opacity" sign to adjust the transparency level. Slide it to increase or decrease how visible the element appears.
4. Audio
Record microphone.
Tick this option to include the audio recording from your microphone to your video. Adjust the audio level with the help of the scrollbar.
Microphone device.
Click the arrow button to the right of this setting to open the drop-down menu with all the devices that are currently available on your PC. If the equalizer is moving while you speak, you have selected the right microphone.
Refresh devices.
Hitting this button refreshes all the audio devices that are connected to your PC. Thus, if you plug in a new microphone and the program doesn't recognize it, press this button so the new device will be added to the list of available ones.
Record audio.
If you wish to record the system audio along with your video – put a tick next to this option. The audio level can be adjusted by means of the scrollbar.
Audio device.
Click the arrow button to view a list of all available audio sources currently detected on your computer.
Open mixer.
This button opens the default Windows Volume Mixer panel where you can customize the volumes of the applications and the devices of your computer.
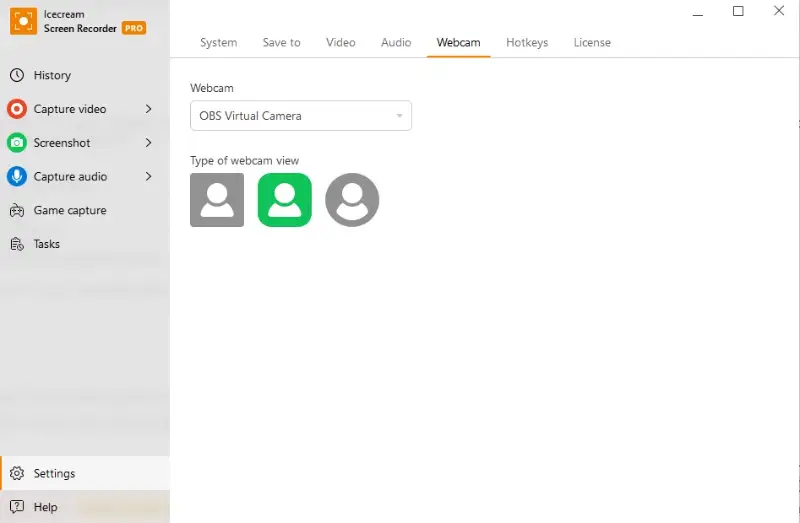
5. Webcam
Webcam.
Choose the webcam you want to use if your computer has multiple connected cameras.
Type of webcam view.
Choose between different shape options for how the webcam feed appears when you record the screen.
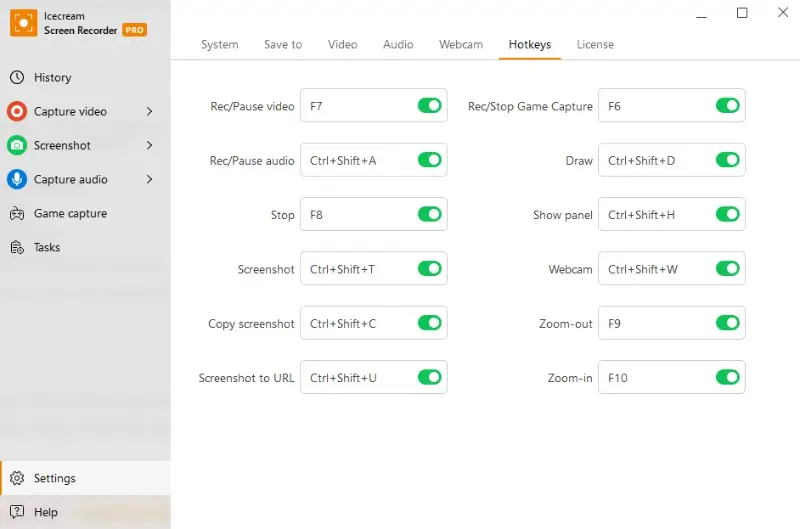
6. Screen recorder hotkeys
Hotkeys like "Rec/Pause", "Stop", "Show panel", etc. will help you record videos in a more convenient way. The program offers default hotkey combinations, but you can disable them if necessary.
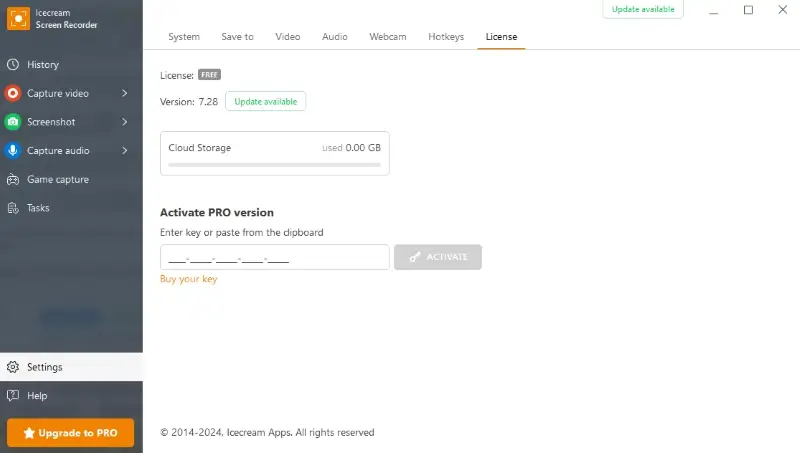
7. Screen recorder license
Version.
The version number represents the specific release of the screen recorder. Here, you can also see notifications if any updates are available.
Cloud storage.
As you record your screen activities, the files are saved directly to the cloud storage. The "Cloud storage" metric indicates the amount of space that has been utilized by the recordings and screenshots stored in your account.
Activate PRO version.
After purchasing the subscription, you will receive an email with the license key. Copy it and enter in this field, and click the "Activate" button to unlock the PRO features of the screen recorder.
License.
View your license key number here if you have the PRO version.

Conclusion
In conclusion, adjusting the settings in Icecream Screen Recorder is a straightforward process that can significantly enhance your capture experience.
By understanding and customizing options such as video, audio inputs, and file format, you ensure that your recordings meet your specific needs and preferences. Whether you’re capturing high-quality tutorials, gaming sessions, or professional presentations, fine-tuning these settings will help you achieve optimal results.


