How to Use the Area Auto Detection Mode
Icecream Screen Recorder is a versatile tool known for its user-friendly interface and robust features. In this guide, we'll explain how to use the Area Auto Detection Mode - a game-changing functionality that allows you to capture specific parts of your screen.
Whether you're a seasoned content creator or a novice user, mastering this feature will undoubtedly elevate your screen recording experience. Join us as we explore step-by-step instructions and practical tips.
What is "Area Auto Detection" in a screen recorder?
Area Auto Detection is a feature that allows the screen recording software to intelligently detect and select the relevant area on the screen. It streamlines the recording process for users who want to focus on specific regions when they capture their screen video.
How to use the "Area Auto Detection" mode
Icecream Screen Recorder is a software application that allows users to capture the screenshots and record videos of their desktops. Here's how to use it to capture a part of your screen:
Step 1. Installation
Download free screen recorder for Windows. Follow the installation instructions and launch the program.
Step 2. Adjust settings
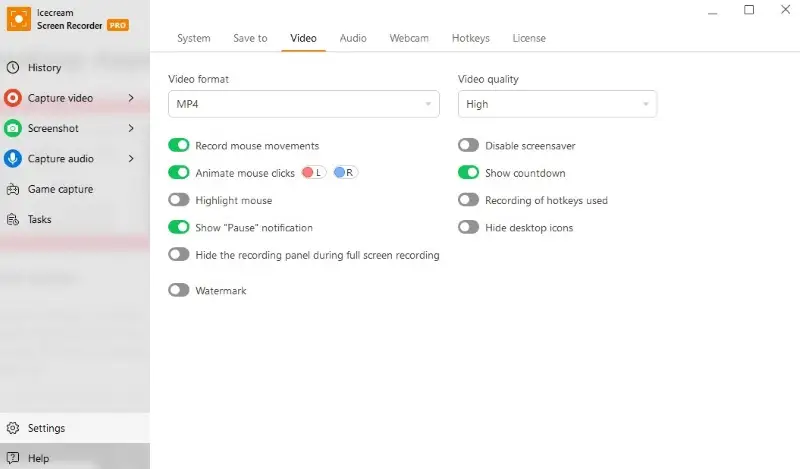
Go to the "Setting" tab. Here you can:
- Select the screen recording quality and the video format for the output file.
- Decide whether you need a countdown and a watermark.
- Apply the audio source (record audio from microphone, system sound, or both).
- Choose colors to animate mouse clicks.
Step 3. Select the video recording mode
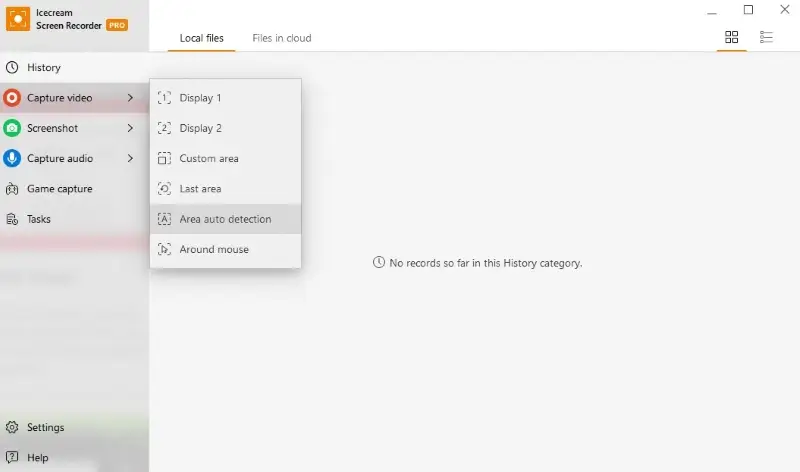
In the side menu click "Capture video" and select "Area Auto Detection".
Step 4. Start recording
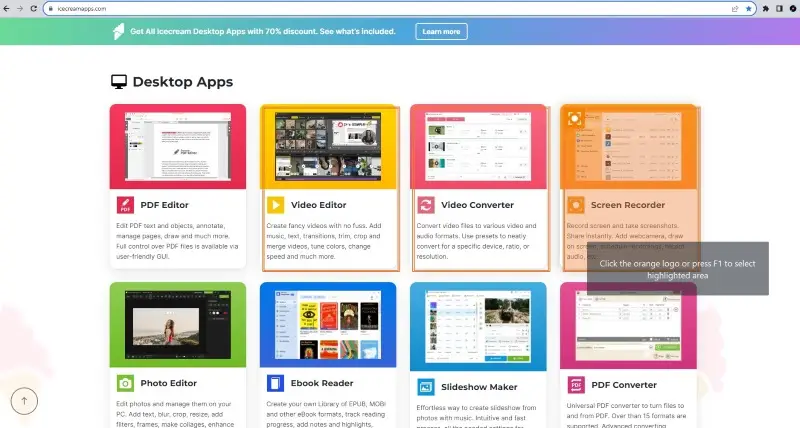
Move the mouse to the part you want to record. The area will be highlighted with an orange frame.
Once you're done selecting, click the orange logo in the upper-left corner or press F1 to choose the desktop recording area.
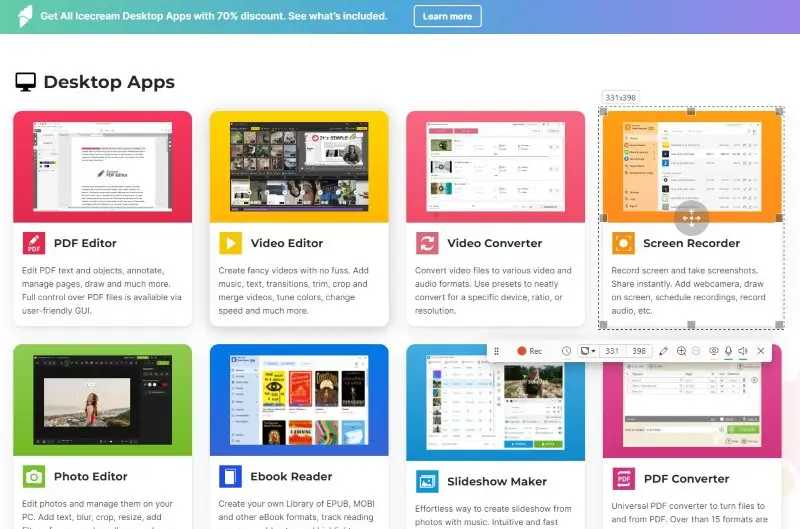
Hit "Rec" or the F7 hotkey to capture a part of the screen.
Step 5. Control recording
Use the toolbar to control the process:
- Pause/Resume. Pause and resume the video recording.
- Drawing panel. Annotate or highlight specific areas on the screen.
- Zoom. Zoom in or out to show something a little closer.
Step 6. Finish recording
When you're done capturing the screen, click the "Stop" button in the toolbar.
Step 7. Save or edit
After stopping the video recording, you'll be prompted to save the video. Choose the name for the file and press "Save".
The screen recorder also comes with basic video editing features. You can trim, cut, or add annotations to your screen recordings.
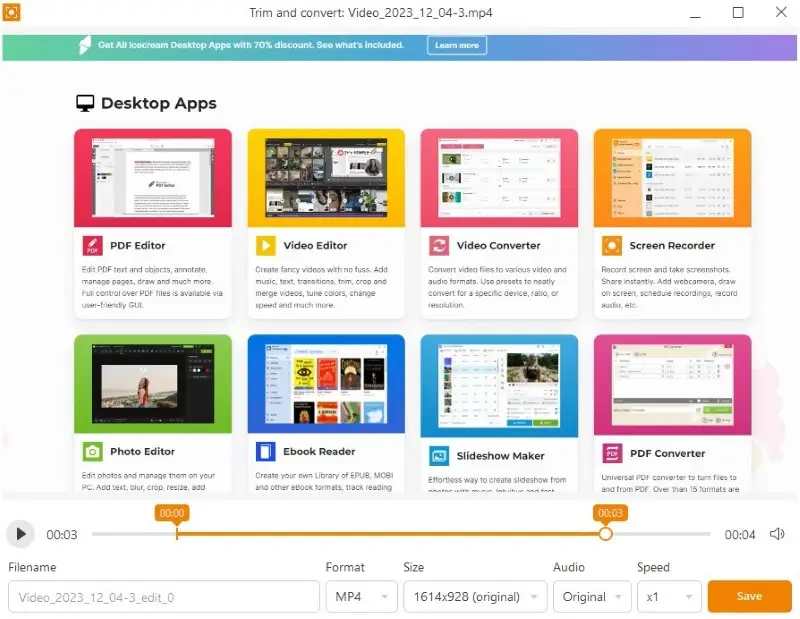
Advantages of using this software to record your screen:
- Simplicity. The video recorder is known for its intuitive interface, making it accessible to people with varying levels of technical expertise.
- Recording options. Users can capture the entire screen, specific regions, or even the area around the mouse. This versatility is useful for different recording needs.
- Clipboard. You can copy screenshots to the clipboard for quick sharing or editing.
- Format options. The screen recorder supports various video formats, providing flexibility in choosing one that best suits your needs. That way you won't have to convert your video later.
- Cloud integration. You can upload the video to the cloud storage and share it with other users via URL.
- Custom hotkeys. Configure personalized keyboard shortcuts for starting, pausing, and stopping recording.
Reasons to use the "Area Auto Detection" mode
Area Auto Detection can be particularly useful in various scenarios.
- When you want to record a specific application window without manually selecting the area each time, the mode can identify and capture the program when it's active.
- When you have multiple windows open and want to capture a particular one without recording the clutter of others, the Area Auto Detection will focus only on the active window.
- In software tutorials or demonstrations, you might want to focus on specific UI elements or controls. The tool can adapt to changes in the location of these elements, ensuring that they're always captured.
- When demonstrating responsive mobile app behavior, the auto detection mode can help in capturing different screen sizes or orientations, adjusting the recording area accordingly.
- When working with dynamic presentations, it ensures the area shifts seamlessly with slide changes.
Area Auto Detection types
| Type | Description | Best For |
|---|---|---|
| Window. | Automatically identifies and records a single application window. | Capturing app demos or video guides. |
| Region. | Detects specific sections or areas within a window, such as toolbars or panels. | Tutorials highlighting specific UI sections. |
| Active Window. | Dynamically tracks the active application window, even if it moves or resizes. | Multi-tasking presentations. |
| Content-Sensitive. | Identifies content like media players, popups, or embedded videos. | Capturing clips or web elements. |
| Application-Specific. | Records specific applications, regardless of screen position. | Recording isolated app usage (e.g., Zoom). |
| Screen Element. | Focuses on screen elements like buttons, menus, or dialogs. | UI/UX testing. |
| Multi-Monitor. | Automatically selects and records content across several displays simultaneously. | Workflows involving dual or triple setups. |
Tips on using the screen recorder
Here are some tips to enhance your experience with Icecream Screen Recorder:
- Hotkeys. Familiarize yourself with the hotkeys for starting, pausing, and stopping recordings. This can significantly streamline the process, especially when capturing dynamic content.
- Schedule. Explore the scheduling recording feature if you need to start and stop recordings automatically at specific times.
- Drawing panel. Utilize this feature to emphasize important points during your recording, making your videos more engaging and informative.
- Mouse clicks. Enable the click tracking to visualize your mouse movements and clicks. This is particularly useful when creating tutorials or instructional videos.
- Audio options. The screen recorder for Windows allows you to record system sounds, microphone input, or both. Experiment with different audio configurations to achieve the desired balance for your recordings.
- Webcam. If your video requires a personal touch, consider using the webcam recording. This is useful for creating tutorial videos, vlogs, or any content where your presence adds value.
- Dimensions. When selecting a specific area of the screen, make sure the dimensions match the aspect ratio of your final output. This can prevent unnecessary black bars or cropping during playback.
- Cloud storage. If you're concerned about storage space on your local device, consider saving your recordings to cloud services. This ensures accessibility from multiple devices and provides a backup for your important videos.
FAQ
- Does Icecream Screen Recorder allow manual adjustments alongside the Auto Detection Mode?
- Yes, you can adjust the selected area manually by dragging its borders.
- Can I use this mode to record specific application windows?
- Yes, if you can move the mouse to open the app, the screen recording software will automatically select it.
- Can I use Auto Detection for capturing specific browser tabs or online content?
- You can record any part of your screen including browser tabs.
- Is the automatic adjustment always accurate in Area Auto Detection Mode?
- In complex environments, such as low-light or cluttered scenes, the system might misidentify areas of interest or fail to make optimal adjustments. In these cases, it might require some fine-tuning.
Conclusion
As you can see, the Area Auto Detection Mode of Icecream Screen Recorder opens a gateway to seamless and precise screen captures. This automatic region recognition eliminates the need for manual adjustments, ensuring a more precise and tailored screen capture.
Now equipped with the knowledge and skills to utilize this advanced functionality, take your screen recording endeavors to new heights.


