How to Capture Video on a PC
Knowing how to capture a video on a PC is an important skill in today's visual world. Whether it's for a school project or a professional video presentation, understanding the fundamentals of screen recording is essential.
In this article, we'll navigate through 7 ways to record your screen video efficiently, with high quality and minimal hassle. We'll cover both options for various devices and operating systems, ensuring there's a solution for everyone.
Summary table
| Program | Access | OS | Price | Rating |
|---|---|---|---|---|
| Icecream Screen Recorder |
Windows
MacOS
Android
|
Free
PRO version starts at $29.95
|
5.0 | |
| OBS Studio |
Windows
MacOS
Linux
|
Free
|
4.5 | |
| Bandicam |
Windows
|
Trial version with 10-minute recording limit and a watermark
$36.95 a year for full access
|
4.3 | |
| Debut Video Capture |
Windows
MacOS
|
14 days trial version
$50 for a lifetime version
|
4.0 | |
| CamStudio |
Windows
|
Free
|
3.8 | |
| Game Bar |
Windows
|
Free
|
3.7 | |
| ScreenRec |
Windows
MacOS
Linux
|
Free
|
3.5 |

How we picked tools to capture a screen video
There are so many different ways to capture a video on a computer depending on the equipment you have and the size of your budget. When choosing a screen recorder, we kept in mind several key considerations:
- Ease of use. It should be intuitive how to start a recording, pause, resume, and stop the video.
- Performance. The screen recording software should not affect the performance of other running tasks.
- Recording quality. The software should be able to record your screen activity in high definition.
- Security and privacy. The tool must ensure that content and user data remain protected throughout the recording and sharing process.
Having investigated each of these criteria we made sure you find the best screen recorders for your personal or professional needs.
Method 1. Icecream Screen Recorder
Capturing video with Icecream Screen Recorder is an easy and convenient method to share your screen. The video recording software is very popular for its simplicity and versatility.
How to capture a video on Windows PC with Icecream Screen Recorder
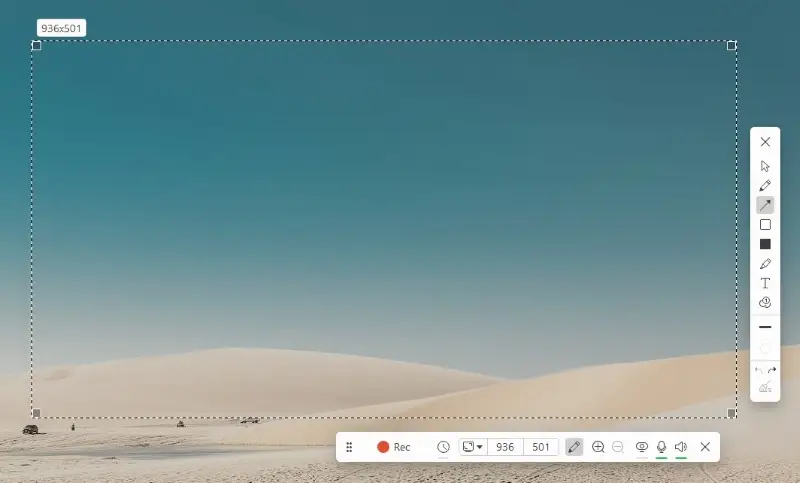
- Download and install the free screen recording software for Windows PC.
- Launch the program and select the type of capture you'd like to do (full screen, custom area, etc.).
- Adjust the settings as needed. You can set up a webcam, microphone, and speakers.
- When ready, press "Record" to start the screen recording. You can also use a "Recording timer" option.
- Click the "Stop" button to end the recording and save your file.
Pros:
- Versatile screen capture. It allows you to capture your entire screen or select specific areas, making it suitable for a wide range of needs, including recording a Zoom meeting, tutorials, and software demos.
- Drawing panel. Draw, outline, or add steps to your screenshot or screen video in real time.
- Audio support. You can record system sounds, microphone input, or both simultaneously, which is perfect for creating video tutorials with voice-over instructions.
- Webcam. Capture your screen and webcam simultaneously to make videos where it's important to have a face cam along with screen recording.
- Built-in editor. The screen recorder also has video editing features like trimming, adjusting playback speed, muting, and much more.
- Scheduled recording. It includes a feature for scheduled recordings, allowing you to automate screen capture at specific times or duration.
- Easy sharing. The software allows you to easily share recordings via a link. Plus, the program will keep track of your recording views.
Overall, Icecream Screen Recorder provides an easy-to-use yet powerful way to capture videos from your desktop quickly and easily. This makes it a great choice for anyone seeking an effective method of video capturing their activity for sharing with others.
Method 2. OBS Studio
Using OBS Studio is a great way to create professional-looking screen recordings. This is an open-source and free video capture software that also allows live streaming.
How to capture various videos of screen using OBS Studio
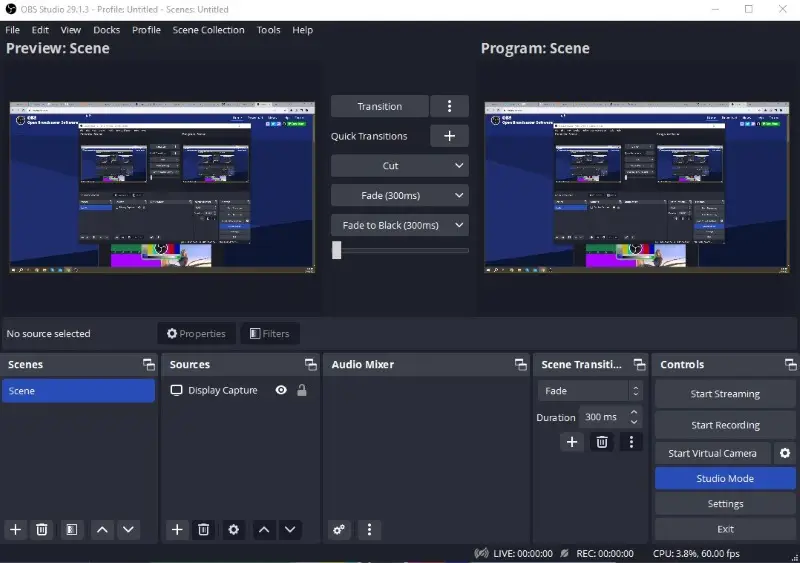
- Download and install OBS Studio on your computer.
- Create a new scene by clicking the "+" sign in the "Scenes" box.
- To add your video and audio sources, click "+" in the "Sources" box.
- Once you're ready, press the "Start Recording" in the right part of the window.
- The "Stop Recording" button is located in the same place.
- Your video will be automatically saved to the default folder.
Pros:
- Completely free. It is an open-source platform, which means that it's absolutely free for anyone to download and use.
- Versatile. The screen recording software allows users to capture windows, images, text, webcams, microphones, and more.
- Multilayering. You can combine multiple video sources in a single recording, which is crucial for professional broadcasts.
- Integrated streaming. The free screen recorder integrates with popular streaming services like Twitch, YouTube, and Facebook. This makes it easy to start and manage your livestreams.
- Cross-platform. It works on Windows, Mac, and Linux, so a wide range of users can utilize it regardless of their operating system.
Cons:
- Complexity. The program has a steep learning curve. Many of the features and settings make it daunting for beginners.
- No editing tools. While OBS is great for recording and streaming, it lacks built-in editing options. Any editing, trimming, or combining your videos will have to be done in a separate program.
Taking advantage of OBS Studio will help you make professional-looking videos without spending any money. With some practice, anyone can start creating high-quality videos in no time!
Method 3. Bandicam
Filming with Bandicam is a simple and effective way to record a screen video on your PC. It is also one of the most popular programs for video capturing and is used by many people worldwide.
How to capture a video on screen with Bandicam
- Download and install Bandicam from the official website.
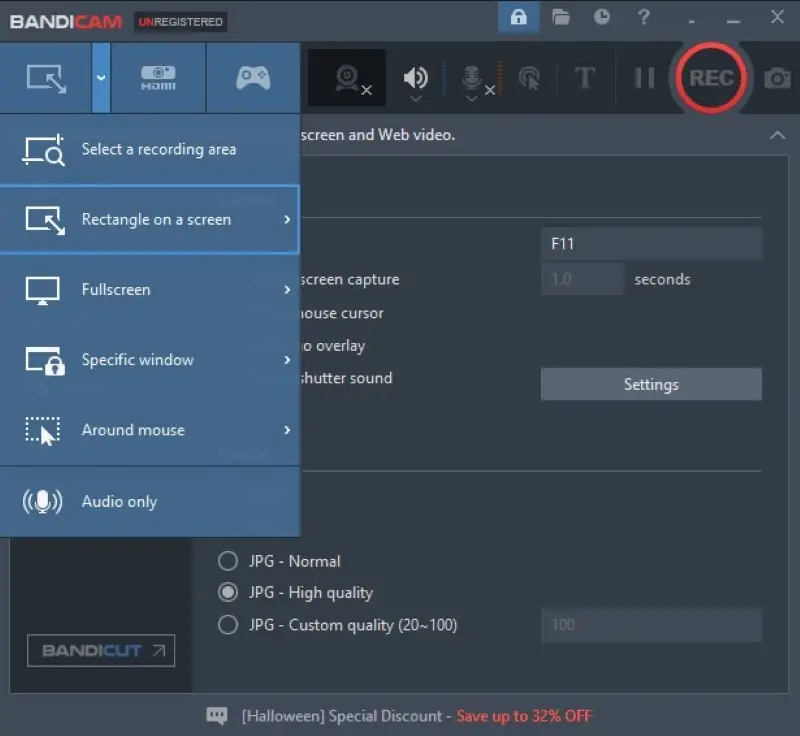
- Run the program and select a recording mode. You can capture a full screen, a specific window, or an area.
- Select the webcam and audio source if wish to employ them.
- Click "Rec" or F12 to begin recording and one of them again when you are finished.
- Press the folder symbol in the upper right corner to open the folder with your screen recording.
Pros:
- Intuitive interface. It is easy to use and set up, making it ideal for beginners or those who do not have a lot of experience with screen recording software.
- Multiple recording modes. The program provides several modes for recording. You can even use it as an audio recording software.
- Customizable settings. It has a range of options for customizing your recordings, including different resolutions, frame rates, audio settings, etc.
- Drawing panel. This software allows you to make drawings or annotations in real time when you capture the screen.
Cons:
- Limited time. If you want to capture videos longer than 10 minutes you will need to purchase the premium version of the program.
- Watermark. The free version places a watermark at the top of all recorded videos.
Utilizing Bandicam for screen recording can be an excellent method of capturing high-quality footage. It is a perfect choice for anyone seeking to capture video from their computer screen quickly and easily.
Method 4. Debut Video Capture
Debut Video Capture makes it simple and easy to capture your screen video quickly. It is a powerful yet easy-to-use tool that can help you record your favorite moments with ease.
How to capture a desktop video using Debut Video Capture:
- Install and launch Debut Video Capture on your computer.
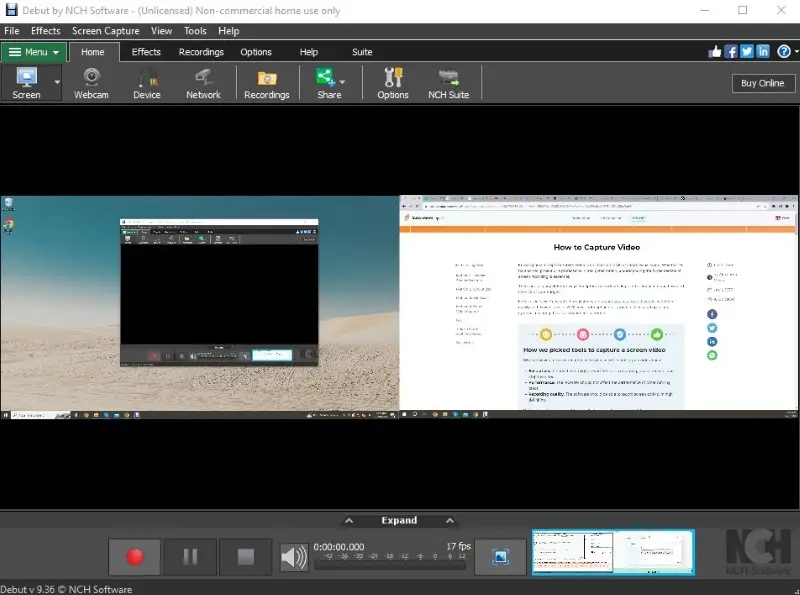
- Select the desired capture device from the list of available options in the program.
- Configure the capture settings, such as frame rate, video resolution, audio source, etc.
- Press the "Record" button to start capturing your video.
- Once you finish recording, click "Stop" and save the file to your device.
Pros:
- Versatility. The screen recorder can capture a video from nearly any source - your computer screen, a webcam, or even videos playing.
- Audio recording. The program can simultaneously record audio from your microphone and the speakers.
- Video effects. It provides basic major video editing effects like brightness, contrast, gamma, filters, flipping, and adding a watermark.
- Green screen. You can replace the background with an image, video, or solid color.
Cons:
- Limited free version. You can use the free video capture software for a limited period of time (2 weeks).
- Interface. The interface looks a little dated and might be confusing to people who have never used screen recording software.
Overall, utilizing Debut Video Capture is an excellent method to quickly capture videos. With its plethora of features and customization options, this screen recorder is a great solution for both Windows and MacOS users.
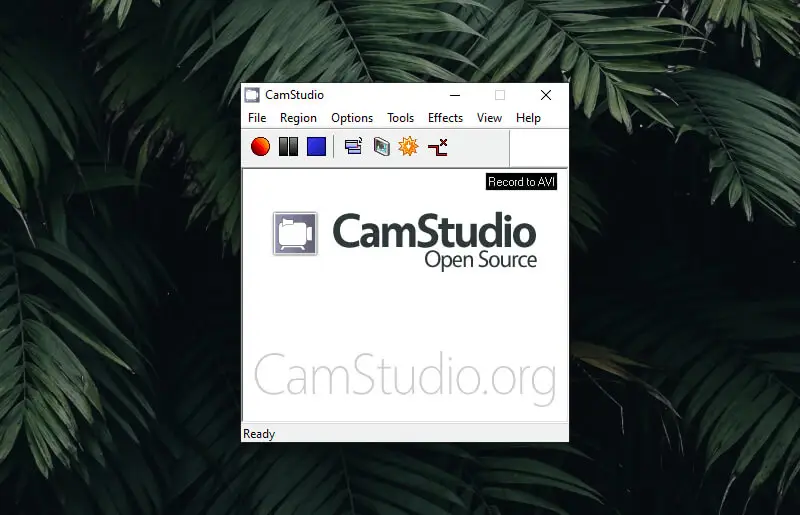
Method 5. CamStudio
CamStudio is a free and open-source screen recording software primarily used to create video guidelines, demonstrations, and presentations. It allows users to capture activity on their computer screen, enabling them to record what they are doing along with any accompanying audio commentary.
How to record your screen video in CamStudio:
- Download and install CamStudio.
- Launch the application and adjust video options such as compression, frame rate, and quality.
- Set the region of the screen you want to capture.
- Optionally, configure audio settings if you plan to include commentary.
- Start recording by clicking the red button. When finished, stop the capturing.
- Save the video file to your desired location.
Pros:
- Simple to use. Its user-friendly interface makes it easy for beginners to start recording their screen activities without a steep learning curve.
- Customizable settings. Users can adjust video and audio settings according to their preferences.
- Flash output. It can generate SWF files, which are lightweight and easily shareable on the web.
Cons:
- Limited output formats. The screen recording software only supports the AVI and SWF formats for output, which may limit compatibility with certain devices or platforms.
- Outdated interface. The user interface may feel outdated compared to more modern screen recording tools.
- Lack of updates. The app hasn't seen significant updates in recent years, leading to concerns about compatibility with newer operating systems.
Despite its limitations, CamStudio remains a popular choice for users seeking a straightforward solution for creating screen capture without investing in expensive software.
Method 6. Game Bar
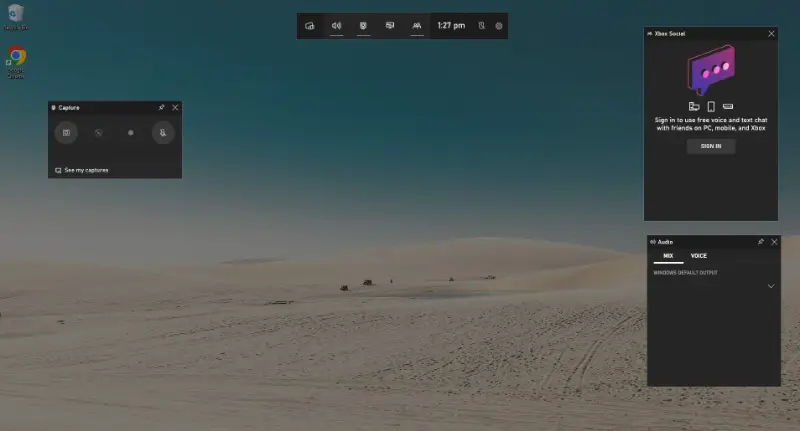
Game Bar is a built-in feature in Windows 10 and 11 designed primarily to capture video and screenshots of the gameplay. It allows users to record screen activity and audio without needing third-party software, making it a convenient option for basic tasks.
The tool can also be used to capture videos of non-game activities, such as tutorials or software demonstrations.
How to record video from computer screen using Game Bar:
- Press Windows + G to open the Game Bar.
- To start recording, click "Record" (the circular red icon) or press Windows + Alt + R.
- To stop the process, use the "Stop" button or the same hotkey combination again.
- The recorded clip will be saved automatically to the
Videos > Capturesfolder on your computer.
Pros:
- No need for third-party software. Game Bar comes pre-installed with Windows, so there's no need to download or install additional programs.
- Easy access. The tool can be quickly accessed, making it very convenient for capturing videos without interrupting your workflow.
- Lightweight. It has minimal impact on system performance, making it ideal for casual screen recording needs.
Cons:
- Limited customization. Unlike some advanced programs like OBS or its alternatives, this method offers fewer settings and options for fine-tuning video quality or audio preferences.
- Not ideal for non-gaming content. While it can record any screen activity, it’s primarily designed with gaming in mind.
Despite its limitations, Game Bar is a solid, easy-to-use option for casual video recording, especially for gamers or users who need a quick and simple solution without extra software.
Method 7. ScreenRec
ScreenRec is a lightweight application compatible with Windows, macOS, and Linux, designed for high-quality screen capture. Particularly useful for training videos, product demos, or presentations, it also supports annotated screenshots and instant sharing via secure links.
The utility offers private cloud integration with automatic uploads and viewer engagement tracking through built-in analytics.
How to capture your screen using ScreenRec
- Launch the software once installed.
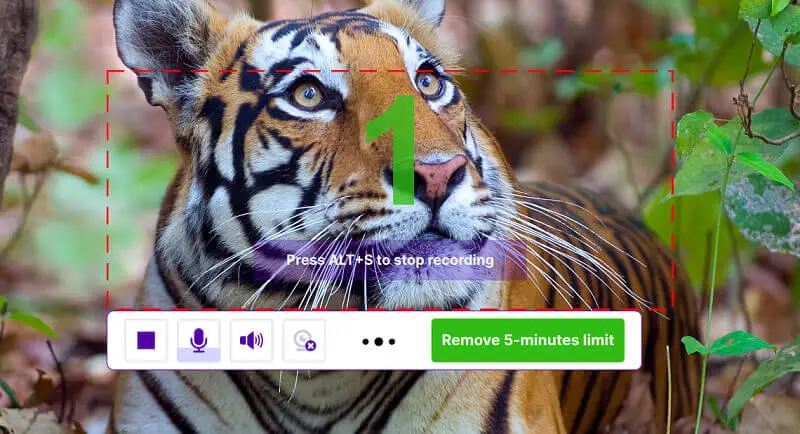
- Press Alt + S and select the area you'd like to shoot.
- Activate sources if needed — either internal sound or voice input.
- Click the red circle to begin the session.
- Stop by hitting the designated key or using the on-screen control. A preview will appear.
- Save the clip, add annotations, or share it through a protected URL.
Pros:
- Instant link generation. Easily distribute content via automatically created private URLs.
- Encrypted storage. Uploads are securely stored and accessible only through personal cloud access.
Cons:
- Limited post-processing. Does not provide advanced editing or timeline tools.
- Recording cap. Short duration limit applies unless you register.
ScreenRec is an efficient choice for those who need fast, secure screen capture and sharing without complex configurations or add-ons.
Reasons to capture screen videos
Screen recordings can be incredibly useful for a number of reasons.
- Tutorials. If you're teaching someone how to employ a specific piece of software, it's often much easier to simply record your screen and share the video with them.
- Software demonstration. If you are a software developer, capturing screen video helps in showing its functionality. This can be used either for marketing purposes.
- Gaming. Gamers routinely record their gameplay to share with others online or upload to streaming services.
- Presentation. Recording your screen during a presentation can create a reference video for those who were unable to attend the meeting or for reviewing later.
- Technical support. If you're having a problem with your computer, video capturing can help you show what exactly is going wrong.
- Product reviews. This is especially important for tech bloggers, who utilize screen capture to help review applications or devices' interfaces.
- E-learning. Online courses often incorporate HD screen recording to teach various lessons, particularly in IT and programming courses. It might help in any case where showing the process adds value.
- Bug reports. Recording the steps that led to a bug or a crash can provide invaluable information to developers trying to fix the problem.
- Content creation. Many creators use footage to produce engaging material for platforms like YouTube, tutorials, or social media posts.
Remember that the screen recording should respect privacy and guidelines. Always ask for the permission or inform about recording if other people's information or a conversation is involved.
FAQ
- What resolution should I record the screen in?
- It depends on what type of video you are recording and who will be watching it. Generally speaking, 1080p resolution (1920 x 1080) is considered high-definition and ideal for most devices and platforms.
- What video format is best for screen recording?
- MP4 is the most widely supported format and is ideal for varied video content. Other popular formats include MOV, AVI, and WebM. You can always convert a video to another format if needed.
- How can I optimize the quality of my recordings?
- To ensure the best quality, consider factors such as screen resolution, frame rate, and audio settings. Avoid recording in low-light conditions or environments with excessive background noise, as this can affect the clarity of your video and audio.
- What frame rate should I use?
- A standard frame rate for most types of videos is 24 FPS. If you are making a video that will be viewed on a big screen, then you may want to use 60 FPS to get smoother motion with less motion blur.
- How do I record video from an external camera on my PC?
- You’ll need a capture card if the camera uses HDMI. After connecting the device, you can use software like OBS Studio or Logitech Capture to record video.
Tips on how to capture a video
- Plan ahead. Before you start recording, outline all the actions you will take. This will help you make a smooth recording and you won't have to edit the final video.
- Audio quality. If you're recording audio, use a high-quality microphone and remember to speak clearly.
- Highlight cursor. Most screen recording software will offer you the ability to highlight the cursor or show clicks. This can be helpful to guide the viewer's focus.
- File size. Be aware of the file size when finished. Depending on where you upload or how you share the video, there might be file size limitations. Most editing software should allow you to compress videos.
Conclusion
Overall, knowing how to capture screen videos is a versatile skill that serves numerous purposes from recording tutorials and bug reporting to creating instructional content and streaming games.
If you use tips from this guide, you will be confident that your screen recordings will turn out great! Remember, practice always makes perfect, so don't hesitate to experiment and learn each software until you master the art of screen capture.


