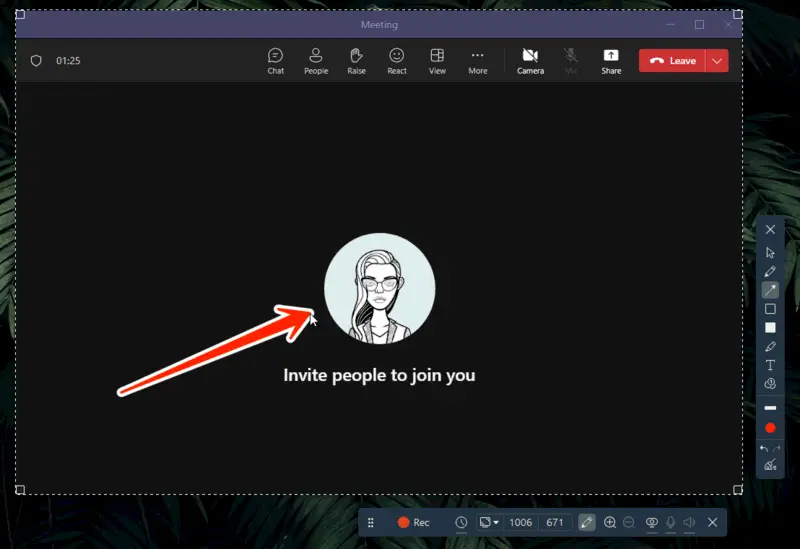
How to Record a Teams Meeting on PC
Online meetings, conferences, and webinars have become commonplace in remote work and study formats. Microsoft Teams is among the most popular.
Sometimes, when hosting or attending a call, there may be a need to capture it. This article offers 8 ways how to record Teams meetings for later review.
Best Teams screen recorders: summary table
| Application | OS | Output format | Additional features | Our rating |
|---|---|---|---|---|
| Icecream Screen Recorder |
Windows
|
MP4, WebM, MOV, AVI
|
Edit, annotate recordings
Schedule recordings
Hotkeys
Record audio only
Share recordings by URL
|
5.0 |
| Microsoft Teams |
Windows
MacOS
Android
iOS
|
MP4
|
No additional functionality
|
4.7 |
| QuickTime Player |
MacOS
|
MOV
|
Choice of the recording area
|
4.5 |
| OBS Studio |
Windows
MacOS
Linux
|
MKV, MP4, MOV, FLV, AVI
|
Stream recordings
Employ hotkeys
Use filters and transitions
|
4.2 |
| Vidyard |
Windows
MacOS
|
MP4
|
Video editing
Analytics tools
Customization of the interface
Share recordings via a link
|
4.0 |
| Xbox Game Bar |
Windows
|
MP4
|
Record audio
|
3.8 |
| EaseUS RecExperts |
Windows
MacOS
|
MP4, MKV, AVI, MOV, FLV
|
Schedule recordings
Employ hotkeys
Record audio
Share recordings directly to the web
|
3.5 |
| Video Candy |
Online
|
MP4
|
Webcam test
Record audio
Edit the result
|
4.0 |

How we picked the apps to record Teams meeting
To write this article, we tested 7 screen recording software available on the market to capture a Teams meeting. We also tested the built-in screen recorder in Microsoft Teams.
Our main criteria included:
- The ease of use;
- Output formats;
- Additional features such as editing tools, hotkeys, and scheduling options.
We recorded various types of meetings, including webinars, lectures, and conferences, to ensure that our instructions worked for a variety of scenarios.
Finally, we analyzed the pros and cons of each method to provide you with a comprehensive guide on how to record Teams meetings on your PC.
Method 1. Icecream Screen Recorder
To capture a conversation or a concert in good quality, you will need to get screen recording software on your PC. Such a program will equip you with the capability to screen capture the entire meeting. More to that, it will record all activities on your display if needed.
Using Icecream Screen Recorder, you will not only get a good recording of a Teams meeting with sound but also save all your manipulations including mouse cursor movements and hotkeys used.
How to record the Teams meeting with Icecream Screen Recorder
- Download free screen recorder for PC and install it onto your computer.
- Launch your Microsoft Teams meeting in a browser or a desktop app.
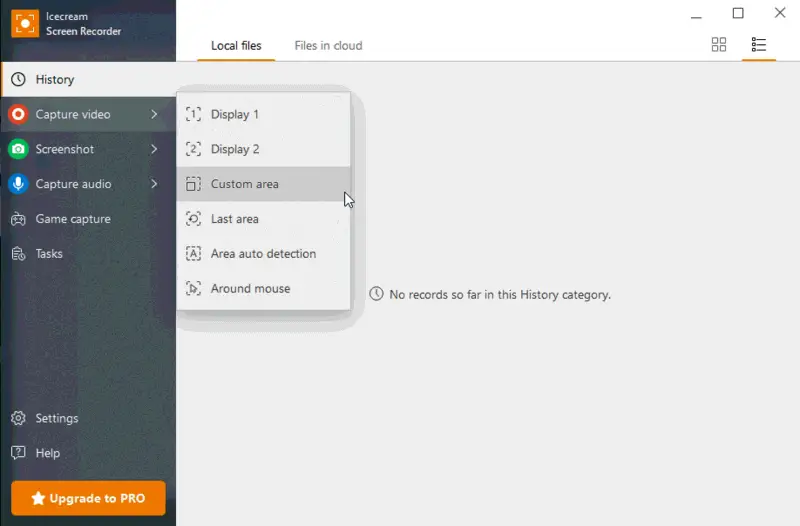
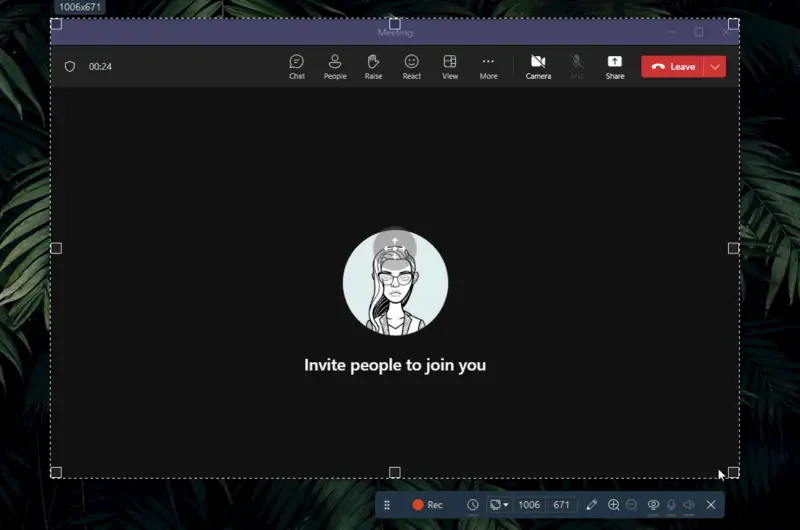
- In the screen recording app, hover the mouse over the "Capture video" button. Click "Full screen" to record a Teams meeting in full-screen mode. Otherwise, hit "Custom area" to manually select the recording space.
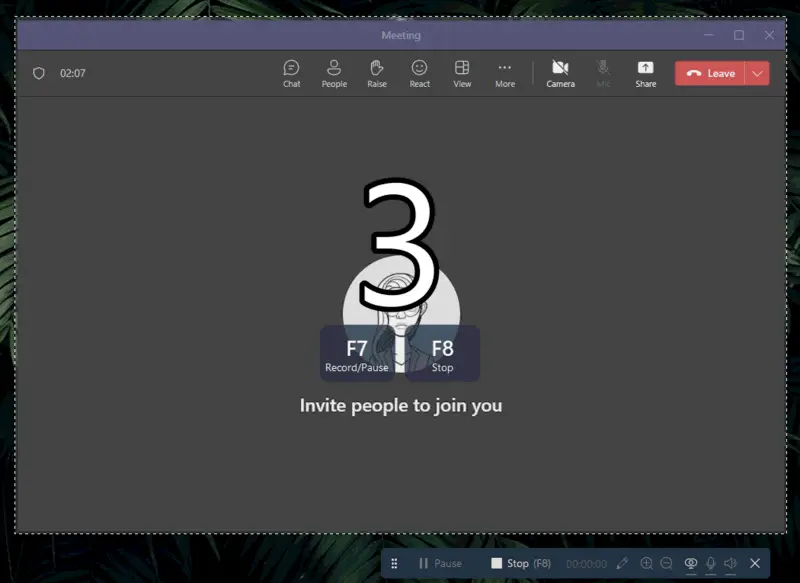
- Press the "Rec" button on the toolbar to start the Teams meeting recording. After a 3-second countdown, the actual screen capture will begin.
- While recording a Teams meeting, you can use the F7 hotkey to pause and resume video capture.
- After exiting the Microsoft Teams meeting or as soon as it is finished, press the F8 hotkey or the "Stop" button on the recording panel. The screen recording software prompts you to specify the file name. Simple editing of the video is also available at this stage along with the feature to upload Teams recording by URL.
Note that the free version of the software offers only 5 minutes of screen recording. Therefore, if you plan a long webinar, conference, or lesson/class, you need to upgrade the screen recorder to the PRO version.
Additional features
- After you stop the Microsoft Teams recording, the program will offer you to use a built-in video editor. You can change the filename and format, resolution, speed, mute, and trim video in it.
- As your Teams meeting recording is in progress, you can use the "Draw" panel to highlight important parts, make notes, add text, point out significant segments, etc.
- If you plan to broadcast your desktop to a meeting, it is better to hide the toolbar of the screen recorder. Enable this option in the "Video" tab of the "Settings" panel of the app.
- Zoom in and out using the F9 and F10 hotkeys or use the relevant buttons on the toolbar.
- Enable and disable audio and microphone recording if needed.
- Disable mouse movement recording so as not to show your cursor in the final video.
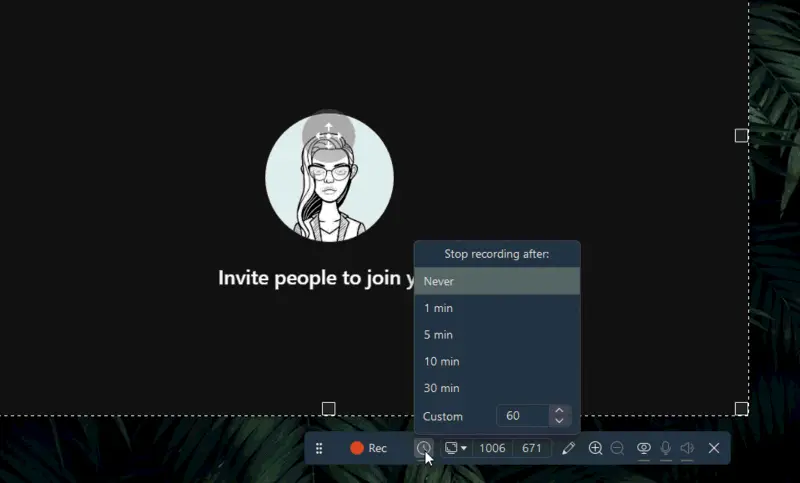
- You may even schedule a screen recording at a specific time.
Pros:
- Cloud integration.
- Feature-rich screen recorder for Windows.
- Impressive number of settings and options, including a feature to take a screenshot.
- User-friendly and simple interface.
- Modern design with various color schemes.
- Built-in video editor.
Method 2. Microsoft Teams
With limited features, this meeting program itself allows for screen capture of the video conference. If you want a quick solution to record a Teams meeting without additional instruments and settings available, this may be something you can try.
However, before recording a Teams meeting with this method, you need to know a few rules that Microsoft has defined:
- Not all users have the right to record meetings. Only the administrators are authorized.
- The recording time cannot exceed 4 hours.
- If the built-in screen recording tool is turned on, all participants will be informed with a relevant message.
- To make a video copy of a Teams meeting recording, you must purchase one of the paid plans.
If your plan meets the terms and your actions do not violate them, follow the steps on how to record on Microsoft Teams outlined below.
How to screen record on Teams
- Launch the Microsoft Teams desktop application.
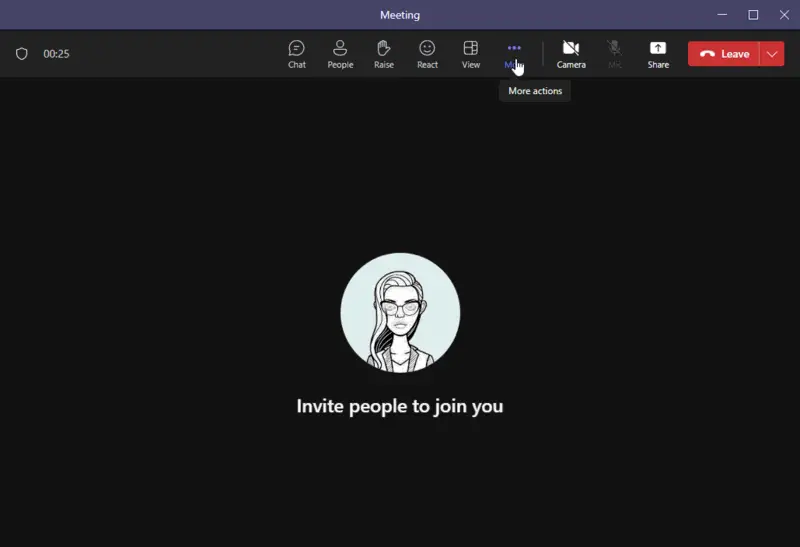
- Left-click the "More actions" icon in the app.
- Select "Start recording" from the list.
- All the participants will see a notification that the screen capture is on.
- You can stop the screen recording in two ways: manually or by waiting until the end of the meeting. To manually end the recording, go to "Additional actions" as described previously, and press "Stop recording".
Once you finish the Teams meeting recording, there is also one more thing to consider. The saved copy of the recording can only be viewed by the administrator. Other users can access it online via a link sent by the admin.
Pros:
- This Teams capture method doesn't require the installation of an additional screen recording app.
Cons:
- All participants know that you record the Teams meeting;
- One of the paid plans is required for long videos;
- Annotations along with notes and whiteboard are not recorded;
- Only 4 people's streams can be recorded in the screen capture;
- The recording of a Teams meeting is only available to the administrator for a limited period.
Method 3. QuickTime Player (macOS only)
QuickTime is a default media player that comes pre-installed on macOS devices. It has a built-in screen recording ability that you can use to capture anything on your display.
How to record a meeting in Teams with QuickTime Player
- Launch media player from the Launchpad.
- Open the "File" menu and click "New Screen Recording".
- A small window will appear with a few options for recording your screen. Select Microsoft Teams for recording and press the "Record" button.
- To stop the screen capture, locate and click the icon with a square inside in the top right corner of the display.
- Your Teams meeting recording will be stored on the desktop.
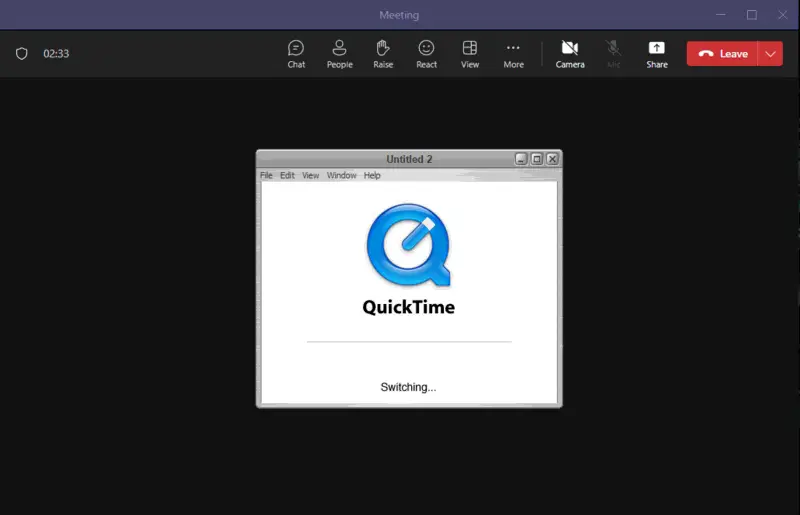
The output format of the recording of a Teams meeting will be MOV. In case you prefer to work with a video in a different format, you will need to convert the video.
Pros:
- Pre-installed application with a free screen recorder for Mac.
- No additional software needs to play the Teams meeting recording.
- Customizable screen capture area.
Cons:
- The features are fairly basic compared to other free screen recording applications.
- If you want to add annotations or draw on your recordings, you will need to use an external application.
- When recording a Teams meeting, files can only be exported in the MOV format.
Method 4. OBS Studio
OBS Studio is a free open-source software for screen recording and live streaming. It is a powerful tool for capturing webcam, audio, and video from your computer.
How to record a meeting in Teams using OBS Studio
- Download and install the screen recorder on your computer.
- Open the software and go to the "Settings" tab.
- Under "Settings", select "Output" and choose your preferred format, such as MP4 or MKV.
- Select the "Video" tab and then choose your resolution size and frame rate.
- Go back to the "Settings" tab and select "Audio" to set your audio source, such as microphone or speakers.
- Press the "Add Scene" (+) icon and select the option for "Window Capture".
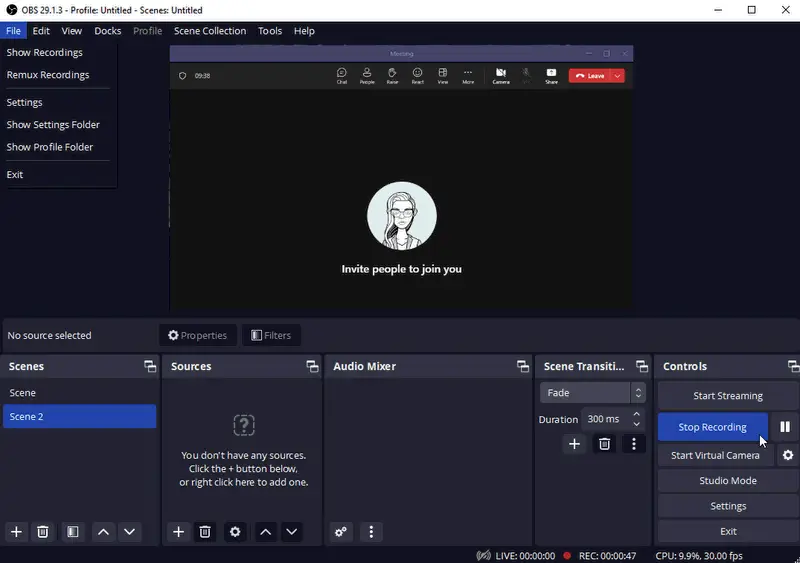
- Click the "Start Recording" button to begin recording the Microsoft Teams meeting.
- Tap the "Stop Recording" button.
Pros:
- Allows you to stream your recordings live to viewers on YouTube, Twitch, or Facebook Live.
- Produces high-quality videos that capture every detail of the meeting.
- Has powerful features for post-processing Microsoft Teams recording. You can edit them in real-time, or export them into various formats.
Cons:
- The program requires some technical know-how to fully maximize its capabilities.
- Users report that in some cases the program crashes or simply stops recording content.
Method 5. Vidyard
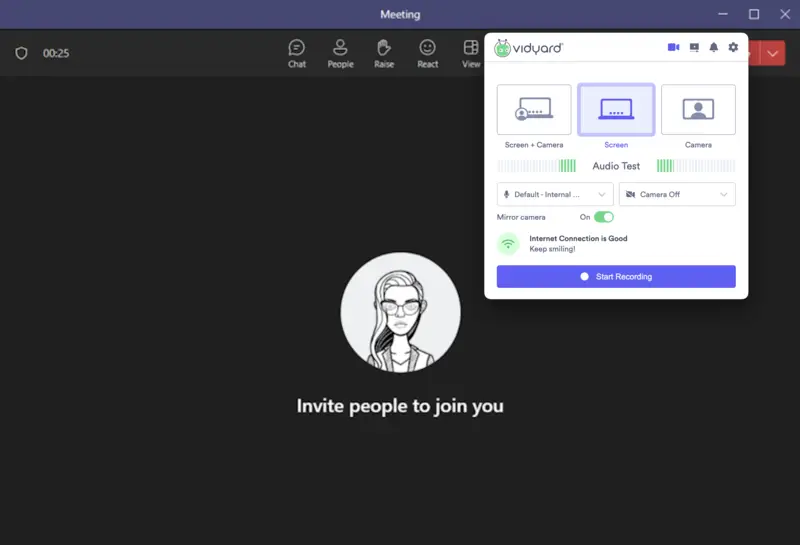
Vidyard is a video hosting platform that allows businesses and individuals to create, manage and share recordings of presentations, webinars, etc. It's particularly popular for creating marketing videos due to its additional functionality.
How to record a Teams meeting with Vidyard
- Download and install the program on your computer.
- Begin your Teams meeting.
- Open the screen recording app. Adjust the settings: select the window, test your camera, etc.
- Hit "Start Recording".
- Once you're finished, press "Stop Recording" and preview the video.
- Edit your recorded Teams meetings if needed or proceed to share them via a link.
Pros:
- Users can gain valuable insights into viewer engagement with detailed analytics provided.
- Integration with various marketing automation platforms, customer relationship management (CRM) systems, and other tools.
Cons:
- In the free version, the recording is limited to 30 minutes.
- Only users with the upgraded plan can download the file (others can just share).
Method 6. Game Bar (Windows only)
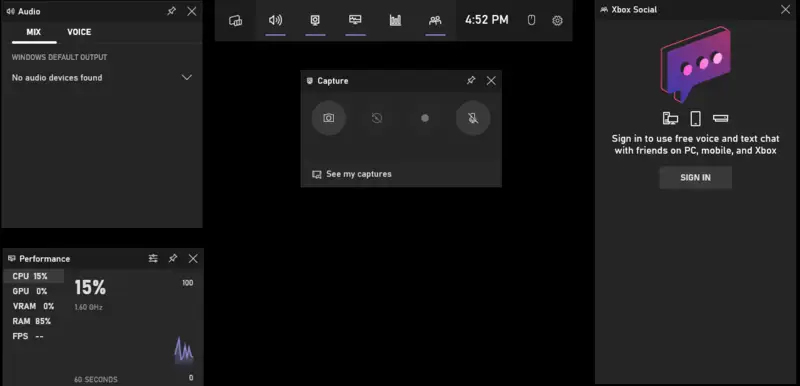
The program known as Game Bar, embedded in Windows 10, facilitates users to capture their screen. It's a great way to record important meetings or gameplay, and it's simple to use.
Recording Teams meetings on Xbox offers a convenient way to record the screen and review key points from past conversations. Plus, it is a piece of cake to configure and employ!
How to record Microsoft Teams call in Game Bar
- Launch the Xbox app on your device. To do this press Windows + G keys.
- Once the meeting has begun, hit the "Start recording" button.
- When you are finished recording, tap the "Stop" button to save your video.
Pros:
- Records system sounds along with external audio devices.
- The audio and video quality of screen recordings are excellent.
Cons:
- It's not possible to record multiple windows simultaneously.
- You can't share the video with others directly from the app.
- Maximum recording time is two hours.
Method 7. EaseUS RecExperts
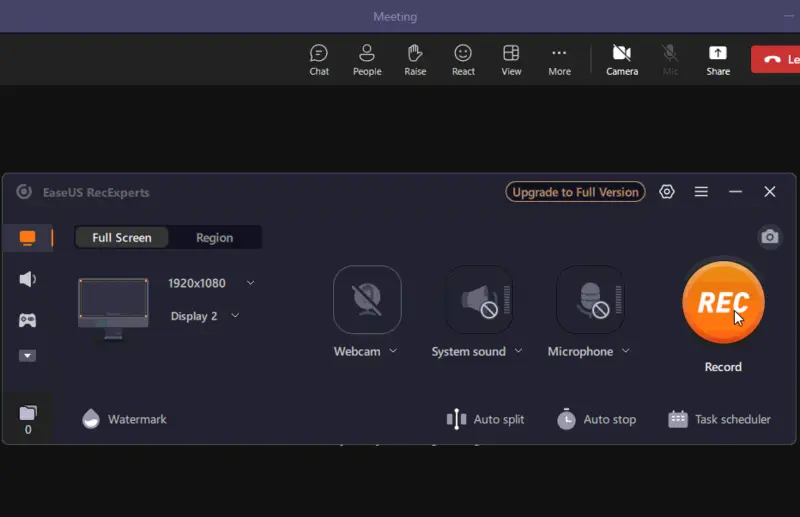
EaseUS RecExperts is an easy-to-use screen recorder that captures audio and video from your PC's camera and microphone. EaseUS RecExperts may not be the cheapest screen recorder on the market, but it does have a lot of impressive features.
How do you record a Teams meeting with EaseUS RecExperts
- Download and install EaseUS RecExperts on your PC.
- Launch the program and click "Settings" to configure the recording area, sound source, output format, and hotkeys for capturing screenshots or videos.
- Open Microsoft Teams meeting.
- Once you're in the meeting, click the "Record" button.
- To end the recording, click "Stop" in the same location or press your chosen hotkey.
Pros:
- Automatically record screens at a set time.
- Provides features to enhance audio by removing background noise.
- Export screen recordings directly to Vimeo, Google Drive, YouTube, etc.
Cons:
- Can only screen record up to 30 minutes per session.
- Doesn't offer any editing functionality.
Method 8. Video Candy
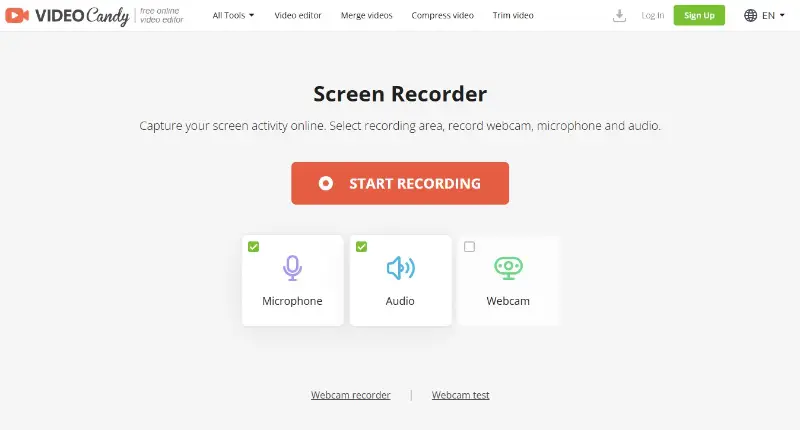
Video Candy is an online service that allows you to capture your screen straight from your browser—no downloads or setup required. It’s a handy option for saving your calls on both macOS and Windows systems.
How to record a meeting in Teams using Video Candy
- Visit the website.
- Click the "Start Recording" button to open the tool.
- Select either "Entire Screen" or the specific window you want to capture, then hit "Share".
- Once the session ends, press "Stop Recording" that appears at the bottom of the display.
- When the clip finishes processing, download it to your device or open the editor.
Pros:
- Browser-based, with no installation needed.
- User-friendly layout suitable for all skill levels.
- Doesn’t require account registration or sign-in.
Cons:
- Depends on an active internet connection.
FAQ about Teams meeting recording
- Is it possible to record a Teams meeting without anyone knowing?
- Yes, the majority of screen recorder tools provide the option to capture meetings without informing participants. Read through the software's terms of use prior to capturing any meetings without authorization.
- How do I ensure everyone's audio is recorded?
- Check that all in the meeting have their microphone on and unmuted. If you're using the Teams, it has an option to mute all participants at once as well.
- Can I record multiple people at once during a Teams meeting?
- Teams can accommodate multiple people on screen at one time and will be able to record all participants simultaneously as long as their sound is enabled and their microphones are working properly.
- Should I consider legal issues before recording a Teams meeting?
- Depending on where you live, there may be laws regarding audio or video that you should take into consideration before recording without permission from all parties involved. It's best to check local laws before proceeding with any recordings just to be safe.
- Can I edit my Teams recordings?
- Yes, various software enables you to edit videos after they are stored.
How to record a Teams meeting: tips
- Plan ahead. Schedule the Teams meeting time and agenda in advance.
- Choose the right platform. Choose a screen recorder with capabilities that best meet your session needs.
- Test the recording. Examine the recording software before you start to verify it will capture everything you need.
- Ensure everyone is on board. Make sure people are aware that the meeting will be recorded and comfortable with it.
- Have a backup plan. Have a contingency plan in case the recording fails.
- Disable notifications. Disable notifications on members' devices to minimize distractions.
- Be mindful of audio levels. Speak clearly, and adjust microphone levels to have good sound quality.
- Check in with participants. Monitor participants before the meeting to check that sound is clear and colleagues can hear each other.
- Label recordings. Label recordings with details such as date, time, and topic covered so they can easily be referenced later.
- Store recordings securely. Keep recordings safe on a cloud-based platform for easy access and future use.
Common Teams screen recording issues
| Problem | Possible Solution |
|---|---|
| Recording stops unexpectedly | Check for conflicts with antivirus software or other applications. Try updating the app. |
| Audio not syncing with video | Ensure the microphone is correctly configured and check your system’s audio settings. |
| Screen flickering or black screen | Update the program and the OS. If the problem persists, try restarting the computer or adjusting the resolution. |
| Lag or choppy video | Lower the resolution or bitrate. Ensure hardware acceleration is enabled. |
| No audio recorded during gameplay | Make sure the correct audio source is selected in the settings. Check if the game’s audio is set to "default." |
| Recording area not capturing full screen | Adjust the area settings in the application and restart the program to refresh. |
Conclusion
In conclusion, recording a recording a Teams meeting is an important task that requires careful planning and preparation.
It is crucial to keep in mind that the quality of the recording will depend on numerous factors such as the type of audio equipment used, the environment in which it's recorded, and the specific needs of the team.
Overall, making a record of a Teams meeting is an indispensable essential task for any organization. By following the steps outlined in this guide, you can ensure that your meetings are thoroughly documented and screen-captured.


