How to Record PowerPoint with Audio: 7 Tools
Being able to make a presentation with voice-over can be useful for many things. So, you might need to know how to record a PowerPoint with audio.
Microsoft PowerPoint is a great way to make training materials, online courses, and tutorials. You can use it to compose interesting and interactive presentations that you can share with other people, whether you're in school or at work.
In this article, we will discuss step-by-step instructions on 7 ways to record PowerPoint with audio. Check them out to find out which one is the best screen recorder for your needs.
What type of audio can you include?
Adding different types of elements to a presentation can make it more interactive, which can have a big effect on the audience.
- A well-timed voiceover can clearly tell the main points of the content and put a human touch.
- Carefully chosen music that fits the theme and mood of the presentation can add emotional depth and keep the audience's attention.
- You can add other sound effects or background noise in a planned way to highlight certain moments or make information stand out.
It's important to find a balance so that the audio parts add to the message instead of taking away from it. Thoughtful integration of voiceovers, music, and other sounds can transform a PowerPoint presentation into a multisensory experience, fostering better understanding and retention of the material.

How we picked screen recorders with audio
To create the list of tools and programs, we followed the criteria:
- The method has a free screen recording allowance.
- There are additional functionality included apart from the video recorder.
- The recording software or tool has a good reputation among users.
While some screen capture utilities discussed below have a learning curve, all of them are easy once you know what they are capable of. Let's have a closer look at each of the 7 best screen recorders to make a PowerPoint with voiceover or audio.
Way 1. Icecream Screen Recorder
The ideal solution for creating a narrated PowerPoint presentation is Icecream Screen Recorder. This software enables effortless capturing of the screen and your voice, computer sound, and webcam video. It is user-friendly and provides high-quality output, making it the preferred choice for many people.
How to produce a recording of your PowerPoint with voiceover with Icecream Screen Recorder
- Download Windows screen recorder and install it.
- Open your PowerPoint presentation.
- Launch the recording software and configure the settings in the control panel: select the screen area, and allow for preserving audio (and webcam, if needed).
- Click "REC" to start the process.
- When you're done filming, hit "Stop".
- Preview and save your presentation on your computer.
.webp)
Pros:
- Intuitive interface. The video recording software is designed to be user-friendly, ensuring that it's accessible to individuals with varying levels of technical expertise.
- High-Quality Recordings. The program delivers top-notch clips with adjustable options, allowing you to tailor your output according to specific preferences.
- Basic Built-in Video Editor. The screen recorder comes equipped with a basic built-in video editor for quick edits. This feature enhances the convenience of making swift adjustments to content without the need for additional software.
- Versatile Recording Options. Various desktop recording options, including full-screen, window, or a specific area, provide flexibility.
- Free and Paid Plans. The screen recording software offers free and cost-effective paid plans tailored for both personal and commercial needs, making it a suitable choice for a broad user base.
- Updates and Support. Users benefit from regular updates, ensuring the software stays current with the latest features and improvements. Additionally, customer support is available, enhancing the overall experience.
In short, Icecream Screen Recorder excels at recording PowerPoint slideshows with accompanying audio. Its simple yet powerful features make it popular among those who want to create engaging and informative presentations.
Way 2. OBS Studio
OBS is a free and open-source screen capture software. Its versatility makes it the perfect option for recording a PowerPoint presentation alongside the sounds, voice, and music.
Moreover, the live-streaming capabilities of the video recorder allow you to broadcast multimedia-enhanced slides over the internet.
Here is how to record audio on PowerPoint with OBS Studio:
- Download and install the free screen recorder from the official website.
- Set up your microphone in OBS under "Settings" and then "Audio".
- Open Microsoft PowerPoint and access your desired presentation.
- Configure the parameters in the "Settings" menu with the "Output" option.
- Add the input screen with "Source" and then "Display Capture". Select your PowerPoint window as your source.
- When ready, initiate screen capture by clicking "Start Recording".
- Hit "Stop recording" after you finish the presentation. Save the recorded video at a chosen location.
.webp)
Pros:
- High Quality. The screen recorder allows you to record at high bitrates and customize the resolution of your video, resulting in better quality.
- Compatible with Various OS. The screen capture software is available for Windows, Mac, and Linux operating systems, making it accessible to users on different platforms.
- Customizable Settings. You can adjust various settings such as frame rate, audio source, and output format to suit your specific needs.
Cons:
- Learning Curve. Beginners may encounter difficulties when using the application, as it may require familiarization with screen recording features and functionalities.
To sum up, employing OBS Studio for recording PowerPoint with audio offers enhanced control and versatility. With its customizable settings and editing options, this screen recorder is a useful tool for creating engaging and professional-looking presentations.
Way 3. Vidyard
Vidyard is a video hosting platform commonly employed for business and marketing purposes. It allows users to create recordings, manage, and share them for various needs, including sales outreach, customer communication, and content marketing.
Additionally, the service provides analytics to track performance.
How to record audio on PowerPoint by means of Vidyard
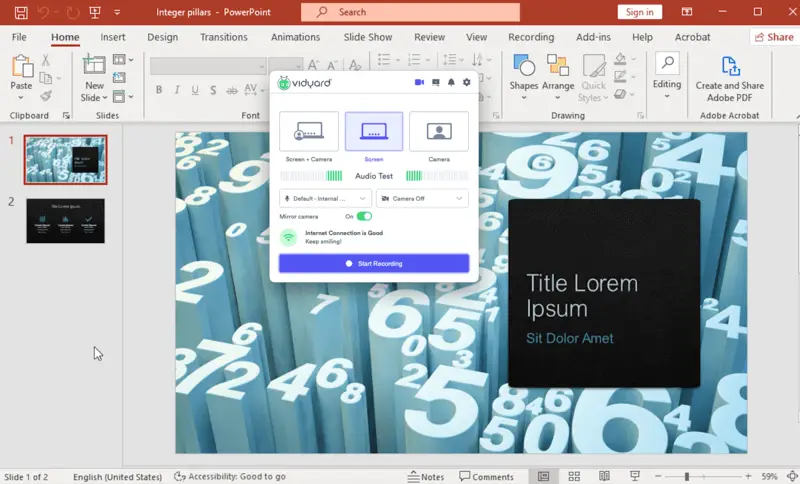
- Go to the website and create a Vidyard account. Download the desktop widget.
- Open PowerPoint and start your presentation.
- Launch the screen recording app and adjust the needed settings: pick the voice input device, perform "Audio test", etc. Choose the recording option: "Screen + Camera" or "Screen".
- Click "Start Recording" and pick the PowerPoint window. Hit "Share".
- Press the stop button to end the capture.
- Click "Edit & Share Video" to upload the file to the web platform.
- Share the recording via a link or embed it on a website.
Pros:
- Integrated Recording and Hosting. The online screen recorder offers an all-in-one solution, allowing users to both record and host videos on the same platform.
- Convenient Sharing Options. The platform provides easy sharing options, including shareable links and embed codes, facilitating seamless integration into presentations or emails.
- Editing Capabilities. There are basic video editing features included, letting you trim or adjust recordings within the platform.
- Analytics. The special tool to see the analytics helps track engagement.
Cons:
- Limitations. With the free account, you have a 30-minute limit for each video recording.
- Platform-Specific. This service is more focused on enterprise applications, so its features may be tailored to those needs.
- Learning Curve. New users might need some time to familiarize themselves with the platform and its tools.
In general, Vidyard is a good program to record voice over the PowerPoint presentation. It offers a convenient solution for creating, hosting, and sharing screen recordings.
While providing basic video editing features and analytics, it caters to business and marketing needs. However, users seeking extensive customization options may find its capabilities somewhat limited.
Way 4. Vimeo
Utilizing Vimeo to capture a narrated PowerPoint presentation is a straightforward and effective approach for producing engaging and informative content. With this online platform, you can effortlessly capture your slides and distribute them to a wider audience. This feature makes it an invaluable resource for educators, coaches, and experts.
How to record PowerPoint with audio using Vimeo
- First, make sure you have a Vimeo account. If you don't have one, sign up for free.
- Open your PowerPoint presentation.
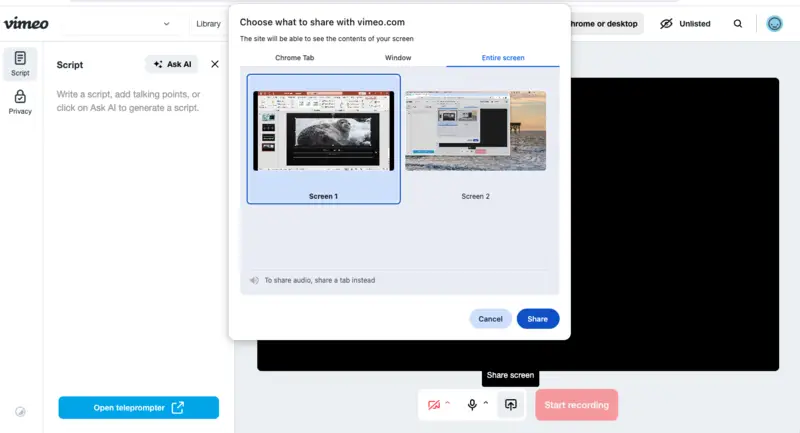
- Go to the online screen recorder. Select the option to "Record" among the tools. Hit "Allow" in the pop-up window to let the service access your camera and microphone.
- In the toolbar, unmute your mic and press the "Share screen" button. Pick the window or screen to record and click "Share".
- Press "Start recording" and begin your presentation.
- When you finish, hit the stop button.
- Your recorded presentation will automatically be uploaded to your Vimeo account.
Pros:
- High-Quality Audio. The captured audio is of high quality, ensuring that your presentation is clear and professional.
- Cloud Storage. Your recorded clips are automatically saved and stored in your Vimeo account, making it easily accessible from any device.
- Shareability. With this screen recording tool, you can effortlessly send the videos to others via a link or by embedding the file on a website.
Cons:
- Few Editing Options. There are not many options, so you may need to use other video editing software to make changes to your presentation recording.
- Limited Recording Time. The free version only allows for a maximum recording time of 10 minutes. Additionally, you can only make 2 videos per month and store 25 files at a time in your web account.
In conclusion, recording PowerPoint presentations with audio using Vimeo is a convenient and effective method for creating dynamic and engaging content. With its intuitive interface and excellent audio quality, the online platform simplifies the process of video recording and sharing for everyone.
Way 5. Loom
Loom is a popular screen recording tool that enables users to effortlessly record and share PowerPoint with narration. When it comes to creating audio-enhanced presentations, this option stands out as an exceptional choice, offering a friendly experience, efficient functionality, and top-notch capabilities.
How to add voiceover to PowerPoint with Loom
- Visit the website and register to create an account.
- Open your PowerPoint presentation.
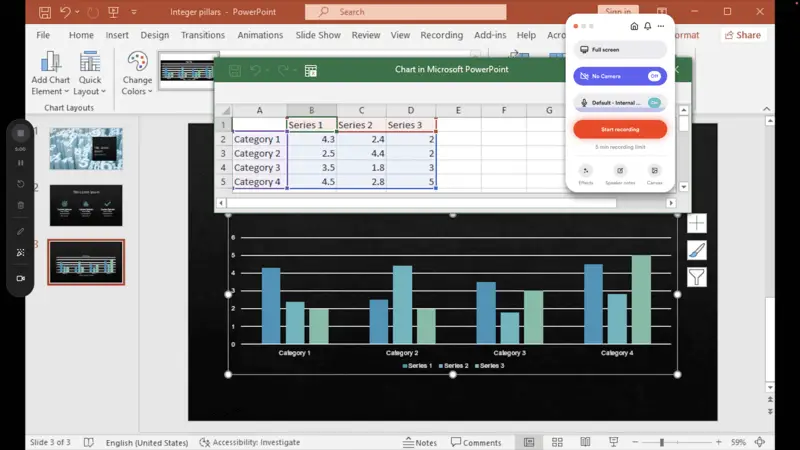
- Start the recorder by clicking the "Record a Loom" button.
- Choose the application window and enable system audio.
- Click "Start Recording" to begin.
- End the capture using the "Stop Recording".
- Share your video with students, colleagues, or friends with a link.
Pros:
- Browser Accessibility. The screen recorder is web-based, allowing users to access its features from any browser, eliminating the need for specific installations and enhancing overall accessibility.
- High-Quality Recordings. The tool excels in delivering high-quality recordings, ensuring that the captured content is clear.
- Real-Time Presenting . For added versatility, the application offers real-time content delivery for those who require simultaneous presentation and capture functionality.
- Direct Video Sharing Option. A notable convenience is the ability to share recorded videos directly from the website, simplifying the sharing process.
Cons:
- Limited Editing Capabilities. While functional, the video recorder has a limited ability to edit recordings, potentially restricting people who require more extensive editing features.
- Internet Connection Dependency. The screen capture tool necessitates a reliable internet connection for optimal performance, which may pose challenges in situations with unstable or limited connectivity.
- Time Limit . Free users face a time constraint, with a maximum limit of 5 minutes. This limitation may impact users with longer recording needs, prompting consideration for premium options to unlock extended capabilities.
In conclusion, utilizing Loom for recording PowerPoint with audio creates a fast and efficient method for generating and distributing materials. The software eliminates the need for complex equipment, making it readily available to anyone. With its user-friendly interface and high-quality recordings, the tool is a great option for both personal and professional use.
Way 6. DU Recorder
DU Recorder is a powerful screen recording app that lets you capture high-quality videos directly from your computer. Users can voice over their PowerPoint, film web camera separately from the display, and stream with this software.
How to record a presentation with audio in DU Recorder
- Open your PowerPoint slides.
- Download and install the screen recorder on your device. Launch it.
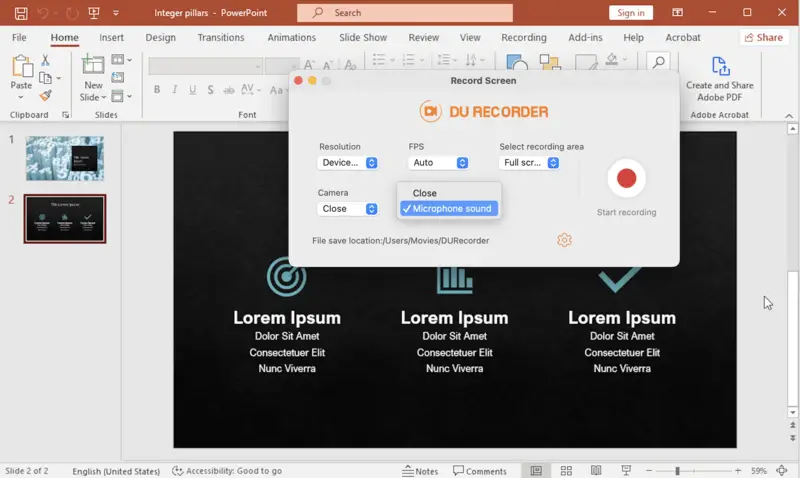
- From the main menu, pick "Record Screen".
- Adjust the settings. You can pick resolution, FPS, and area_. Make sure the microphone is on through the "Sound" dropdown menu. Switch on or off your camera depending on your preference.
- With the gear icon, indicate the folder for saving the file.
- When ready, hit the red "Start recording" button.
- After a 3-second countdown, the video will begin. You can pause and end it at any time.
- Whenever you're finished, the preview of the narrated PowerPoint will be available. Close it to save the recording or delete it if you're not satisfied with the result.
Pros:
- No Time Limit and Watermark. The duration is not limited to any specific number and no watermarks are placed on your final video.
- Live Streaming. Broadcast your PowerPoint presentation live to platforms like YouTube, Facebook, and Twitch.
- Cross-Platform Compatibility. Versions of the screen recorders are available for Windows, macOS, iOS, and Android.
Cons:
- Performance Issues. Some users report that DU Recorder can cause lags on computers with lower specifications.
- Lack of Built-In Editing. You need to rely on external video editing software to make adjustments to recordings, like cropping extra parts.
DU Recorder is a good choice for recording a presentation in PowerPoint with sound without worrying about the time limit. However, it does not have video customization tools and may experience performance issues on older devices.
Way 7. Video Candy
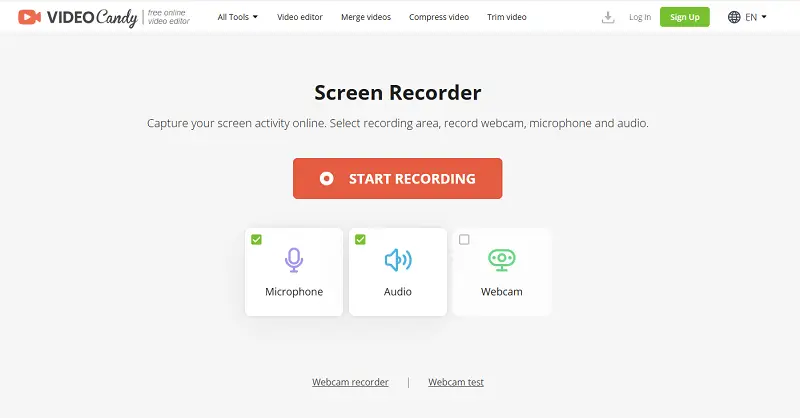
Video Candy is an easy-to-use online tool that allows you to record your slideshows with audio effortlessly. Whether you're creating educational content, business presentations, or tutorials, it provides a seamless way to capture your slides while narrating in real time.
How to record audio on PowerPoint online with Video Candy:
- Go to the website.
- Locate the "Screen Recorder" tool to start the process.
- Check "Audio", "Microphone" to capture both your PowerPoint slides and voice. Choose "Webcam" if applicable.
- Open your PPT and switch to "Slide Show Mode" for a full-screen presentation.
- Click the "Start Recording" button on Video Candy. Give the needed permissions and pick the capture area.
- Present your slides as you normally would while narrating.
- Once finished, hit "Stop Recording". Download the result.
Pros:
- Web-Based Convenience. No need to install screen recording software; capture directly from your browser.
- Secure & Free. No hidden costs for basic needs.
This method is a plain, no-installation way to record PowerPoint presentations with audio, perfect for teachers, students, or marketers.
FAQ
- What file format is the audio saved in PowerPoint?
- PowerPoint typically embeds audio in WAV or M4A format, depending on the version.
- Why isn’t my microphone working in Microsoft PowerPoint?
- Check your system's settings and ensure the program has access to the microphone.
- Why does the audio sound distorted or echoey?
- This may be due to poor microphone quality or recording in a noisy environment. Go to a quiet space with minimal echo.
Conclusion
PowerPoint can record audio for more than just public speaking. It can also be used for interviews, panel discussions, and other types of recorded events. Overall, learning how to add audio to your presentations is a great skill that can help you get your point across and keep your audience interested in any situation.
Learning how to add audio to PowerPoint or other types of presentations lets you give them a personal touch. This makes them more effective and memorable.
This article will help you make the best content to share with anyone you want, including customers, coworkers, family, and friends. Look into the options!


