How to Crop an Image on PC, Mobile & Online
Capturing the perfect moment is only half the battle, the other one is ensuring that your photos are framed and in focus. Knowing how to crop an image allows you to cut away distractions and emphasize the essence of your visuals.
Whether you're using a Windows PC, a Mac computer, an iOS device, or an Android smartphone, this guide will walk you through the simple steps of cropping images. With the right image cropper and techniques, photo editing can be done quickly and efficiently.
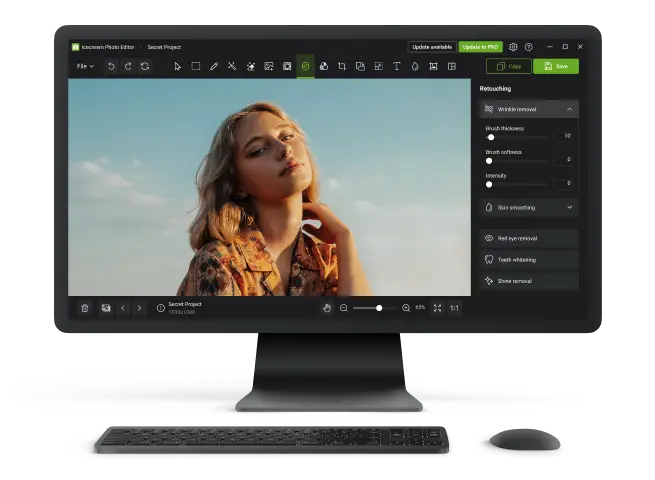
Icecream Photo Editor (Windows)
Icecream Photo Editor is a versatile and user-friendly free image editor for PC. Whether you're a novice or an experienced photo enthusiast, the process of cropping an image using this program is effortless.
How to crop an image on Windows in Icecream Photo Editor
- Download the free photo editor and install it on your computer. Launch the application.
- Click the "Browse for images" button or drag and drop your desired photo into the workspace.
- Select "Crop" from the top toolbar. You can also press T on your keyboard to access the cropping tool.
- You'll notice a bounding box surrounding your image. Click and drag its sides to tailor the crop area to your specific preferences. Use the "Ratio" drop-down menu to choose a predetermined aspect ratio or input custom dimensions.
- Once you are satisfied with your selection, press the "Apply" button.
- To save the cropped image, click "Save" in the top right corner and choose the output settings.
If you want to resize the image but keep the original aspect ratio, make sure the lock icon between width and height is closed.

Pros:
- Ease of use. The intuitive interface of the photo editor enables effortless image cropping for users of all levels, regardless of their prior experience or technical abilities.
- Customizable options. With predefined aspect ratios and custom dimension settings, you can achieve precise and consistent results every time.
- Rotation feature. You can rotate the image prior to cutting. This enables you to manipulate its orientation and attain the desired framing.
- Grid overlay. The grid overlay assists in identifying and selecting the precise region you wish to retain in your cropped image.
- Format support. From commonly used formats like JPG and PNG to more specialized ones like TIFF, users can seamlessly work with images regardless of their file type.
- Export options. With this free image editor you can save your cropped photo with specific quality and in various formats.
- Non-destructive. Changes are applied without altering the original file, allowing you to experiment freely and revert if needed.
In conclusion, Icecream Photo Editor offers an efficient way to crop your images preserving high-quality results. The image editing software also provides additional features such as filters, color adjustments, and blur options, enabling users to create polished pictures.
Preview (macOS)
Are you looking to quickly cut a picture on your Mac computer but don't want to download any additional photo editor? Look no further than Preview, the built-in image viewing and editing tool.
How to crop an image on macOS in Preview
- Locate the image you want to crop and open it with the image editor. You can do this by right-clicking on the file, selecting "Open with", and choosing "Preview".
- Press the "Show Markup Toolbar" button, which looks like a pencil in a circle.
- Once the markup toolbar is visible, click the "Rectangular Selection" button, which resembles a dotted square.
- Click and drag to create a rectangle around the area you want to keep in the cropped picture. You can adjust the size and position of the selection as needed.
- Finally, select "Crop to Selection" or simply press Command (⌘) + K.
If you want to see the dimensions for more precise results, go to the "Tools" menu and choose "Show Inspector". Open the "Crop Inspector" tab and select a unit of measurement.

Pros:
- Preview comes pre-installed on macOS, eliminating the need for additional downloads or installations.
- Free image editor supports various image formats, ensuring compatibility with a wide range of files.
- As a native application, the photo cropper is completely free to use and performs consistently.
Cons:
- The picture cropper will automatically replace the original file with the cropped photo. Make sure you have a backup copy if you want to keep the original file.
- Users have no control over the compression and quality settings when saving images.
Using Preview, you can effortlessly crop an image without any complications. So next time you need to resize or cut out a part of a photo, remember that this pre-installed image editor has got you covered.
Photos app (iOS)
Cropping a photo on iOS is a quick and straightforward process that allows you to enhance your images directly on your smartphone or tablet. With the native Photos app, you can easily focus on the key elements of your pictures.
How to crop a photo on iPhone and iPad in Photos app
- Open the Photos app and navigate to the image you want to crop. Tap on it to open.
- Press the "Edit" button in the upper-right corner of the screen.
- In the editing menu, select the "Crop" option.
- Adjust the corners or edges of the crop box with your fingers. You can also pinch to zoom in or out for more precise adjustments.
- Tap "Done" in the upper-right corner to crop the picture and exit the editing mode.
Hit the three overlapping squares icon while in the cropping tool to toggle between different aspect ratios (wallpaper, square, 4:3, 9:16, etc.). You can still adjust the crop box using your fingers.


Pros:
- In addition to the built-in image cropper, the app offers other tools like rotation, filters, and flipping, providing a comprehensive editing experience.
- The photo editor allows users to revert to the unedited version if needed.
- Pictures edited in the app are included in the device's automatic backup, ensuring data safety and recovery options.
Cons:
- Fine-tuning options for precise adjustments might be limited compared to more advanced photo editing software.
Photos app (Android)
Cropping an image on an Android smartphone can be done using the built-in Gallery or Photos app, depending on your device and software version.
How to crop an image on Android in Photos app
- Open the photo you need to cut in your default gallery app.
- Look for an "Edit" or "Pencil" icon, usually located at the bottom or top of the screen. Tap on it.
- Select the cropping tool. Use the handles around the edges of the image to adjust the desired area.
- Once satisfied with the crop, look for a "Done" or "Apply" button and tap it.


Pros:
- This method is readily available on most Android devices, eliminating the need for any downloads.
- The gallery app often provides quick access to recently captured or downloaded photos, streamlining the editing and resizing process.
- Offers essential functions like rotation, filters, and markup in addition to cropping, making basic photo adjustments convenient.
Cons:
- Different device manufacturers may have slightly different gallery apps, leading to variations in features and interfaces.
Image Candy (online)
Image Candy is a user-friendly online tool designed for cropping, resizing, and editing images. It provides an intuitive interface and a range of functionalities to help users modify their photo collections effortlessly.
How to crop a picture online on Image Candy website
- Navigate to the online image cropper using your preferred browser.
- Click the "Add file" button to select the image you wish to crop from your device.
- Drag and resize the cropping tool frame to select the desired portion of the image.
- You can adjust the dimensions by dragging the corners or edges of the frame or by inputting the width and height.
- Use the "Crop image" button to finalize the process and save the result to your device.

Pros:
- Easy to navigate with a clear layout, making it accessible for users of all skill levels.
- You can use all image editing features without the need to sign up or log in.
Cons:
- Being an online image editor, it requires a stable internet connection to function.
Adobe Express (online)
Adobe Express is a browser-based creative platform developed to streamline visual content production for individuals, educators, small teams, and businesses.
How to cut picture with Adobe Express
- Visit the website.
- Upload the image you want to edit.
- Choose the predefined aspect ratio or move frames manually.
- Save the edited picture.

Pros:
- All projects are saved online, allowing access to the images cropped from any device.
- Beyond cropping, users can resize, add text, apply filters, and employ templates for quick design creation.
Cons:
- Editing large files or working on slower connections might cause lag or delays.
Image cropping tips and tricks
- Rule of thirds. This rule suggests dividing an image into nine equal parts and placing the main subject along these lines or their intersections. This helps create a balanced and visually appealing composition.
- Maintain resolution. Avoid excessive image cropping that may result in a loss of quality. Strike a balance between cropping for composition and preserving image details.
- Aspect ratios. Choose the appropriate aspect ratio and image resizing parameters for your intended use. Different platforms and purposes may require specific dimensions.
- Consider the background. Pay attention to the background elements in your image. Crop to eliminate distractions and emphasize the main subject, creating a cleaner and more focused composition.
- Mind the horizon. When dealing with landscapes, pay attention to the horizon line. Aligning it with the rule of thirds or experimenting with unconventional angles can add dynamism to your compositions.
- Leave breathing space. When cropping around a subject, avoid placing it too close to the edges.
Social media image dimensions
| Platform | Post Type | Recommended Dimensions | Aspect Ratio |
|---|---|---|---|
| Profile Picture | 180 x 180 px | 1:1 | |
| Cover Photo | 820 x 312 px | 2.63:1 | |
| Shared Image | 1200 x 630 px | 1.91:1 | |
| Profile Picture | 110 x 110 px | 1:1 | |
| Post (Square) | 1080 x 1080 px | 1:1 | |
| Post (Portrait) | 1080 x 1350 px | 4:5 | |
| Post (Landscape) | 1080 x 566 px | 1.91:1 | |
| Story | 1080 x 1920 px | 9:16 | |
| Profile Picture | 400 x 400 px | 1:1 | |
| Header Photo | 1500 x 500 px | 3:1 | |
| Tweet Image | 1200 x 675 px | 16:9 | |
| Profile Picture | 400 x 400 px | 1:1 | |
| Cover Photo | 1584 x 396 px | 4:1 | |
| Shared Image | 1200 x 627 px | 1.91:1 | |
| YouTube | Channel Profile Picture | 800 x 800 px | 1:1 |
| Channel Art (Cover) | 2560 x 1440 px | 16:9 | |
| Video Thumbnail | 1280 x 720 px | 16:9 | |
| TikTok | Profile Picture | 200 x 200 px | 1:1 |
| Video | 1080 x 1920 px | 9:16 |
FAQ
- What are the common aspect ratios for image cropping?
- Standard aspect ratios include 4:3 (common in digital cameras), 16:9 (widescreen), and 1:1 (square).
- Does cropping reduce image quality?
- Yes, excessive cropping can lead to a loss of visual quality as you are essentially discarding pixels.
- What is an ideal resolution for cropped photos?
- It depends on the intended use. For print, higher resolution is generally preferred, while online sharing may require lower quality.
- What is non-destructive cropping?
- Non-destructive cropping retains the original image data, allowing you to revert to the uncropped version if needed.
- Can I cut photos without changing the aspect ratio?
- Yes, many image editing tools allow you to crop while maintaining the original width and height.
- Does cropping affect the image's DPI?
- No, cropping itself doesn't affect DPI (dots per inch). DPI is more relevant when resizing or printing an image.
- What is the golden ratio?
- The golden ratio is a mathematical concept used in design and art. Some photographers use it as a guide for cropping to achieve aesthetically pleasing compositions.
Conclusion
To conclude, mastering the art of cropping an image is an essential skill that enhances your ability to convey powerful visual narratives. Whether you're refining photos on Windows, Mac, iOS, or Android, each platform offers unique tools and features to bring out the best in your pictures.
From the user-friendly interfaces of desktop image croppers to the convenience of on-the-go cropping with mobile devices, the ability to cut, focus, and creatively compose is at your fingertips.

Tech Writer and Photography Aficionado
