How to Create a Video from Photos
So next time you are taking a bunch of pictures of your picnic, and you really want them be more than just images in your phone or computer or a collage, make a movie out of them! Knowing how to create a video from photos is a great way to share moments from your life, to tell a little story, and to help those pictures come alive.
You might want to share the memories with others, for example, after a vacation, a wedding, a birthday or any other special occasion, or you may wish to just save the video to keep the memories fresh.
In this guide, we show you 6 easy ways of creating a video from photos. Let’s get going!

How we picked video makers
In this article, we'll discuss 6 services that make your images to a video. All the tools are free, allow editing your clip and are for the beginners level.
They support a large number of image and audio formats. In all the ways described, you can create your video in just a few mouse clicks.
And, not least, we provided options for Windows, Mac and smartphone users, in a plethora of formats for our readers to download.
Method 1. Icecream Slideshow Maker
Icecream Slideshow Maker is a user-friendly software that allows you to compile your photos into a stunning video with ease. It is a great option for anyone wanting to create a slideshow without any prior knowledge or skills in video editing.
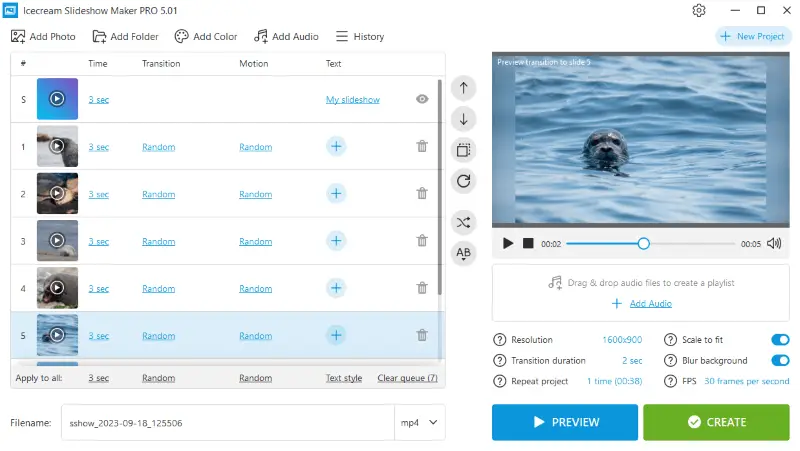
How to make a video from photos on Windows in Icecream Slideshow Maker
- Download and install the free video maker on your computer.
- Select "Add Photo" to add images (PNG, JPG, JPEG, BMP, TIFF, TIFF, or GIF) or "Add Folder" to import a whole photo album.
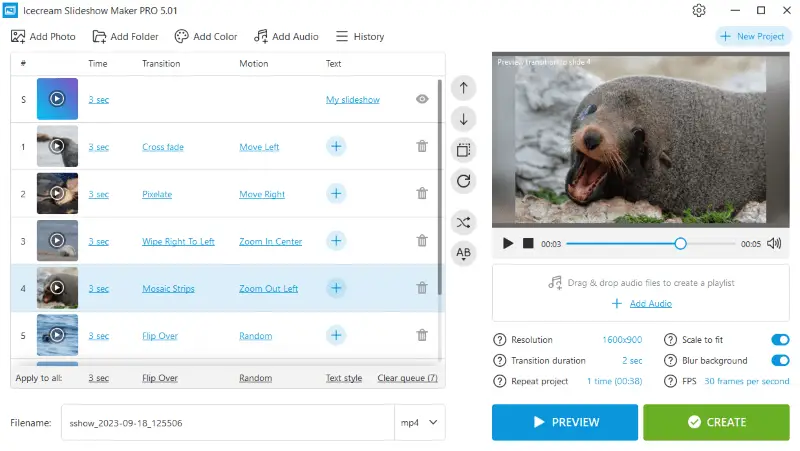
- Adjust presentation settings for each slide:
- Set time. Select how long you want each slide to stay on the screen.
- Select transitions and motions. You can set a certain transition between the slides, a random effect, or select no effect at all. The same goes for motion.
- Attach text. Add captions and select the font, color, and position of the text.
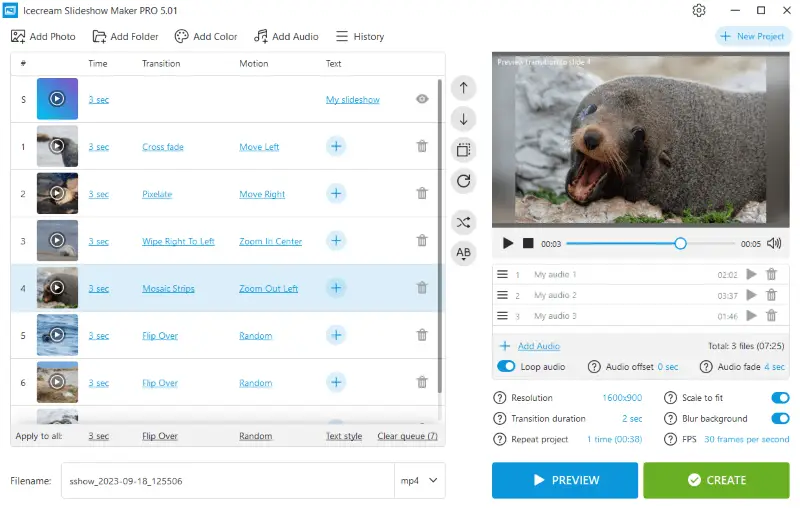
- Click "Add Audio" to add some music in the background. MP3, M4A, WAV, WMA, OGG, and FLAC formats are supported. Add multiple songs or enable the "Loop audio" option.
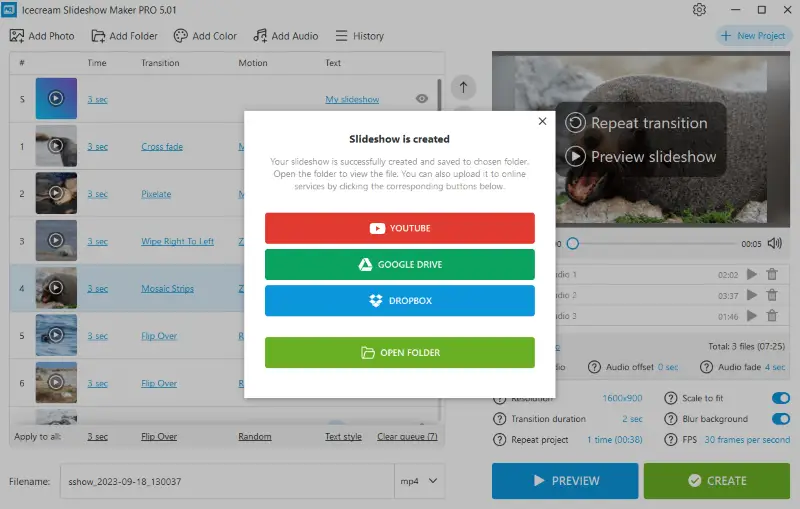
- Preview your slideshow and press the "Create" button. The slideshow will be saved to the chosen folder.
Advantages:
- User-friendly interface. The slideshow maker provides an intuitive and easy-to-navigate interface, which makes it accessible to users with varying levels of expertise.
- Customization options. You have control over slide duration, text additions, background music, and the motion applied to slides. This enables you to craft unique and memorable slideshows.
- Output formats. The application allows you to export your projects in popular video formats such as MP4, AVI, MOV, or WebM.
- Easy sharing. The video maker provides straightforward sharing options to social media platforms and cloud storage services. Instantly upload your video to Google Drive, YouTube, or Dropbox.
- Resume projects. Go back to any previously created slideshow and continue working on them from the "History" panel.
- Sort slides. Arrange photos in a queue alphabetically, shuffle randomly, or rearrange manually.
Overall, Icecream Slideshow Maker is an effective and versatile tool for creating a video from photos on Windows. Its rich feature set, customization options, and support for multiple media types make it an excellent choice for both beginners and experienced users.
Method 2. iMovie
Choosing the right photos is critical for a compelling video. You can select high-resolution images that are visually appealing, meaningful, and relevant to the theme or purpose of your video.
iMovie is a free video editing software application developed by Apple. It is available for macOS and iOS devices, making it accessible to both computer and mobile device users.
How to create a photo slideshow on Mac in iMovie:
- Launch iMovie, select "Projects" and "Create Movie".
- Go to the "My Media" tab and press "Import" to add photos, music, and videos from your device.
- Drag and drop all images to the timeline, then click "Transitions" and place the transition between photos.
- Add music from the "My Media" tab or go to "Audio" to select a song from iTunes.
- Click on "Share" in the top-right corner to save your images converted to video.

Advantages:
- Intuitive interface. The video editor is known for its user-friendly interface, making it a great choice for beginners and professionals.
- Built-in music. Users can access a library of royalty-free music and sound effects, simplifying the process of adding audio to videos.
- Supported formats. The service allows to add images in BMP, GIF, HEIF, JPEG, PNG, PSD, RAW, TGA, and TIFF formats.
- Simple export. The application includes options for sharing finished videos directly from iMovie.
- Mobile compatibility. There is a mobile version available for iOS devices, that allows users to create photo slideshows on iPhones and iPads.
Disadvantages:
- Storage space. Video projects can consume a significant amount of storage space. It may be a concern if you have limited disk space and want to make a slideshow with various effects and transitions.
While the iMovie slideshow maker option offers several advantages, it may not meet the needs of advanced users or those requiring less resource-intensive software.
Method 3. Canva
Sometimes you may run out of ideas of how to make a beautiful photo slideshow. To help you out, there are app and web platforms that provide templates, such as Canva.
This is an online graphic design creation platform with functionality to work with photos and videos as well. It enables users to create a wide range of visual content including making a slideshow.
How to make a video with your pictures online with Canva:
- Sign up for a free account on Canva and select "Video" from the main menu.
- Select "Upload" from the side menu and press "Upload files" to add images, videos, or audio.
- Place all media pieces on the timeline and adjust the duration.
- To add transitions, click between two photos and select "Add transition".
- When you're done creating a slideshow, press the "Share" button to download or send the video.
Advantages:
- Templates. The slideshow maker offers many pre-designed templates for various purposes. They can serve as a starting point to create their designs quickly.
- Collaboration features. The service supports collaborative design projects. It allows multiple users to work on the same video simultaneously.
- Cross-platform access. The video editor is available directly in your browser, allowing users to create and access their projects from various devices.
- Drag-and-drop functionality. Simplifies layout adjustments and visual arrangements without needing technical expertise.
Disadvantages:
- File export formats. You can only save the slideshow as an MP4 file. If you need the file to be in a different format, you might want to use a video converter.
- Premium features. While the platform offers a free plan with basic features, some templates, fonts, and more are only available for paid subscribers.
Overall, using Canva is an easy and efficient method that provides many benefits. This free video maker is great for quick and visually appealing designs. However, it may not be suitable if you want your video in any format other than MP4.
Method 4. PicsArt
PicsArt is a versatile multimedia editing app available in the App Store and Google Play. Although the program does have a built-in slideshow, it is only available with a paid subscription. We will teach you how to use the app to make slideshows for free using the video editing option.
How you can create a video from photos on mobile in PicsArt:
- Install Picsart on your phone.
- Launch the app and hit the "+" button.
- Click "Videos", then "See All" and add all photos you need.
- Edit the length of each slide, add effects, transitions, and music, and use other editing options.
- Tap the arrow in the upper right corner, select FPS or resolution if needed, and save the photo slideshow.
Advantages:
- Photo and video editing. If you want to create a project that combines both photos and videos, you can seamlessly merge videos and photos within the same app.
- Creative effects. The video maker includes a variety of effects, overlays, and stickers that you can apply to videos. It enables users to add artistic and appealing elements to their content.
- Familiarity. If you already feel comfortable with this app for photo editing, transitioning to its video features will be intuitive, as the interface and tools are similar.
Disadvantages:
- Watermarks and ads. The free version of the slideshow maker includes watermarks on exported videos. It also displays ads, which can be distracting or undesirable for some users.
- Restricted export. Exporting videos from this app has limitations in terms of available formats. This can be a drawback if you need specific video formats as you will have to convert the video.
Although not perfect, this app is a good tool to invest in if it fits your needs as a content creator. Try it out and see if that's what you need.
Method 5. Video Candy
Creating a video from photos allows you to add your personal touch and creativity. You can apply filters, zoom in, pan, rotate, or add special effects to make the video more engaging and unique.
To get an outstanding result fast, cut down the time it takes to download a new app. Instead, use an online slideshow maker.
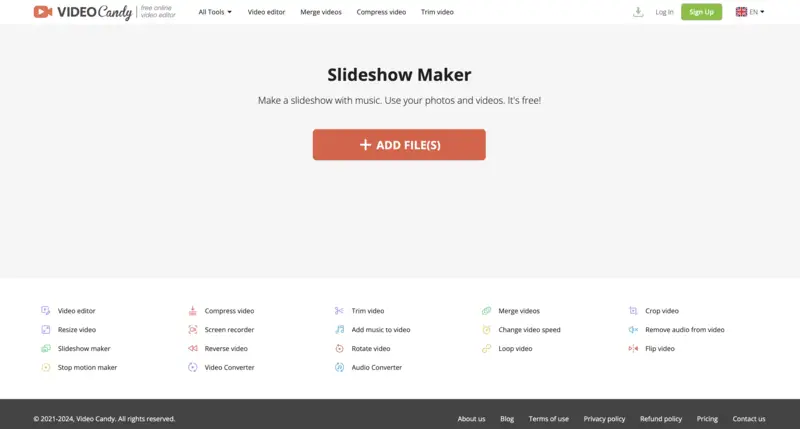
Video Candy is a user-friendly and intuitive online platform for creating various types of multimedia content. Apart from offering a video editor, converter, and screen recorder, it provides a tool to effortlessly transform your photos into a captivating video with just a few clicks.
How to make a video with pictures online in Video Candy:
- Open the slideshow making tool in any browser on your device.
- Hit the "Add File(s)" button to import your photos.
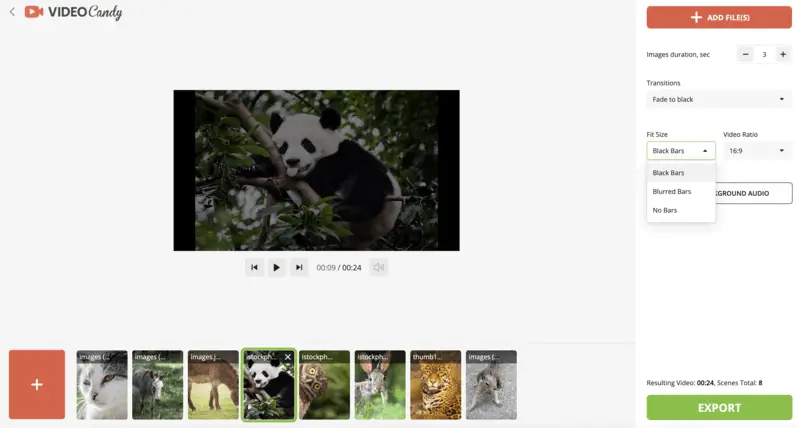
- Rearrange the pictures to the desired order, add background music, apply transitions, and change the aspect ratio if needed. Set the image's duration.
- Click the play icon below the preview to see the result before saving it.
- If satisfied, press "Export" to create your slideshow.
- Download the file.
Advantages:
- User-friendly interface. The slideshow maker is simple to use and all the tools are easily located.
- Variety of settings. Despite being a simple editor, there are plenty of customization options available.
- Many formats. Wide range of supported image formats, so users can upload images in JPG, HEIC, PNG, BMP, and others.
Disadvantages:
- Limitations. The platform lacks advanced editing capabilities such as text overlays and filters for photos.
- Watermark. The free version places a watermark on your exported photo slideshow.
In conclusion, Video Candy is a great choice for creating a video from photos quickly and easily. With its help, you can bring life to your memories in no time. Give it a try and unleash your creativity!
Method 6. SlideDog
SlideDog enables seamless integration of various media formats into a single, cohesive presentation without requiring conversion. The playlist system allows dynamic rearrangement, insertion, or deletion of items, giving full control over the sequence.
How to create video from photos
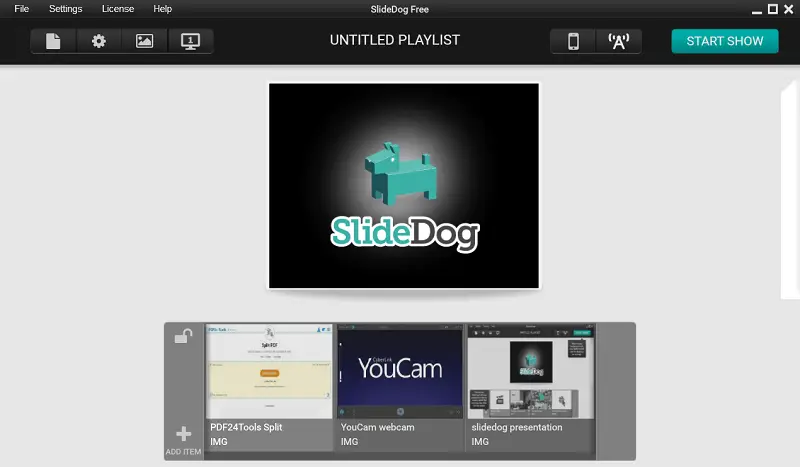
- Launch SlideDog and begin a new playlist to compile your materials.
- Click “Add Item” and bring in the pictures intended.
- Arrange the visuals by dragging them into your chosen display order.
- Include extra elements such as presentation slides, clips, or embedded websites if needed.
- Review the sequence to ensure smooth pacing, clear audio, and consistency.
- Save the output in your desired quality and format, ready for distribution or upload.
Advantages:
- Synchronized broadcasting. Shares presentations live with viewers, ensuring real-time followers alignment.
- Independent display control. Offers dual-screen mode to manage presenter tools separately from audience view.
Disadvantages:
- Restricted customization. Limited control over animations, transitions, or enhancement effects.
- Dependency on internet. Full feature access often requires a reliable network connection.
This blend of multimedia adaptability and real-time engagement makes SlideDog an excellent choice for converting photo collections into captivating video presentations.
Tips for enhancing your slideshow
- Add smooth transitions between photos to maintain viewer engagement.
- Find the perfect background music to set the mood.
- Apply simple effects like zoom or pan to add movement to still images.
- Consider adjusting the timing of each slide to match the pace of the audio.
- Add captions or text to provide context or personal messages.
- Incorporate a consistent visual theme to ensure a cohesive and polished presentation.
FAQ on creating a video from photos
- What image file types can I use in video editing software?
- Most video editing programs work with common photo formats like PNG and JPG. If you’re using more advanced software, you might also be able to use RAW files, which are often preferred by professional photographers.
- How should I arrange photos in the video to tell a story?
- To consistent the narrative, group the photos together. Open with an image that grabs the viewer’s attention.
- How do I add music to my video?
- Adding music is simple. You can import an audio file directly into your video editor or slideshow maker. A good background track enhances the atmosphere and can really elevate the viewer’s experience.
- What are some tips for choosing the right music for my photo video slideshow?
- Choose music that complements the mood and pace of your photo video. Consider the emotions you want to evoke and ensure the music enhances the visual narrative.
- How do I edit the timing of a video?
- You can edit the video by adjusting the duration of each photo or clip in your timeline. If you realize the slideshow is too long after you saved the file, you can trim the video.
- How do I include text in my video from photos?
- You can add text to video within the program or platform you use or do so in another editing software.
- How long should my photo video be?
- The length of your video depends on where you’re sharing it. If it’s for social media, shorter videos—about 1 to 3 minutes—usually work best. But if it’s for something like a presentation or a more detailed project, a longer video is perfectly okay.
- Do I need to worry about copyright?
- Yes, make sure you have the rights to use any photos or music in your video. Stick to your own photos or get permission from the copyright holder if you’re using someone else’s. The same rule applies to any music you add.
- What are some good tips for sharing my video on social media?
- When posting your video to social media platforms like Instagram, Facebook, or YouTube, make sure it’s in the right format for that platform. Also, engaging with viewers by replying to comments or giving some behind-the-scenes context can help get more attention and interaction.
- Can I edit my video after exporting it?
- In some cases, you can still make minor edits after exporting, depending on the software you used and whether you saved the project file. For bigger changes, though, you might need to go back and re-edit the original project.
Conclusion
Now you know how to easily create a video from photos. It is not as complicated as it may seem. With the right software, you can turn your photos into a creative video that captures moments and emotions in a special way.
No matter which tool you are working with or the topic of your next slideshow project, you can use these tips to create beautiful videos. So, pick up your camera, gather those photos, and get working on your next project. Have at it!


