How to Edit Photos on Windows
Are you looking to take your photography skills to the next level? In this article, we'll show you how to edit photos on Windows PCs with a powerful and user-friendly desktop program.
Photo editing is the procedure of making changes to photographs in a special program. The process is also called "post-processing" or "post-production". (MasterClass)
Finding a reliable Windows photo editor can be a challenge for many users. Read our guide below on using basic and advanced tools of the Icecream Photo Editor. You'll be able to edit your images like a pro in no time!
Download the photo editor for Windows
Icecream Photo Editor is the best free image manager for Windows 11 and 10. It offers all the necessary tools to edit photo tools for both basic and advanced image manipulations. Users can add text and shapes, crop and resize images, add filters, create collages, and more
The major advantages of this free Windows photo editor include:
- Completely free. You don't need to subscribe or watch ads to complete your task. All features are available right away.
- Various formats supported. You can edit photos and pictures in JPG, JPEG, PNG, GIF, TIFF, and BMP.
- Simple to use. You can use our program even if you've never seen a photo editor before. There is no need to study manuals.
All of these benefits combined with the variety of features make this image editing program the best photo editor for Windows. Every beginner or professional should try it!
Basic photo editing tools
Image editing is a great way to enhance and make your pictures something special.
The fundamentals include: resizing, adjusting contrast, sharpening, reducing noise, and cropping. These tools are usually found in basic and free photo editors. They allow you to easily refine your images to match what you have in mind.
More than 70% of all social media users said they edit their selfies before posting them online. (The Modems)
Depending on how you want to manipulate your art piece further, there are more advanced image editors. They have instruments such as masking, selective coloring, recomposing, and color grading.
To create professional-quality images, you must have a good understanding of the basic photo editing techniques.
In addition to having the technical skill set, it’s also necessary to pick the best app for editing photos. It has to fit your specific needs, be it a minor cropping or major color balancing. Our photo editor for Windows can accommodate a beginner and a professional.
Crop and touch up your images
Cropping is one of the most used features of an image editor. It offers a great way for you to emphasize a particular part of the picture by removing the parts that don’t contribute to the photograph's intended message.
Cutting images can also help balance the overall composition and draw a viewer’s eyes to a certain point in your picture. This will allow you to have more control over how viewers experience your images.
And lastly, cropping is often necessary if you need to get an image into a specific size. You can easily adjust the image’s dimensions so it will fit into whatever shape you need.
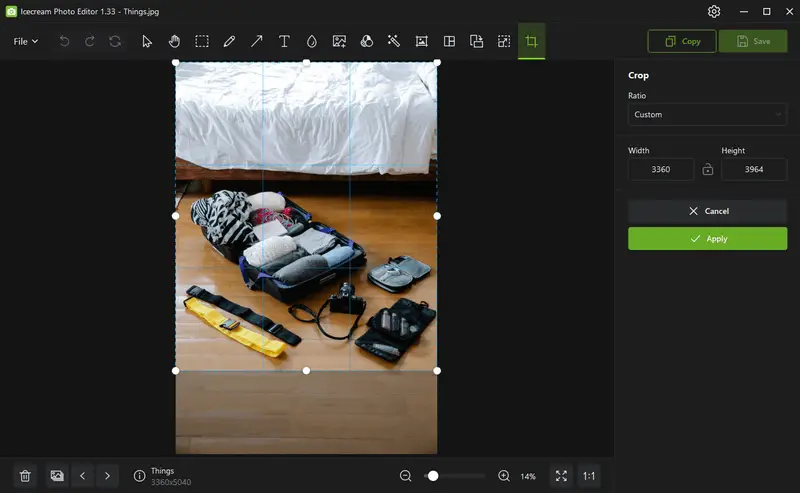
Sometimes you may rethink your photo after you have already finished shooting. Those few seconds of cropping might make the difference between a great picture and a truly stunning one.
Adjust the color balance
Your photographs may experience color balance problems, causing the colors of the subject to appear unrealistic or different from what the human eye perceives.
By mastering color balance adjustments, you can produce images that more accurately reflect reality. This will help your photos authentically capture the moment and convey the emotions you intend.
The most common issue occurs when shooting in natural light. The bright sunlight can make photos appear too blue or too yellow, respectively known as having a "cool" or "warm" temperature.
These problems can be corrected by changing the color balance of your pictures with a photo editing software. Our photo editor allows you to correct color saturation, temperature, and tint, so your image looks as natural as possible.
Other times, you may want to intentionally alter the colors to give a certain mood or atmosphere to an image.
- Adjusting the white balance will let you give your photo an overall warmer or cooler look, depending on the effect you are going for.
- For intense portraits and landscapes, you might also want to adjust your photos’ hue and saturation settings.
This will get the perfect blend of colors that accurately show what you see in real life. This will make sure that the sky is blue, the grass is green, and so on.
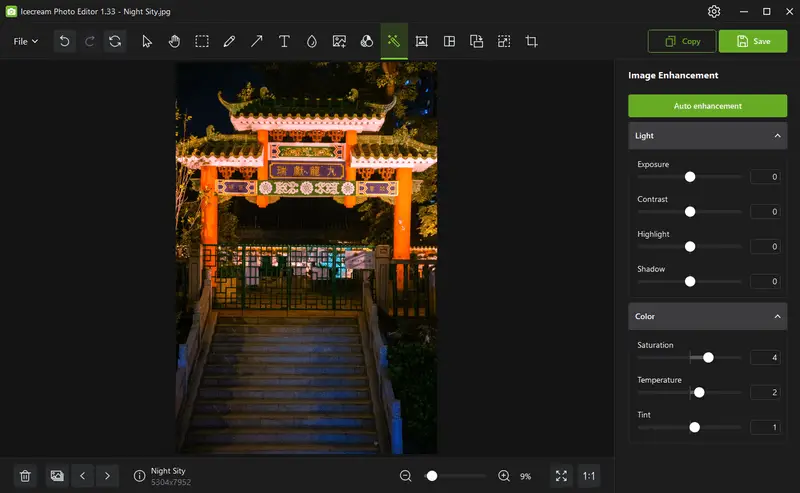
No matter why you need to fix the color of your photos, getting to know these settings will help advance your editing capabilities. Keep practicing and experimenting until you find what works best for your images!
Tune up your exposure and contrast
Any aspiring photographer needs to learn how to adjust the exposure and contrast of the images. This is a crucial part of capturing stunning pictures.
Exposure and contrast are two of the most important elements that will determine the overall look and feel of your photograph.
Exposure refers to the amount of light you capture in a photo. Adjusting it allows you to lighten or darken your image depending on the situation and the effect you’d like to achieve.
With our photo editing app, you can lighten certain images to create a cheerful atmosphere. Alternatively, darken them to give the picture a more mysterious atmosphere.
Contrast, meanwhile, is the difference between light and dark areas in an image. Increasing the contrast can bring out details in darker parts of a photo, or add drama to specific elements.
On the other hand, decreasing it can flatten out textures so that distracting details won’t detract from a more minimalistic composition.
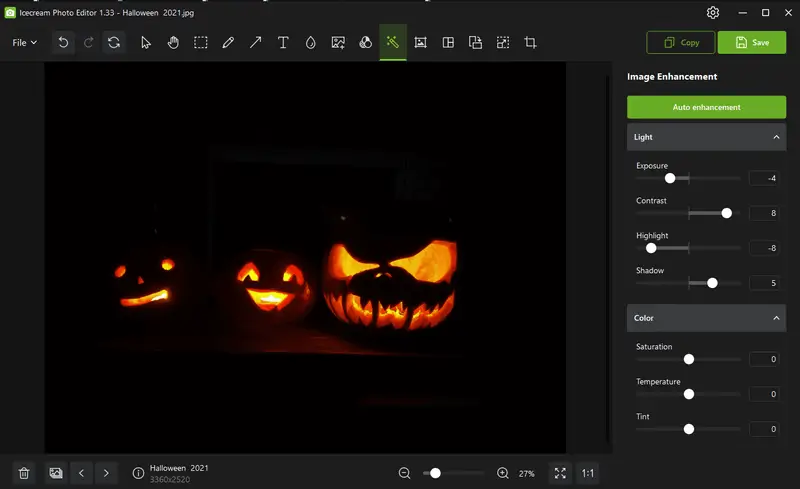
Knowing how to adjust exposure and contrast is essential for any photographer so that each image we capture truly achieves its full potential.
Straighten your images
While scrolling through your photos, have you ever come across impressive shots of emotions or movement where the horizon seems slightly off? This issue can occur with both amateur and professional photographers, especially when capturing dynamic or moving scenes.
However, our image editor can help fix this. To straighten your photograph, you can use the corresponding tool within the editor. It will help you save the shot even if you thought it was ruined.
To use the straightening tool, go to "Rotate" or "Flip". Use the "Tilt" feature to adjust the slant of the image so that it appears perfectly leveled.
Straightening your photos is an easy way to make them look professional. It will give them structure and dimension and can take your photo from "just okay" to a work of art!
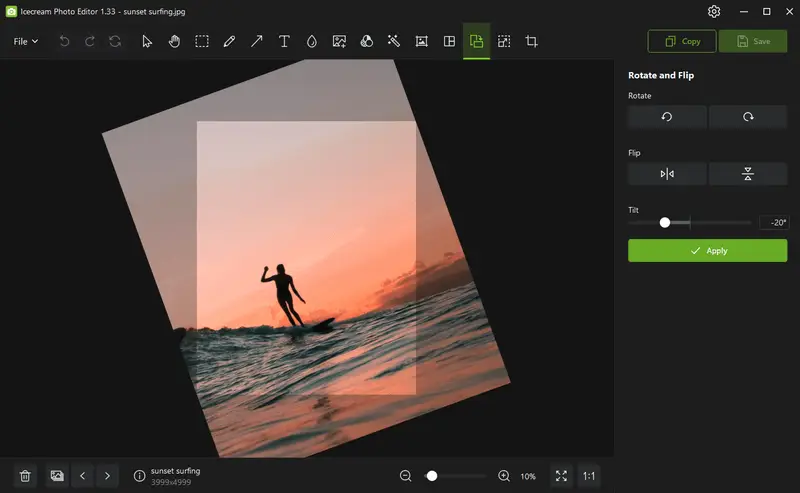
Don’t underestimate the power of a straightened photo. Take some time to work on yours and give your images the attention they deserve!
Post and share your edited pictures
Once you have finished editing your photos, take a break and then look at them one more time. Make sure that you are satisfied with the result. If any further editing is required, make the necessary adjustments.
You can then convert the photographs to the desired format, print the images, or compress them for sending via email or posting online.
Advanced photo editing
Beyond the basic tools available in all editors, our program offers additional features tailored for digital artists, social media managers, and anyone who creates new image content. Among the most popular and essential tools is the lasso. Additionally, the program includes instruments for handling objects, text, blur effects, and more.
The majority of professional photographers do some kind of editing to their images. It is a critical step of the creative process that helps to add the author's perspective on what they captured. (Karen Wiltshire Photography)
Work with the famous lasso tool
The "Lasso" tool is crucial for photo editing, allowing for precise cuts and modifications. It’s ideal for swiftly selecting specific areas in an image, such as a product or individual, without the need to manually outline the selection.
Icecream Photo Editor offers 4 modes of the selection tool: rectangle, ellipse, lasso, and straight lines. Though the lasso is considered to be the most popular one, it can lack accuracy when you need to make a precise selection. This way, you can easily separate the background from the foreground and make a finer-tuned adjustment.
For instance, let's say you want to keep just the subject of a photo and discard the background. By using the lasso tool, you can select your subject, and resize image and shape according to your preference.
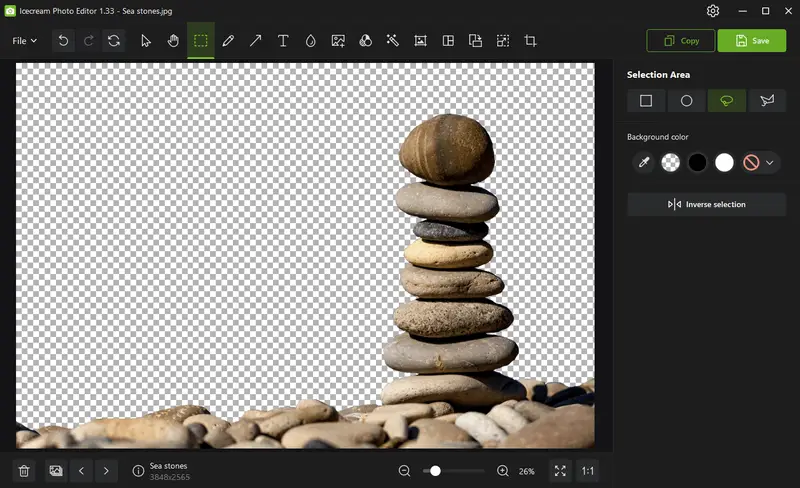
Similarly, if you want to add text to a specific selection without affecting the rest of the background, the lasso tool is your best option. By dragging it over the relevant areas during your selection, you can create a designated space for placing text.
Add simple shapes
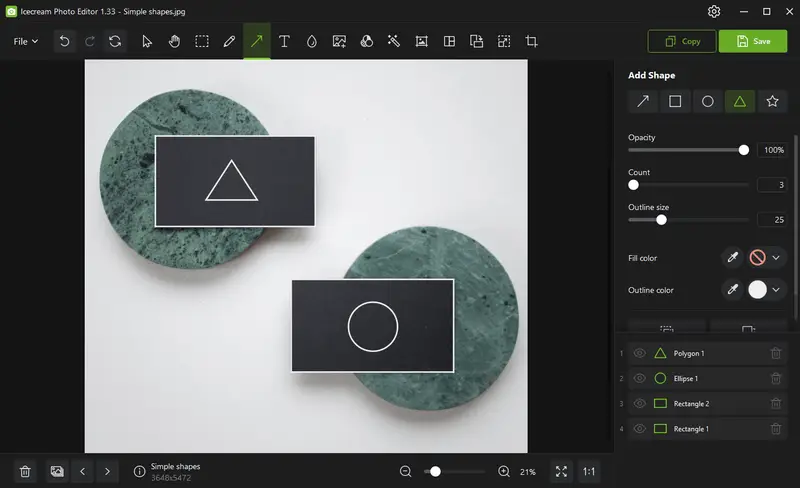
Transforming simple elements into something extraordinary is achievable with just a few basic shapes. Our photo editor includes all the essential shapes, which are crucial tools for any novice graphic designer.
Shapes can serve as the framework for your composition, influencing the overall tone and mood of your design. They can direct attention or establish harmony within your work.
When combined with other design elements, such as lines and text, basic shapes contribute to crafting striking compositions for presentations, advertisements, and more.
The power of the blurring
We’ve all experienced it: you’ve just captured the perfect photo, but there's something distracting in the background—like a person or an object. This is where the blur tool proves invaluable.
Blurring is a key feature in photo editing that allows you to conceal parts of your image so viewers can concentrate on the main subject. It can also highlight different textures and details in your photo.
For instance, in a landscape photo with elements such as trees or power lines, the blur tool can minimize their impact, ensuring they don’t detract from the overall scene. Additionally, blur can be used to soften harsh edges and improve the depth of field, adding a polished touch to your photographs.
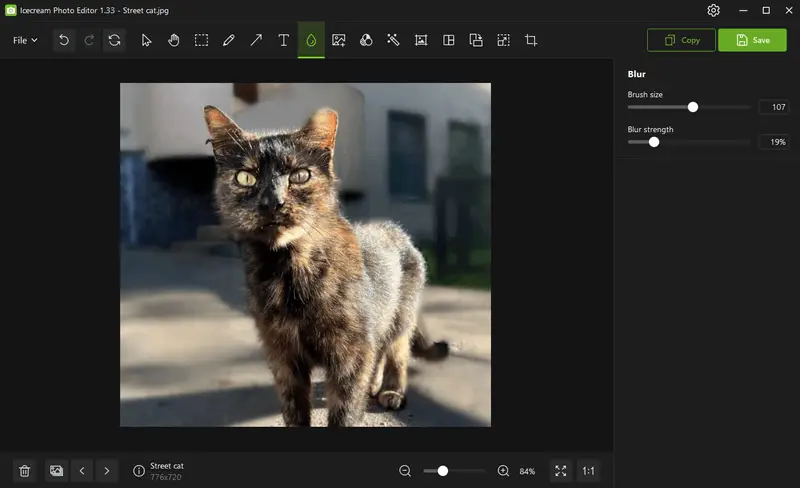
In portrait photography, blur can help create a dreamy effect. You can soften facial features or even add a subtle halo effect around your subject's eyes and hair. This will give your photos an ethereal look and draw attention to the main subject rather than background distractions.
Role of text in photo editing
Text is increasingly becoming an asset when it comes to editing photos. With the help of this tool, you can easily leverage text to enhance your social media graphics or design virtual flyers.
The add text tool in an image editor is useful in countless ways – here are just a few examples.
With the add text to photo feature, you can:
- Create captions for custom memes to add humor to your images;
- Add copyright or attribution information to protect your media from being misused;
- Include quotes to highlight inspiring messages or show solidarity;
- Add credits at the end of videos and animations to give credit where it’s due;
- Label graphs or charts with titles and descriptions to make complex data more digestible.
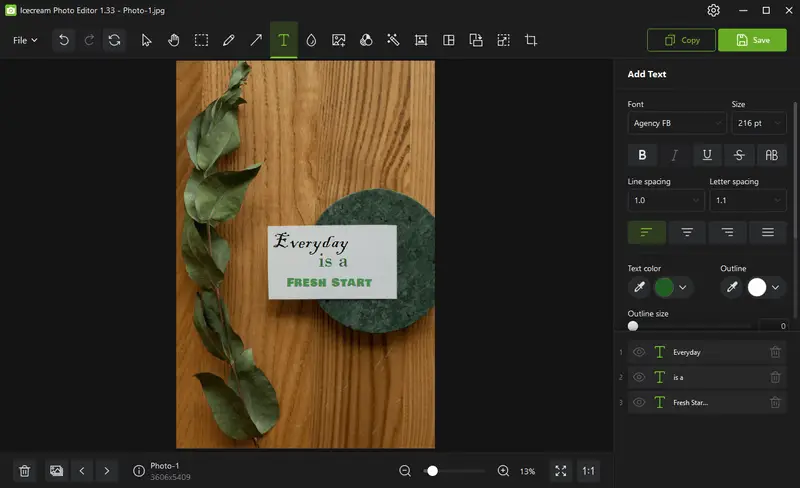
When used creatively, captions or titles can have a powerful influence on viewers. So don’t forget - when it comes to photo editing, let the text do the talking!
Photo framing
This refers to the technique of adding a surrounding design element—usually a border or edge enhancement—that visually encloses the main image. This feature not only improves composition but also lends a refined, complete appearance to the final result.
A frame can serve both aesthetic and functional purposes. It might be applied to draw the viewer’s eye toward the center, emphasize the subject, or create a separation between the photo and the background it’s displayed on.
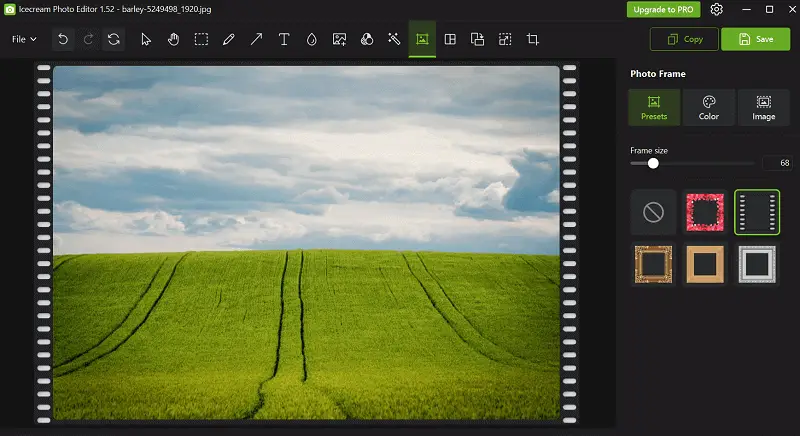
Framing is especially useful for social media presentation, print-ready designs, slideshows, or collages, where visual structure helps maintain consistency and impact.
FAQ
- How can I crop and resize photos on Windows?
- Most desktop photo editor software offers tools for cropping and resizing images. Typically, you can find them in the editing toolbar or menu.
- What is RAW photo editing, and why is it important?
- RAW editing involves editing uncompressed photo files captured directly from a digital camera sensor, allowing for greater flexibility and control over image adjustments without loss of quality.
- Can I edit RAW image files on Windows?
- Yes, many photo editing software on Windows supports RAW file formats, allowing you to edit your photos without losing image quality.
- What is the difference between raster and vector editing?
- Raster editing involves altering individual pixels in an image, while vector modification involves manipulating shapes and lines based on mathematical equations, allowing for scalable graphics.
- How can I remove unwanted elements from my photos?
- You can use tools like the clone stamp, healing brush, or content-aware fill to remove blemishes, objects, or distractions from your photos.
- Is it possible to restore old or damaged photos?
- Yes, with photo restoration techniques, you can repair old or damaged photos by repairing scratches, tears, or fading, and restoring colors and details.
- What file format should I use when saving edited photos?
- Apply JPEG for standard sharing and reduced file size. Opt for PNG when you need high-quality images with transparency. Save as TIFF or PSD to retain layers and maximum quality.
How to edit photos on Windows: conclusion
In conclusion, Icecream Photo Editor can be an easy and efficient solution to make your photos more aesthetically pleasing.
Mastering color balance, cropping, removing unwanted objects, adding text captions, and applying various filters and effects allows you to give your images a polished, professional quality. Editing pictures is a powerful way to express your creativity and transform any photo into something truly remarkable.
Co-authors


