How to Take a Partial Screenshot on Windows
Knowing how to take a partial screenshot on Windows empowers users to capture exactly what they need, efficiently and effectively.
Whether you're annotating a presentation, troubleshooting an error message, or simply sharing a snippet of your desktop, mastering this skill can streamline your workflow and enhance your communication.
In this guide, we'll explore several methods on how to screenshot part of the screen on Windows 11, 10, and earlier versions. You will be equipped with the tools to capture and communicate with precision.

What is a partial screenshot on Windows?
A partial screenshot is an image that captures a specific area of your computer screen, as opposed to a full screenshot which captures the entire desktop.
This allows you to focus on and share only the relevant section of your display, which can be useful for highlighting specific information, avoiding unnecessary details, and improving clarity in communication.
For example, if you're troubleshooting an issue and want to show only the error message without capturing your entire desktop, a partial screenshot is ideal.
Icecream Screen Recorder
Icecream Screen Recorder is a versatile and user-friendly program designed for capturing screenshots and recording desktop activity. It is well-suited for both personal and professional use, offering a range of features that make it easy to create high-quality images and videos.
How to take partial screenshot on Windows with Icecream Screen Recorder
- Download the free screen recorder for Windows and follow the instructions to set it up.
- Once installed, launch the screenshot tool from your desktop or start menu.
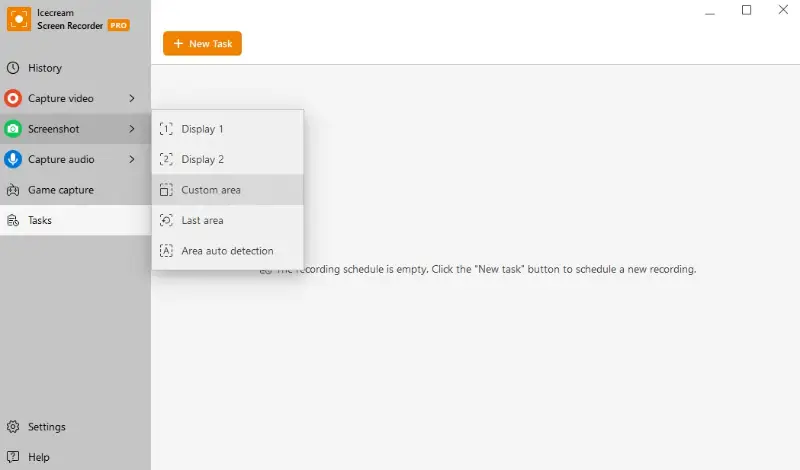
- On the main interface, hover your mouse over the "Screenshot" option and select "Custom area".
- Your cursor will change to a crosshair. Hold and drag your mouse to create a rectangle around the desired area to screenshot a portion of the screen.
- Press the "Screenshot", select the destination folder and file name, and save the resulting image.
Pros:
- The screenshot software has an intuitive and easy-to-navigate interface, making it accessible even for beginners.
- Built-in tools for adding annotations, such as arrows, text, and shapes, enable you to highlight important parts of the screenshot immediately.
- Options for full-screen captures and auto area selection, providing flexibility depending on the user's needs.
- Partial screenshots can be saved in PNG or JPG, providing flexibility depending on your needs.
- Users can record their entire screen or select a specific area, making it ideal for creating video tutorials, saving webinars, or gameplay.
- Offers scheduled recording functionality to capture videos automatically at set times without manual start.
Bandicam
Bandicam is a robust screen recording and screenshot taking tool that also offers features for capturing a partial screenshot on your PC. The layout is straightforward, allowing for quick navigation and easy access to its features.
Here's how to screenshot part of the screen on Windows using Bandicam
- Download and install Bandicam from the official website. Open the application once installed.
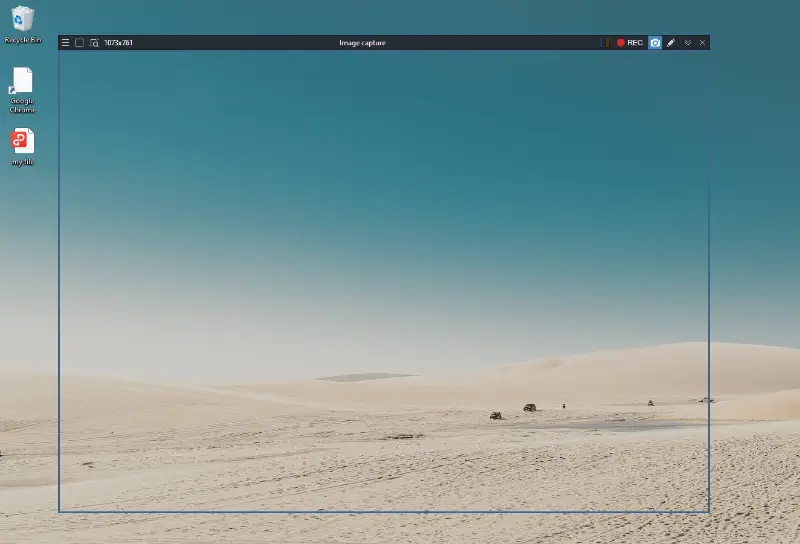
- In the main menu, press "Rectangle area" to choose a custom part for your partial screenshot.
- Drag the edges of the new windows to adjust the selected area.
- Once you're done, click the camera icon in the upper right corner or press the assigned hotkey (F11 by default) to capture the screenshot.
- Access the resulting image in the "Bandicam" folder on your computer.
Pros:
- Allows users to take screenshots in various formats, such as PNG, JPG, and BMP, providing flexibility for the intended use.
- In addition to screenshots, the app has various options for recording the screen, specific regions, or individual windows, with or without audio.
- The screenshot tool is designed to use minimal CPU resources, ensuring smooth performance even when capturing or recording high-definition content.
- Includes hardware acceleration support (e.g., NVIDIA NVENC, AMD VCE, Intel Quick Sync) to reduce CPU load.
Cons:
- The full-featured screenshot software requires a purchase. This can be a deterrent for users looking for free solutions.
Lightshot
Lightshot is a lightweight screenshot tool that allows users to capture their desktop or specific windows quickly. It's available as a downloadable application for Windows, as well as a browser extension for Chrome.
The instruction below is for the desktop version. To install this tool as an extension, go to the Chrome Web Store, search for "Lightshot," and click "Add to Chrome".
How to take a partial screenshot on Windows with Lightshot
- Go to the Lightshot website and download the application.
- After installation, you can launch the program and it will run in the background.
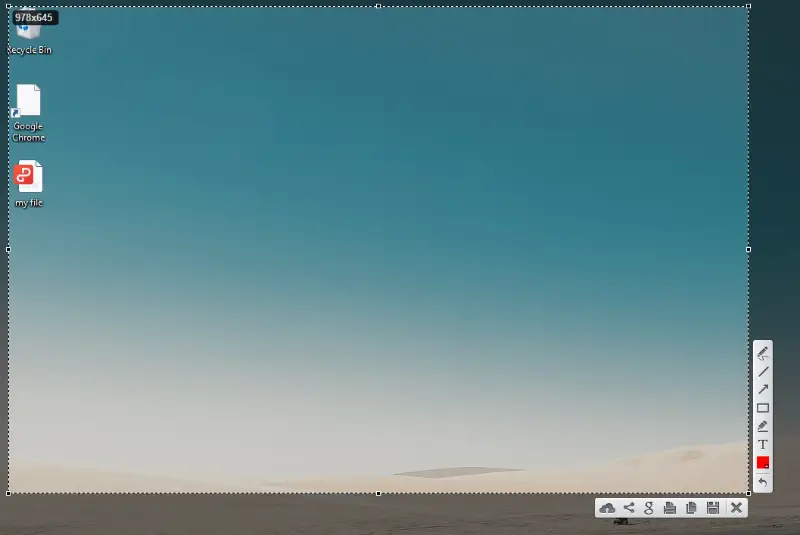
- To make a partial screenshot, press PrtScn (Print Screen) on your keyboard.
- Click and drag your mouse to select the specific area of the display that you want to capture.
- Hit the disk icon to save the image directly to your computer or use one of the sharing options.
To change the default hotkey, right-click on the Lightshot icon in the system tray and select "Options". In the "Hotkeys" tab, you can click on the current shortcut and then press the new key combination you wish to assign.
Pros:
- You can quickly make and upload screenshots to the server and get shareable links.
- It is possible to customize hotkeys for different actions, which can improve your workflow if you frequently take screenshots.
- Seamlessly integrates as both a standalone desktop application and a browser extension.
Cons:
- While the free screenshot tool offers basic annotation tools, it lacks more advanced image editing features.
- Uploading partial screenshots to a cloud service raises potential privacy concerns, especially for sensitive content.
Snipping Tool (Windows 8 and earlier)
The Snipping Tool is a straightforward application designed for capturing screenshots on operating systems prior to Windows 10.
How to do partial screenshot on Windows using Snipping Tool
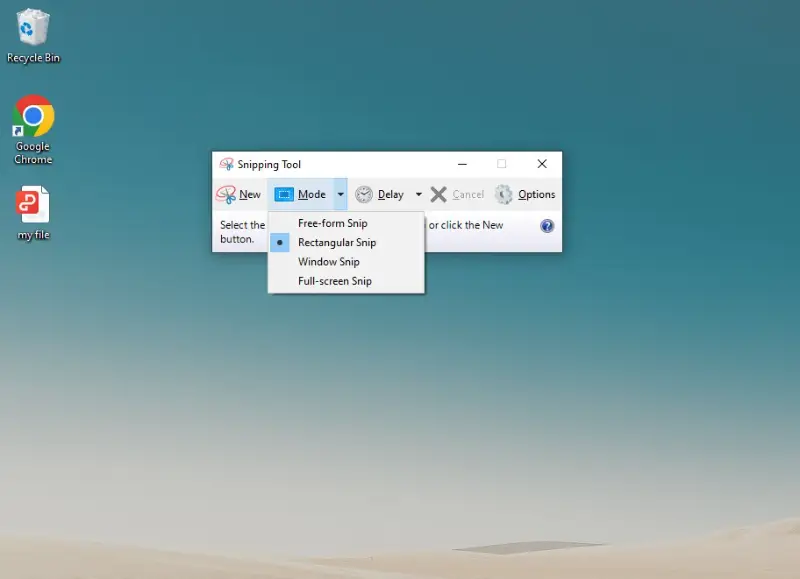
- Navigate to the Start menu, search for "Snipping Tool" and open the application.
- Choose from the available capture modes: free-form, rectangular, window, or full-screen snip.
- Depending on the selected option, drag the cursor to select the area. Draw a free-form shape around it, or click on the desired window.
- Use the pen and highlighter tools to annotate the partial screenshot if needed.
- Hit "File" > "Save As" to save the result.
Snip & Sketch (Windows 10 and later)
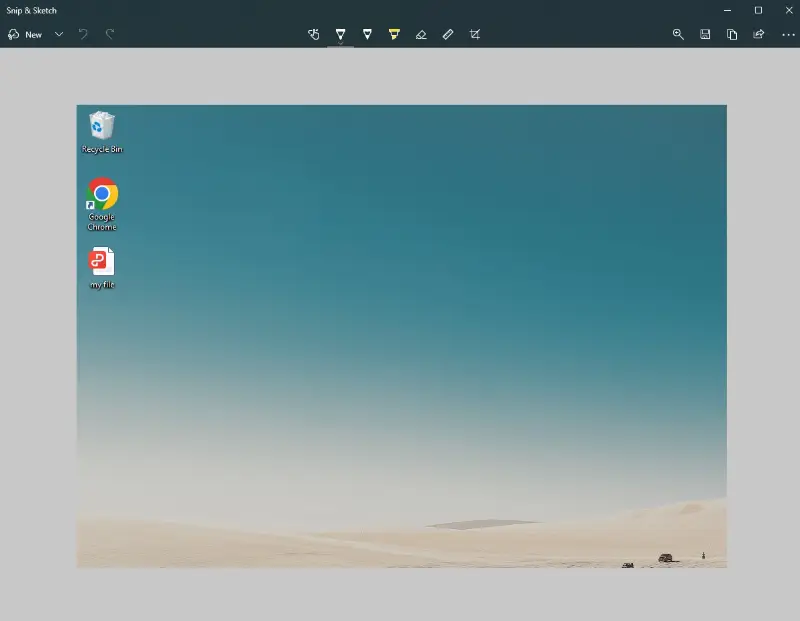
Snip & Sketch is the successor to the Snipping Tool, integrated into newer OS versions for enhanced capabilities. This method allows to capture part of the screen on Windows 10 and 11.
How to screenshot a portion of the screen with Snip & Sketch
- Press Windows + Shift + S on your keyboard.
- Choose from the screenshot options in the toolbar at the top of the screen.
- Drag the cursor to select the area of the screen you want to capture.
- After capturing, use the editing tools (pen, highlighter, eraser) to annotate the screenshot if necessary.
- Click the "Save" icon to export the screenshot. Alternatively, use the "Share" icon to directly paste the image into other applications.
Game Bar (Windows 10 and later)
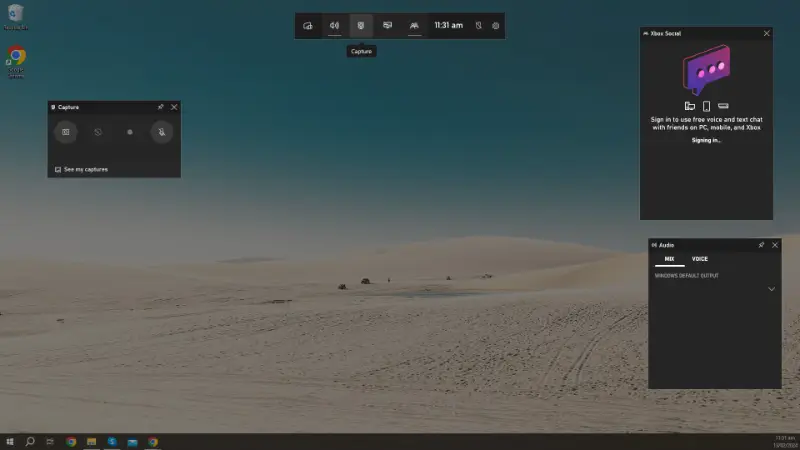
The Game Bar is a built-in Windows feature originally intended for gamers, but it also supports taking screenshots.
How to do partial screenshot on Windows using Game Bar
- Press Win + G to open the overlay.
- If this is your first time, ensure that the game features are enabled by checking the "Yes, this is a game" checkbox.
- Use your mouse to click on the "Capture" widget (usually a small camera icon on the top bar).
Keyboard shortcut (all Windows versions)
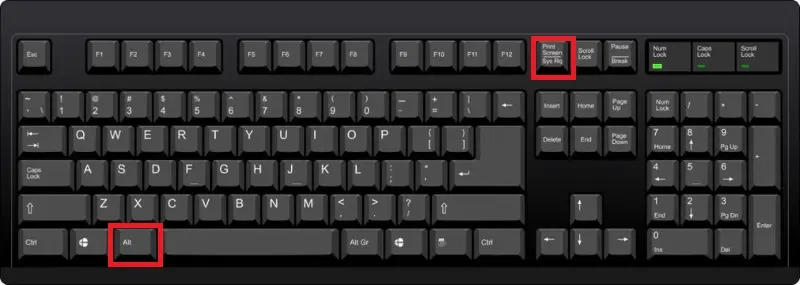
There are several common keyboard shortcuts for taking screenshots. While the most commonly known Print Screen (PrtScn or PrtScr) button captures the entire display, there is a combination that allows for partial screenshots.
Alt + PrtScn captures only the active window instead of the entire screen. The image is copied to the clipboard and can be pasted into other applications.
To access the taken photo, open any program (Paint, Word, etc.) and press Ctrl + V or right-click and select Paste to insert the partial screenshot from the clipboard.
Python
Taking a partial screenshot on Windows using Python involves specifying a region on the desktop and capturing that area. The resulting file is saved as a PNG image for high-quality output.
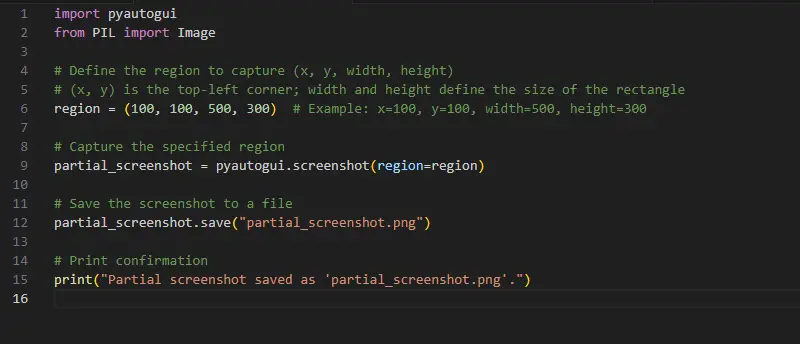
If you're not sure about the coordinates, you can use pyautogui.position() to get the cursor position in real time.
FAQ on partial screenshot taking on Windows
- Can I capture a specific window as a partial screenshot?
- Yes, both Snipping Tool and Snip & Sketch allow you to capture specific windows by selecting them after initiating the snipping process.
- How do I change the default save location for my screenshots?
- For native Windows apps, go to "Settings" > "System" > "Storage" > "Change where new content is saved". For third-party apps, you typically need to check within the settings of each program. Look for options related to saving or storage settings where you can specify a new default save location.
- Can I crop a partial screenshot after capturing it?
- Yes, you can open the picture in an image editing program like Paint and crop it as needed.
- How do I disable the notification after taking a partial screenshot?
- Go to "Settings" > "Notifications" and turn off the toggle for "Show notification after taking a screenshot".
- Can I capture a partial screenshot on a PC with a multi-monitor setup?
- Yes, with all the methods described above, you can select the monitor from which you want to make the partial screenshot.
- Can I take a partial screenshot of a dynamic or changing footage?
- Yes, but it’s important to time your screenshot carefully. You’ll want to pause or freeze the content momentarily to capture the area accurately before the image changes again.
- Can I capture a partial screenshot using a touchscreen device?
- Yes, on touch-enabled Windows devices, you can utilize the same shortcut (Windows + Shift + S) or try the Snip & Sketch app with touch gestures to select the area.
Conclusion
Mastering the art of taking a partial screenshot on Windows can significantly enhance your productivity. Whether you prefer using simple built-in tools or versatile third-party screenshot tools for Windows, each method offers its own set of features to cater to your specific needs.
By practicing these techniques, you can quickly and easily capture part of the screen on Windows 10, 11, and other versions. This way you can ensure your presentations, reports, and troubleshooting efforts are more precise and effective.


