Mastering Food Photography
Food photography is all about capturing the essence of a dish, but great images often require careful adjustments to make the results truly appetizing.
Whether you’re a professional specialist or an enthusiastic blogger, understanding how to enhance color, texture, and composition is essential.
In this article, we’ll explore the key techniques, tools, and tips that will elevate your food photography editing and help your dishes stand out online.
Why food photography editing matters?
Food photos aren’t just about snapping a picture. It’s about capturing the story, texture, and flavor. Enhancements allow you to highlight details that a camera alone may not fully capture. For example:
- Textures: Make flaky pastries appear crispier or creamy sauces silkier.
- Colors: Boost greens in a salad or the golden tones in roasted vegetables.
- Lighting: Correct shadows or brighten underexposed areas to maintain visual balance.

Essential food photo editors
When it comes to culinary photography, having the right programs can transform a simple image into something truly mouthwatering.
Desktop Software
Professionals often rely on PC programs for advanced control and fine-tuning:
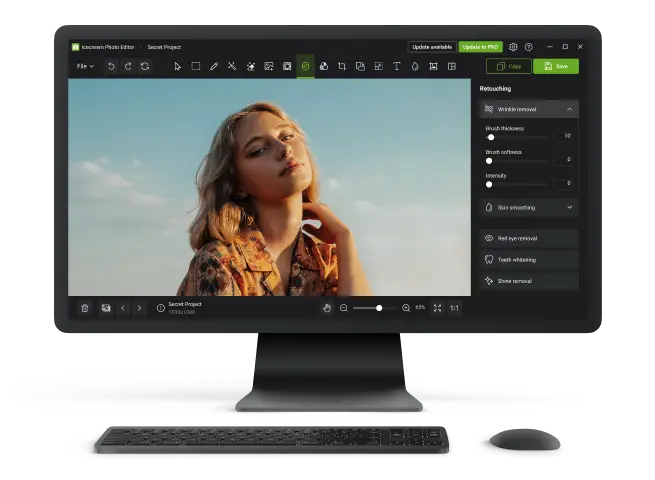
- Icecream Photo Editor: A user-friendly option for quick changes, offering color correction, cropping, and filters. Its intuitive interface makes it accessible for beginners and pros alike who want fast, polished results.
- Adobe Lightroom: Excellent for adjusting exposure, contrast, and tones with precision. Its batch feature ensures a consistent style across multiple pictures.
- Adobe Photoshop: Perfect for detailed retouching, removing distractions, and enhancing textures subtly.
- Capture One: Known for its superior color rendering, ideal for studio-level food photography.
Combining Lightroom for overall adjustments with Icecream Photo Editor for simple tasks can streamline your workflow without sacrificing quality.
Mobile Apps
For bloggers and social media enthusiasts, these provide flexible, high-quality editing of food photos anywhere:
- Snapseed: Free and powerful, with selective tools.
- VSCO: Great for filters and subtle color adjustments.
- Adobe Lightroom Mobile: Brings most desktop features to your phone, keeping your feed consistent even while traveling or shooting in restaurants.
Accessories
Even the best photo editing software can benefit from good hardware.
- Color-calibrated monitors: Ensure accurate representation.
- Graphics tablets: Helpful for precise retouching.
- External storage: RAW files are large; backups prevent data loss.
How to edit food photos?
Basic Adjustments
After selecting your tools, the next step in editing food photos is making simple changes. These tweaks can dramatically improve the look of your images, bringing out the flavor, texture, and vibrancy of your dishes.
Exposure and Brightness
Balancing exposure helps make sure the picture is well-lit without losing detail. Proper levels make textures pop and preserve the natural tones of your ingredients.
Examine different parts of the frame individually. Sometimes the photography of food is perfect, but the background elements need slight brightening.
Contrast and Definition
Contrast defines the difference between light and dark regions, while definition sharpens textures—think of a flaky croissant or glistening sauce.
Vibrancy
Colors are key in making food appealing. Tweaking saturation or individual hues can make ingredients look fresh and appetizing.
You can adjust global tones or target specific colors, such as intensifying a green garnish or a golden crust.
White Balance and Tone
Accurate white balance ensures whites appear true and overall tones remain natural under mixed lighting.

Even minor refinements can dramatically improve your cooking photography. The goal is not to exaggerate, but to highlight textures, colors, and lighting in a way that invites viewers to savor every detail.
Advanced Techniques
Once the fundamentals are mastered, you can explore sophisticated methods to elevate your food photography. These techniques help appear professional, cohesive, and visually striking.
Selective Adjustments
Focusing changes on specific areas lets you highlight key elements without altering the entire image.
For example, you can make a glossy sauce shimmer while keeping the surrounding plate subtle.
Photoshop’s layer masks enable precise, localized corrections, perfect for emphasizing textures or adjusting inconsistencies.
Layering and Compositing
Combining multiple pictures or layers can create depth and perfection in food photos.
Advanced software can even merge exposures, add reflections, or replace backgrounds while maintaining realistic lighting.
Dodging and Burning
This technique manipulates shades to draw attention to focal points or deepen shadows for dramatic effect.
Professionals often use dodge and burn brushes to sculpt dimension, making dishes appear more three-dimensional.
Retouching Imperfections
Even the most carefully styled plate may need minor corrections.
You might need to remove crumbs or unwanted reflections, ensuring a clean, appetizing image.
Color Grading for Mood
Beyond accurate colors, creative grading can set the tone of your photo, from warm, cozy breakfasts to vibrant, fresh salads.
Icecream Photo Editor includes filters and balance options to apply stylistic effects.

Presentation tips
Editing works best when paired with thoughtful styling. No matter how strong your post-processing skills are, the foundation of great food photography is how the dish is lit and framed before you ever touch the software.
- A neatly arranged plate requires only subtle refinements—slight balance corrections or soft color adjustments.
- Messier compositions, like rustic stews or layered desserts, may benefit from more noticeable edits, such as selectively brightening garnishes.
Think ahead while styling. For instance, if you know you’ll increase contrast later, avoid overly harsh shadows during the shoot.
| Element | Why It Matters | Considerations |
|---|---|---|
| Props | Utensils, linens, and tableware add atmosphere but shouldn’t steal focus from the food. | Neutralize strong tones in post-processing so props support the dish rather than dominate it. |
| Background | Surfaces like wood, stone, or linen give context and depth. A clean backdrop makes the subject stand out. | Subtle blurring, desaturation, or exposure changes can keep the back soft while letting the food shine. |
| Lighting | Natural light highlights textures and keeps dishes realistic, while artificial sources can create mood. | Fine-tune warmth or coolness to preserve the intended atmosphere. |

Food photography editing for social media
Most of the time, your food photography will end up on blogs or restaurant websites. That means editing is also about preparing visuals that load quickly, display well, and maintain a recognizable aesthetic.
Large, high-resolution pictures are perfect for print, but they can slow down websites and cause social media uploads to compress images harshly. Resizing thoughtfully keeps your work crisp and professional without sacrificing quality.
| Platform | Resolution | Format | Why It Matters |
|---|---|---|---|
| 1080 × 1350 px (portrait) | JPEG | Balanced quality and size; prevents Instagram from blurring or pixelating. | |
| 1000 × 1500 px | PNG or JPEG | Longer vertical images perform well and attract more engagement. | |
| Websites | 1200 px width (variable height) | JPEG/WebP | Keeps page speed fast while retaining sharpness. |
Beyond technical adjustments, building a visual identity is essential online. A consistent approach makes your feed, blog, or portfolio look intentional and polished.
- Stick to a cohesive color palette—for example, warm tones for comfort foods, or cooler hues for fresh, modern dishes.
- Apply similar contrast, brightness, and saturation levels across multiple photos to create harmony.
- Utilize filters or replicate settings to keep your style uniform without extra effort.
Consistency not only strengthens your brand—it makes your audience instantly recognize your work, even before they see your name attached.
Common mistakes to avoid
Even with strong styling and careful editing, some errors can make food photography look unappealing or artificial. Knowing what to stay clear of will keep your images natural and professional.
Unrealistic Colors
Over-saturation can make strawberries look neon-red or lettuce appear radioactive green. Aim for true-to-life tones that highlight freshness without exaggeration.
Heavy-Handed Sharpening
While sharpening can emphasize texture, too much can make food look gritty or unappetizing.
- Reserve strong parameters for details like crusts or seeds.
- Keep softer areas, like whipped cream or soups, more natural.
Ignoring Shadows
Flat pictures lack depth, but extreme contrast can destroy details.
- Check that highlights aren’t blown out and shadows still hold subtle elements.
- Use selective adjustments instead of global boosts to preserve balance.
Cluttered Compositions
Too many props, overlapping dishes, or a busy backdrop draw attention away from the main subject.
- Keep elements minimal and purposeful.
- Mute distractions in the background while guiding focus toward the food.
Inconsistent Style
Applying a different filter to all food photos or changing tones drastically can make your portfolio look chaotic. Develop a consistent workflow so all your images feel connected.
Remember: restraint is key. The best food photography doesn’t scream “edited”—it quietly enhances the dish, making it look like something you want to eat right now.
Conclusion
Editing is an indispensable part of food photography, transforming well-shot pictures into irresistible visual stories.
By mastering essential adjustments, advanced techniques, and platform-specific optimizations, you can make every dish look as delicious on-screen as it does in real life.
Remember, the best changes enhance natural beauty rather than overshadow it, letting your food photos shine.

Tech Writer and Photography Aficionado
