How to Create a Video Tutorial: 6 Programs
In the digital age, mastering the art of creating informative and captivating video guides has become an essential skill for professionals in various industries.
This article will describe 6 best tutorial video makers with step-by-step instructions for each. In addition, you will find practical tips to help you produce compelling content.
What is a video tutorial?
It is an instructional recording designed to guide viewers through a process or concept using visuals, narration, and structured steps. It often combines spoken explanations with demonstrations, making complex topics easier to grasp.
Main features
| Element | Function |
|---|---|
| Visuals | Illustrate actions clearly—ideal for showing workflows or hands-on tasks. |
| Voiceover | Offers context, instructions, and clarification alongside the visuals. |
| Step-by-step flow | Organizes content logically, helping learners follow along smoothly. |
| Playback control | Allows pausing, rewinding, or adjusting speed to suit individual needs. |
| On-screen highlights | Draw attention to key details with text, arrows, or animations. |

Why make tutorial videos?
Developing expertise in making video tutorials carries potential benefits for diverse purposes.
- Individuals can share their knowledge and expertise with others in an engaging and visual format.
- Using video tutorials helps businesses and organizations train their employees or customers remotely, saving time and resources.
- Being proficient in producing video guides can enhance one's digital aptitude and heighten their appeal in today's technology-dominated market.
- Producing tutorial videos offers a possibility for earning passive income through the use of monetization strategies on platforms such as YouTube.
- It can be a fun and creative way to express ideas and connect with audiences globally.
Knowing how to make video instructions has become increasingly popular due to the rise of online learning, making it a valuable skill for educators and students. Mastering the art of perfecting the skill of creating explainer videos can bring about many advantages, whether it be for academic, career, or personal purposes.
Icecream Screen Recorder
Employing video tutorials can prove to be an effective method for disseminating information and showcasing procedures.
Creating and manipulating videos may prove challenging for those new to the process. Thanks to Icecream Screen Recorder, even those without technical know-how can easily produce high-quality instructional videos.
How to create a video tutorial with Icecream Screen Recorder
- Download screen recording software for PC.
- Adjust the video recording settings to suit your preferences. Choose the area of the screen you want to record, audio sources, and video quality.
- Open the application or window that you want to demonstrate and click the "Record" button in the tutorial video maker. You can also use hotkeys (F6 by default) to start and stop the recording.
- While filming, there is a possibility to add annotations such as text, arrows, or shapes to highlight important points.
- Once you have finished, click the stop button. Use the built-in editor to trim your video, change the format, mute, and more.
- Upon completion of editing, export the recording as a video file or upload it directly to YouTube or Google Drive.
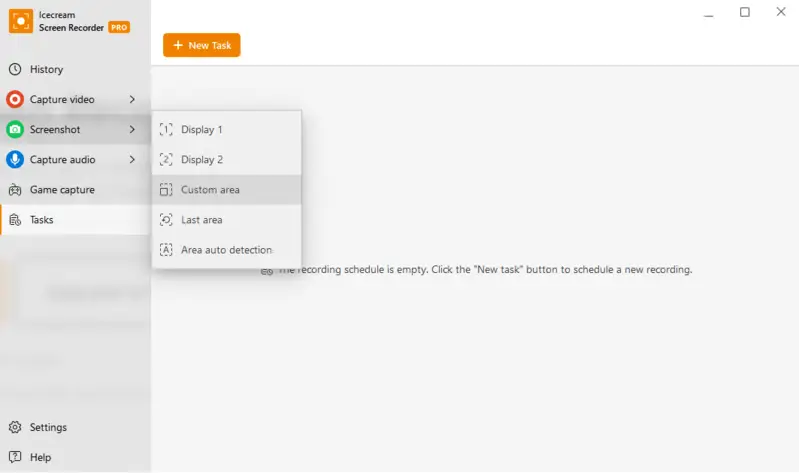
Benefits:
- User-Focused Design. Icecream Screen Recorder has a simple and intuitive interface that makes it easy for beginners to use.
- Customizable Recording Area. With this free screen recorder, you can choose to record the entire screen or a specific area, making it perfect for creating focused tutorials.
- Audio Recording. You can capture system sound, microphone audio, or both while recording your video tutorial.
- Real-Time Drawing. The ability to add annotations in real time is a valuable feature for creating engaging and informative tutorials.
- Editing Tools. There's a built-in video editor that allows you to make changes to your video without using any third-party software.
- Multiple Output Options. You can save your tutorial video in various formats or directly upload it to popular platforms like YouTube or Google Drive.
- Free Version Available. The recorder offers a free version with the most important features, making it accessible for those on a tight budget.
As a final point, Icecream Screen Recorder stands out as an exceptional tool for making educational videos. Its user-friendly interface, customizable recording options, and built-in editing tools make it a preferred choice for beginners. So, if you want to share your knowledge with others through engaging video tutorials, give this tool a try.
Vidyard
Creating video instructions offers a wonderful chance to share knowledge and information with others. In light of the growing popularity of remote work and online learning, video guides hold even greater importance.
Another popular tool for creating video tutorials is Vidyard. This is an advanced video hosting and sharing solution equipped with specialized features for educational materials.
How to make a video tutorial with Vidyard
- To get started, you will need to sign up for a free or paid account on the website and download the app to your computer.
- Once you install the program, open it and adjust the recording settings: pick the part or window for capture, conduct the audio text, and customize the camera settings.
- Prepare your tutorial materials and press "Start Recording". Pause and resume at any point throughout the video. To finish, click the stop button.
- You can make edits to your footage before exporting it with the "Edit in Vidyard". Alternatively, share right away with the "Copy Link" button.
.webp)
Pros:
- Ensures easy video editing and creation for everyone.
- Engaging features to enhance viewer experience.
- Tracks video performance with detailed analytics.
Cons:
- Limited functionality with the free account: recording for 30 minutes maximum.
Overall, using Vidyard as a tutorial video maker provides a variety of advantages, including its intuitive interface, interactive components, comprehensive data analysis, and effortless integration capabilities. With its help, you can produce top-notch instructional videos that effectively communicate your message and engage viewers.
OBS Studio
The OBS Studio is open-source screen recording software that enables you to simultaneously record your webcam, screen, and audio. It also offers various features such as scene transitions, customizable overlays, and multi-platform streaming.
How to create a video guide with OBS Studio
- Go to the official website and download the version for your operating system. Once downloaded, follow the installation instructions to complete the process.
- Before recording, need to set up your scene. Click the "+" button found under the "Scenes" section in the lower left corner.
- After setting up your scene, you need to add sources to it. Sources are the elements that will be included in your video tutorial, such as your screen or webcam footage. Click the "+" button under the "Sources" section in the bottom left corner.
- Find "Settings" located in the lower right-hand corner. Under "Video", select the resolution. Under "Audio", select your preferred microphone and adjust the volume levels accordingly. If you want to include background music in your tutorial, check "Enable desktop audio".
- Open your slides and hit the "Start Recording" button in the bottom right corner.
- After you're done, click "Stop Recording".
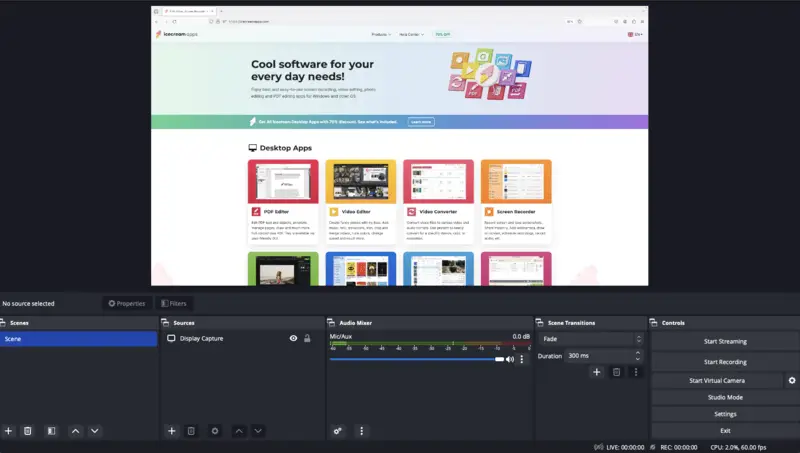
Pros:
- Free and open-source screen recording software available.
- Includes multi-platform streaming options.
- Produces high-quality video output.
Cons:
- Requires a powerful computer to run smoothly.
- Can be overwhelming for first-time users.
To conclude, crafting video instructions through OBS Studio is a great method due to its range of features and high-quality results. By adhering to these simple steps, you can create professional-looking video tutorials that will effectively teach others.
EaseUS RecExperts
EaseUS RecExperts is a screen-recording software developed by EaseUS, a company known for its data recovery and management solutions. This tutorial video maker is designed to capture screen activities, including video and audio, making it useful for creating instructions, gameplay recordings, presentations, and more.
How to make video tutorials with EaseUS RecExperts
- Visit the official website and download the latest version. Follow the on-screen instructions to install the software on your computer.
- Open the application on your computer.
- In the main interface, select the screen area you want to record (full screen, custom region, specific application window, etc.). Choose the audio source (system sound, microphone, or both). Adjust other settings such as video quality, frame rate, and hotkeys according to your preferences.
- Click the "REC" button to start capturing your screen activities. If needed, you can pause the recording at any time.
- Once done, hit "Stop" to finish the recording. Review the recorded video in the preview window.
- Save the video to your desired location on your computer.

Pros:
- Has an intuitive and easy-to-use interface.
- Allows you to capture the entire screen, specific regions, or individual application windows.
- Supports recording system sound, microphone, or both for comprehensive audio capture.
- Provides options to adjust video quality, FPS, and other settings for personalized recordings.
Cons:
- Full functionality access requires purchasing the premium version of the software.
In summary, EaseUS RecExperts provides a straightforward and efficient solution for capturing screen activities, offering a range of customizable options to suit various technical needs. With its user-friendly interface and diverse features, this app is a reliable tool for creating video instructions.
Camtasia
Camtasia is a popular screen recording and video editing software developed by TechSmith. It is widely used for creating tutorial videos, software demonstrations, presentations, and other types of screen-capture content.
How to make a tutorial video with Camtasia
- Download the recorder from the official website. Install and launch.
- Click the "New Recording" button to initiate the filming.
- Choose the screen area you want to capture and set audio and other system preferences. Hit "Start".
- When finished, click the "Stop" button.
- Drag the recorded clips to the timeline for editing. Trim unwanted sections, add annotations, callouts, and other visual elements. Enhance audio quality, and add music or voiceovers.
- Use transitions and animations for a polished look. Hit the "Share" button.
- Choose the export settings (resolution, format, etc.). Click "Export" to save your video to a chosen location.
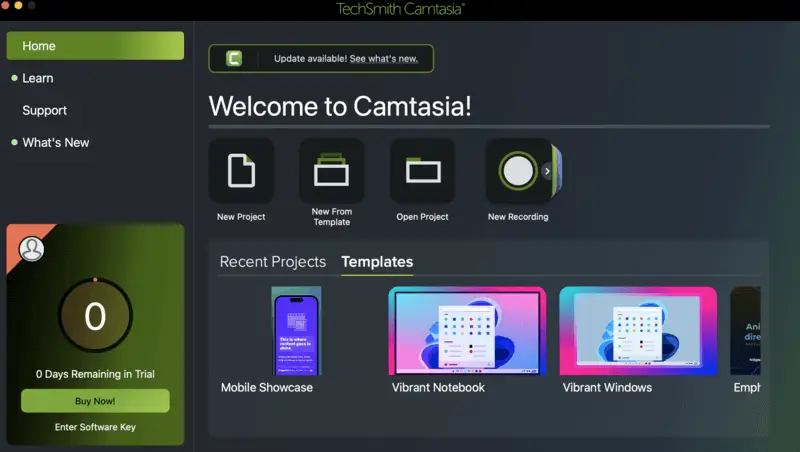
Pros:
- Features an intuitive interface that is easy for beginners to navigate.
- Provides a comprehensive set of editing tools like video cropping, making it suitable for creating professional-quality content.
- The multitrack timeline enables users to work with multiple media elements simultaneously.
- Users can add quizzes, callouts, and clickable elements to enhance viewer engagement.
Cons:
- This is a paid software, and while it offers a free trial, the full version comes with a price tag.
- Video editing can be resource-intensive, and large projects may require a powerful computer for smooth performance.
In conclusion, Camtasia stands out as a versatile and user-friendly tool, offering a seamless blend of powerful screen recording and video editing capabilities. Its intuitive interface, coupled with additional features makes it a preferred choice for individuals seeking to create professional and engaging video tutorials.
Loom
Crafting video tutorials offers a valuable opportunity to share information and abilities with others.
Traditional desktop methods of recording and editing videos can be time-consuming and complex. This is where Loom comes in – a user-friendly solution for hassle-free video guide creation.
How to create tutorial videos using Loom
- Download and install the desktop app or Chrome extension.
- Once installed, open the app. Log in using your Google or Microsoft account. Press "Record a Loom".
- Select the type of video you want to create – screen only, camera only, or both. Decide if you would like to capture your entire screen or only a particular application window.
- Click the red "Start Recording" button to begin capturing your tutorial. While recording, you can pause and resume as needed with the pause button.
- Once you're finished, hit "Stop" to end the recording. Loom will automatically save your video and take you to their editing interface.
- Here, you can trim your video, add text or emojis, adjust playback speed, and more. When you're satisfied with your edits, press "Done" to save your changes.
- You can now preview the result and make any final adjustments if needed. Once you're happy with your tutorial video, click "Share" to generate a link or embed code.
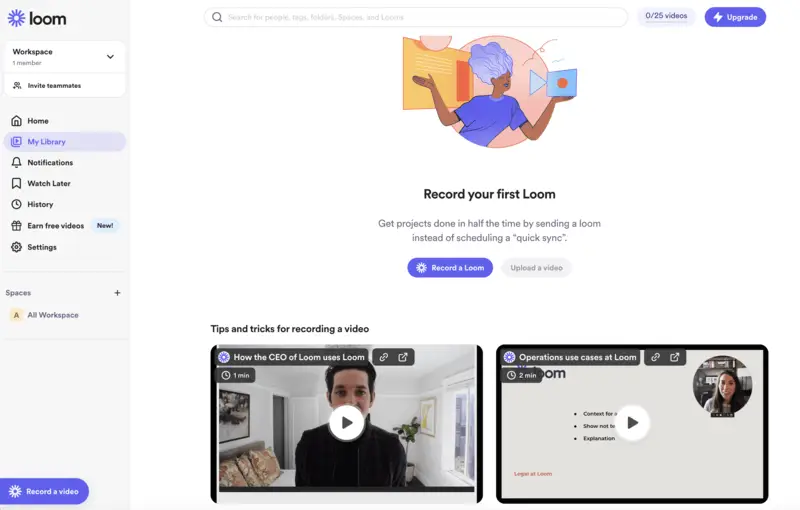
Pros:
- Swift and effortless video tutorial creation.
- No requirement for external software or equipment.
- Records your screen, camera, or both simultaneously.
- Provides a variety of video editing tools for a polished result.
- Allows to share videos through links or embed codes.
Cons:
- Free version restrictions: 5-minute limit for each video, 25 videos maximum, and no option to download, only to share.
Ultimately, utilizing Loom is a simple and successful strategy for disseminating information and expertise to others. Thanks to its user-friendly design and range of capabilities, it is the preferred option for individuals aiming to create professional video tutorials without any complications.
Tutorial vs lecture vs webinar
Understanding the distinctive characteristics of video tutorials, online lectures, and webinars is essential for educators and learners alike. Each format serves unique purposes and employs different instructional methods.
The table below provides a comparison of tutorials, lectures, and workshops based on key aspects.
| Aspect | Video Tutorial | Online Lecture | Webinar |
|---|---|---|---|
| Format | Pre-recorded video content often covering specific topics. | Pre-recorded or live lecture-style content delivery. | Live, interactive online seminar with audience interaction. |
| Technical Requirements | Reliable screen recorder and video editor. | Stable internet and dependable streaming software. | Internet access, webcam, microphone, and webinar platform. |
| Interactivity | Minimal interaction, generally one-way communication. | Limited interaction, may include quizzes or forums. | High interactivity, Q&A sessions, polls, and discussions. |
| Audience Size | Typically for individual self-paced learning. | Can cater to both small and large audiences. | Variable, ranging from small groups to large audiences. |
| Scheduling | On-demand, available for learners at any time. | Scheduled or on-demand, offering flexibility. | Scheduled at a specific time, often announced in advance. |
| Engagement | Self-paced learning with repeated viewing if necessary. | May include quizzes, assignments, or discussion forums. | Real-time engagement with the presenter and other attendees. |
| Feedback | Limited immediate feedback, may have comments section. | Feedback through assessments, forums, or office hours. | Immediate feedback through Q&A and interactive features. |
| Collaboration | Typically individual learning without collaboration. | Limited collaboration through discussion forums. | Collaboration through live chat, Q&A, and interactive features. |
| Examples | YouTube tutorials, instructional videos. | Online university lectures, and course modules. | Professional development webinars, and virtual conferences. |
Types of video tutorials
- Screencast: Displays on-screen actions with voice over a video; suited for digital tools, coding, and software walkthroughs.
- Live Demonstration: Presents real-time execution of tasks by a person; perfect for hands-on skills like cooking, crafting, or repairs.
- Whiteboard: Breaks down ideas through visuals or sketches; effective for math, science, and theoretical topics.
- Animated Explainer: Simplifies abstract subjects using motion graphics or illustrations; ideal for technical concepts and storytelling.
- Talking Head: Features a speaker addressing viewers directly; commonly used for presentations, coaching, or commentary.
- Slide Narration: Merges spoken content with slides; practical for business briefings, lessons, and professional training.
- Interactive Format: Engages learners through choices, quizzes, or branching paths; excellent for immersive education and onboarding.
- Case-Based: Explores real-world examples or challenges; valuable for problem-solving, analysis, and applied learning.
How to get ready for a video tutorial
Producing instructional videos has become a favored method of imparting knowledge and expertise to others. Whether you are an educator, a content creator, or simply wish to disseminate your expertise, creating a video tutorial can be an effective and engaging method to do so. However, creating a video guide requires some planning and preparation.
Below are 10 steps on how to get ready for filming:
Step 1: Define your objective
Before you start creating your tutorial video, it is important to define your objective. Ask yourself what you want your viewers to learn from your tutorial. This will help you stay focused and ensure that your content is relevant and valuable.
Step 2: Plan your content
Once you have defined your objective, it's time to plan your content. Break down the topic into smaller sections or steps. This will simplify the process for your audience to keep up and comprehend the material. Use bullet points or mind maps to organize your thoughts and create a flow for your tutorial.
Step 3: Gather your equipment
To create a high-quality video tutorial, you will need some basic equipment such as a web camera, microphone, and maybe lighting equipment. Make sure to test all of these beforehand to ensure that they are in good working condition.
Step 4: Choose your location
Selecting the right location is crucial for creating professional-looking video instructions. Make sure that the background is clutter-free and well-lit. Avoid noisy areas or places with distractions.
Step 5: Write a script
Writing a script may seem unnecessary, but it can help you stay on track and deliver your content more effectively. Keep it simple and use everyday language. This will make it easier for your viewers to understand and follow along.
Step 6: Include engaging visuals
Adding visuals such as images, graphs, or animations can make your tutorial more engaging and help reinforce the material. Ensure that you use high-quality visuals that are relevant to your content.
Step 7: Practice, practice, practice
Practice makes perfect, and this applies to creating video tutorials as well. Rehearse your script multiple times until you feel confident and comfortable. This will also help you identify any areas that may need improvement.
Step 8: Record your tutorial
Once you are ready, hit the record button and start delivering your tutorial. Remember to speak clearly and at a steady pace. Don't worry if you make mistakes; you can always edit them out later.
Step 9: Edit your video
The process of perfecting a visual presentation involves necessary editing. Use editing software to trim video, add transitions, and include any visual aids or graphics.
Step 10: Add background music
Background music can enhance your video tutorial, making it all the more enjoyable for your viewers. Choose instrumental music that is not too distracting and matches the tone of your tutorial.
Tips and life hacks
- Start with a clear and concise outline of your tutorial before you begin filming. This will assist in maintaining organization and keeping your content on track.
- Utilize a high-performance microphone to guarantee crisp audio in your video tutorial. Viewers will quickly lose interest if they can't hear you properly.
- Keep your video guide between 5-10 minutes in length to maintain viewers' attention and prevent them from getting overwhelmed with too much information.
- Use visuals, such as graphics or animations, to enhance your tutorial and make it more engaging for viewers.
- Practice your speaking and delivery before guaranteeing a smooth and confident presentation in your tutorial video.
- Avoid using technical jargon or language that may be difficult for beginners to understand. Keep your explanations simple and easy to follow.
- Simplify the process for viewers to follow by incorporating step-by-step instructions and emphasizing key points in your tutorial.
- Utilize different camera angles and shots to make your video more visually interesting and dynamic.
- Test out different lighting techniques to find the best setup for your video tutorial. Good lighting can make a significant difference in the overall quality of your video.
- Enhance the appeal of your tutorial by adding background music or sound effects, but be mindful of not overusing them and taking away from the main content.
- If possible, include real-life examples or demonstrations in your tutorial to help viewers better understand the concepts being taught.
- Edit your video carefully, removing any unnecessary pauses or mistakes, and add text overlays or annotations if needed to clarify certain points.
- Take advantage of social media channels to market your tutorial video and increase your reach. Utilize relevant hashtags and tags to facilitate the discovery of your content by others.
- Engage with your viewers by responding to comments and addressing any questions or concerns they may have about your tutorial.
- Continuously improve and update your tutorials based on feedback from viewers. This will aid in keeping your content pertinent and beneficial to your audience.
- Consider collaborating with other creators or experts in the field to provide different perspectives and add credibility to your tutorial.
- Enjoy yourself and remain true to your natural self in your video tutorial! Viewers can sense authenticity, and it will make them more likely to engage with and learn from your content.
Thorough preparation and careful planning are essential for producing a successful and engaging instructional video that will aid others in learning and development. Keep in mind that having fun and being yourself will enhance the authenticity and enjoyment of your tutorial for your viewers.
What effects to use in tutorial videos
| Type | Description | Examples |
|---|---|---|
| Emphasis | Focus attention on specific screen elements. | Spotlights, zoom-ins, annotations like arrows or labels. |
| Transitions | Smoothly move between sections or steps. | Simple cuts, crossfades, slides, wipes. |
| Visual Enhancements | Add animations or visual aids to clarify concepts. | Motion graphics, on-screen drawings, progress bars. |
| Timing | Modify video speed to emphasize or simplify actions. | Slow motion for details, fast-forward for repetitive tasks, pauses to elaborate. |
| Overlays | Use animated or static text to guide viewers or highlight steps. | Captions, subtitles, checklists with ticking animations. |
| Picture-in-Picture (PIP) | Display additional content like a talking head or complementary visuals. | Webcam overlay, secondary view in a corner. |
| Split Screen | Show multiple views simultaneously for comparison or clarity. | Side-by-side processes, alternative perspectives. |
| Color Cues | Use hues to categorize different elements. | Red for errors, green for success, distinct shades for titles. |
| Intro & Outro | Include branding and action prompts to wrap up professionally. | Logo animations, opening overviews, closing with “Subscribe” or links to related content. |
Where to share video tutorials?
Developing a visual tutorial can effectively convey your knowledge and capabilities to others. But once you've put in the time and effort to create your masterpiece, where do you share it?
Here are some popular platforms to consider:
YouTube
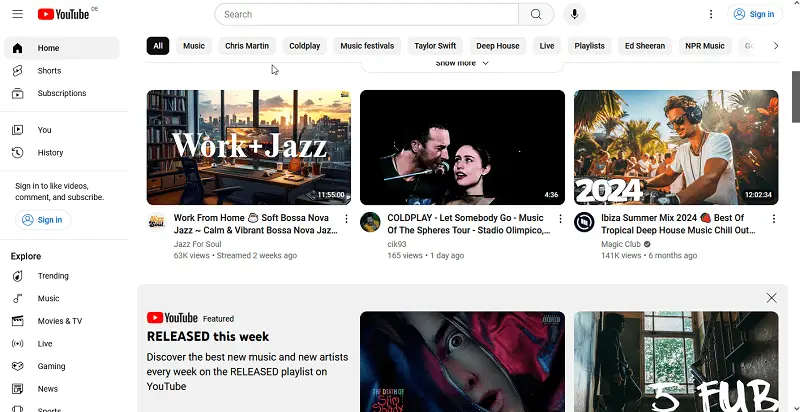
As the second largest search engine in the world, YouTube tutorial videos are by far are most popular.
Its massive user base and easy accessibility make it perfect for reaching a wide audience.
Vimeo
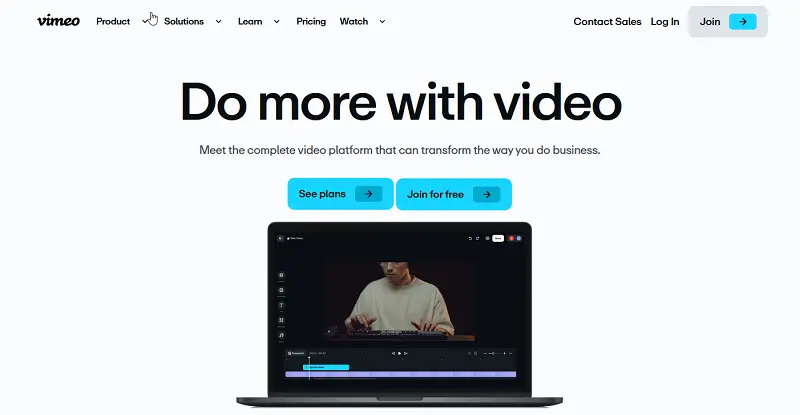
This platform is known for its high-quality videos and professional community. If you're looking to target a more niche or creative audience, Vimeo might be the place for you.
Social media
Don't underestimate the power of social media when it comes to sharing your video tutorials. Platforms like Instagram, Facebook, and X allow you to reach your followers and potentially gain new ones through shares and hashtags.
Your website
If you have a personal or business website, consider embedding your video tutorial there. This will not only showcase your skills but also drive traffic to your site.

Online learning platforms
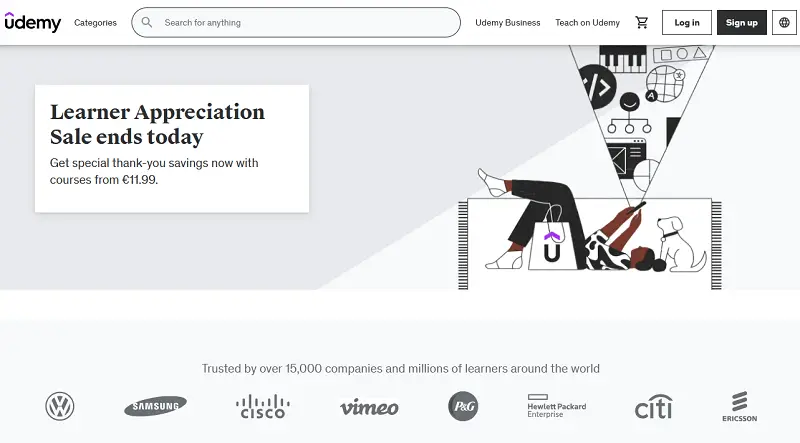
Websites like Udemy, Skillshare, and Coursera are popular among those looking to learn new skills. By uploading your tutorial on one of these platforms, you can reach a targeted audience who is specifically interested in learning.
Forums and online communities
If your tutorial is focused on a specific topic or skill, consider sharing it on related forums or online communities. This will allow you to connect with people who are already interested in what you have to offer.
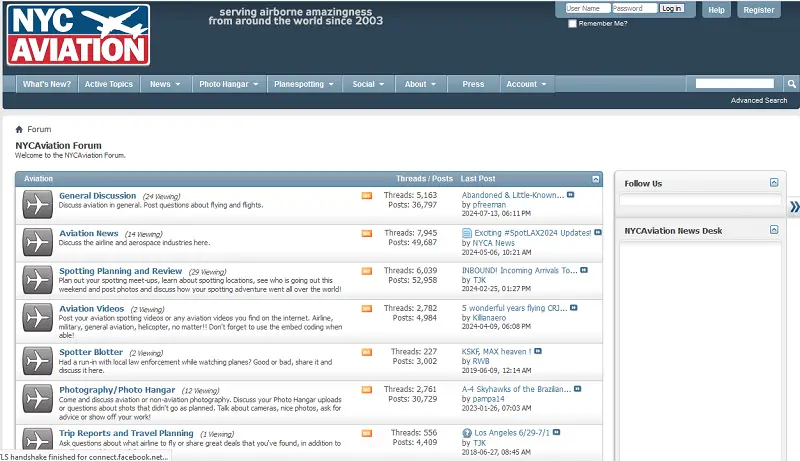
Collaborations
Teaming up with other content creators can help expand your reach and audience. Think about partnering with another YouTuber or posting your tutorial on a blog that reaches a similar audience.
Keep in mind, that the crucial factor is selecting platforms that align with your desired audience and objectives. Don't be afraid to experiment with different services and see which ones work best for you.
Your instructional video has the potential to reach and influence a wide audience, making your efforts worthwhile with the right platform.
FAQ on making tutorial videos
- What equipment is necessary for producing a video tutorial?
- A good quality camera or smartphone, a tripod, and a microphone are essential for creating a video guide.
- How do I choose the right topic for my video tutorial?
- Choose a topic that you are knowledgeable and passionate about. It should also be relevant and useful to your target audience.
- What is the best way to script my video instructions?
- Write a detailed outline of what you want to cover in your tutorial and then use it as a guide while recording. Avoid reading from a script as it may sound unnatural.
- How do I promote my tutorial video?
- Spread it across various social media platforms, post it on relevant forums or communities, and request friends or colleagues to share it with their networks.
- How often should I create new video tutorials?
- It's important to maintain consistency, but the frequency of creating new tutorials will depend on your schedule and availability. Aim for at least one new tutorial per month.
Conclusion
To sum up, crafting a video tutorial has the potential to bring fulfillment and success as a means of communicating your sharing your insights with others. However, it takes careful planning and attention to detail to create a high-quality tutorial that will engage and educate viewers.
We hope that with the provided above tips and possible choices for a tutorial video maker, you feel ready to create unique educational content to spread knowledge!
Co-authors


